


We use cookies to improve the services we offer you. By continuing to browse this site, you consent to keep them in accordance with our Privacy Policy.
×We use cookies to improve the services we offer you. By continuing to browse this site, you consent to keep them in accordance with our Privacy Policy.
× 6,347
6,347
 6 min
6 min

Each scene in a movie is shot with its own set-up, lighting, and audio settings. Different elements need to be accentuated or corrected in different scenes. But what do you do if you only have the master file at your disposal, with all scenes already merged in one story arc? Manually recutting the video scene by scene might take hours, but with the new Scene Detection feature in the 15.4 release of Movavi Video Editor Plus, the whole process comes down to a couple of clicks and won’t take more than a minute.
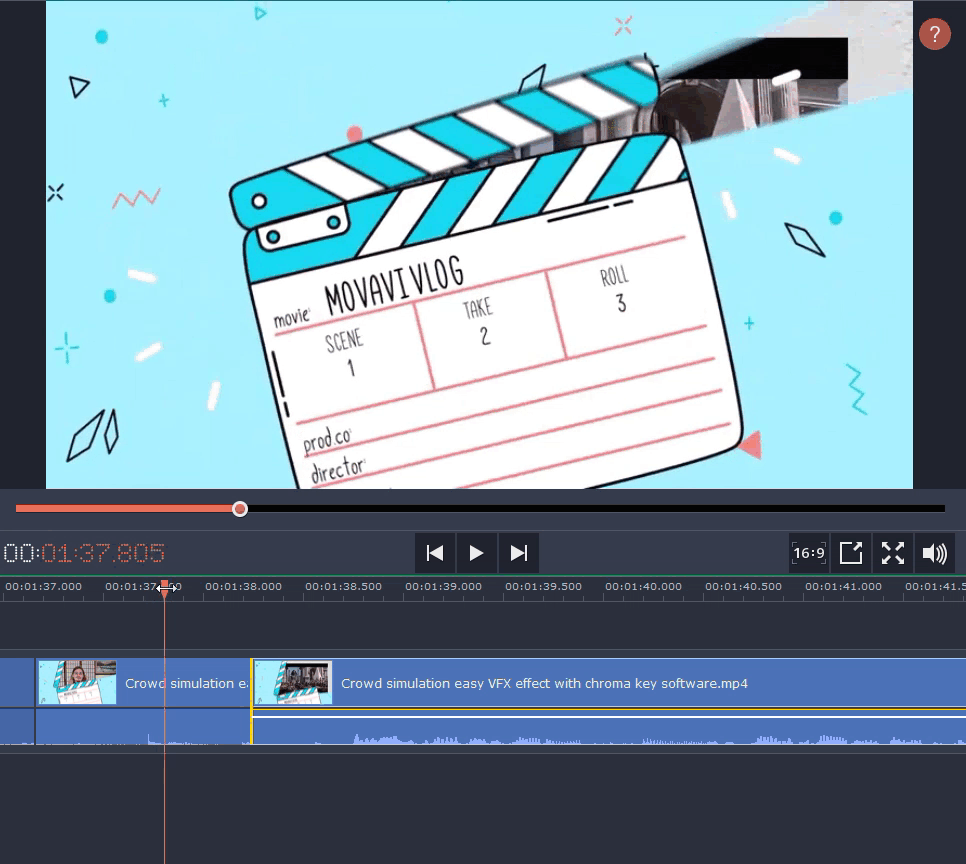
To show you how it works, I took one of the latest videos from the Movavi Vlog about the crowd simulation effect. Check it out, by the way, it’s really fun!
I’ll need to make some changes to the scenes, but my colleague who has the original files has gone on a Wi-Fi-free vacation. So I guess I’ll have to cut the video by myself!
Enjoy our special discount for all blog readers!
Promocode: SUPERBLOG
Download Movavi Video Editor Plus with 10% discount for Windows
Download Movavi Video Editor Plus with 10% discount for Mac
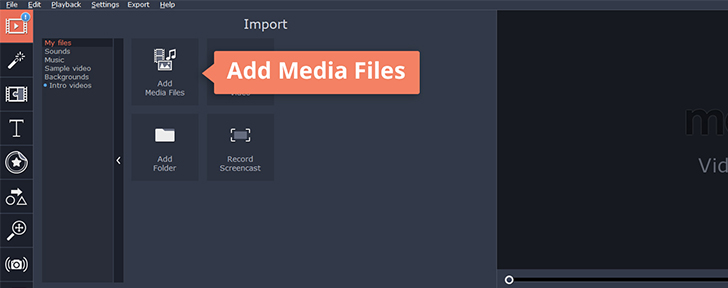
1. First, add your video to the timeline by clicking on Add Media Files in the launch window.
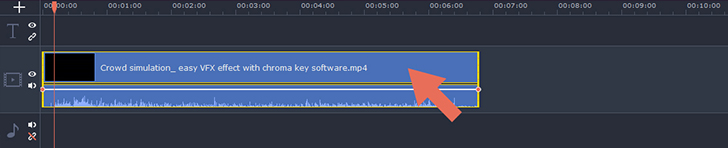
2. Select your video by clicking on it on the Timeline.
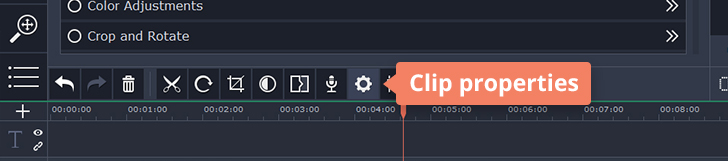
3. Click on Clip Properties in the toolbar.
4. In the panel that opens, scroll down to see the Scene Detection tool. Click on it.
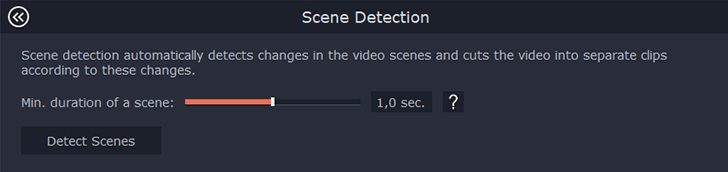
You’ll see the Min. duration of a scene slider set automatically to 1 second. This is the optimal value and I do not advise you to change it at this stage. If you set the value too low, the program may cut out some “false scenes”, mistaking a rapid movement in a scene for a distinct scene change. On the other hand, if you set the value too high, the program may leave out some scenes just because they are too short.
5. Click Detect Scenes.
The program will automatically cut your video into individual scenes. If your video is long enough, you may see something like this:
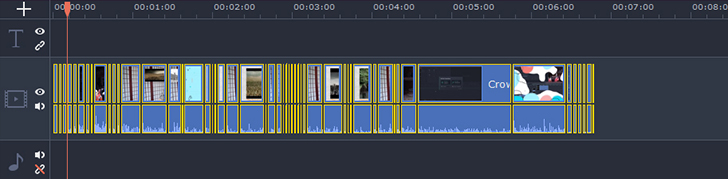
To see the individual scenes more clearly and optimize your workflow, you need to scale your Timeline. To do this, press Ctrl/Cmd and Scroll Up with your mouse while keeping the cursor in the Timeline area. If after scaling your video extends beyond the preview window, use the slider at the bottom of the Timeline to navigate through scenes.
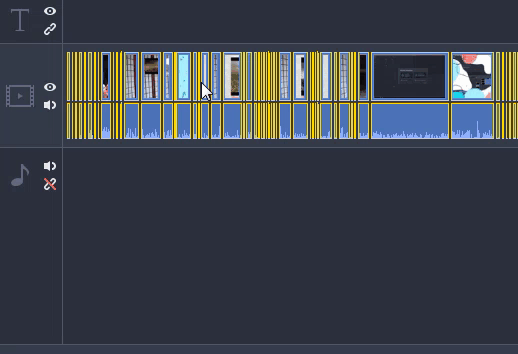
6. Check the result.
Go through the clips and verify that the scenes have been cut correctly. If there are too many errors, consider changing the Min. duration of a scene value. Press Ctrl+Z to cancel the cut, go back to the Scene Detection tool, and repeat the process with a new value.
If there are only a few errors, you can always correct them manually.
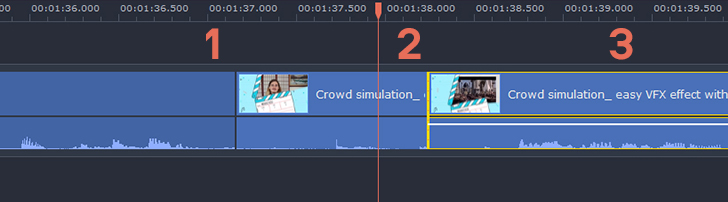
Here is an example. The tool may have a hard time cutting scenes if there is a transition between them, which is understandable: as the scene appears gradually, it is hard to define the precise position for the cut.
This was the case with my video. A scene with Conor talking for the camera was followed by a Movavi transition into the next scene with some shots from the film Cleopatra.

After the cutting was completed I noticed that, although the program had seen the transition as a distinct scene between the other two, a part of it was still present in the Cleopatra scene, as you can see in the preview window:
My goal was to apply color correction to the third scene without touching the transition. So I had to separate them completely.
So, here is what you need to remember when correcting the duration of a clip manually:
For example, I am editing the third clip and I know that I want to cut out the transition at the beginning of it. That means my clip should start later than it does, and therefore I should move its beginning to the right on the Timeline. Here you see the part that should be cut out:
I pull on the beginning of the clip and move it to the right until I can see in the preview window that the transition has gone. Then, when I release the clip, it snaps automatically to the previous one.
Note that the tool works both ways: you can not only shorten a clip but lengthen it as well – just pull in the opposite direction.
When you’re making duration corrections on one clip, the surrounding clips won’t be affected, so if you want to keep the continuity of the video, you should always correct the target clip and the one adjacent to the point of correction.
The Scene Detection tool not only gives you technical and time-saving functions, but it can also be used creatively. It is a powerful editing tool that enables you to change the rhythmic structure of the video. Even if you don’t have access to the source files (or if you’ve lost them!), you can still cut unnecessary lengthening or add dynamic actions.
And to wrap up, here’s an idea for a game with your friends: cut scenes from a series you all love and ask your friends to recall the missing parts. Try this in teams and score points for each correct answer. How does that sound? Too nerdy? Well… Tell us what you think in the comments!
Stay creative and stay in touch.
Yours as always,
Movavi Team.

