


We use cookies to improve the services we offer you. By continuing to browse this site, you consent to keep them in accordance with our Privacy Policy.
×We use cookies to improve the services we offer you. By continuing to browse this site, you consent to keep them in accordance with our Privacy Policy.
×
 4,883
4,883
 8 min
8 min

Last week, we started sharing with you news about some of the exciting new features in our version 15.4 Movavi video editing software releases, and talked about the Unsplash stock photos now included in Movavi Video Editor Business. As promised, today we will dig deeper into the improvements and new functions in v15.4. This time, we’ll be working in Movavi Video Editor Plus, but all the functions described are also accessible in Movavi Video Editor Business.
In this release of Movavi Video Editor Plus, much work has gone into facilitating multi-clip editing. When managing a large number of similar clips, it can be frustrating and time-consuming to edit them one by one. That is why we have begun implementing multi-clip editing functionality in several areas: audio editing, application of effects, color adjustments, and cropping. Let’s see what we’ve achieved so far.
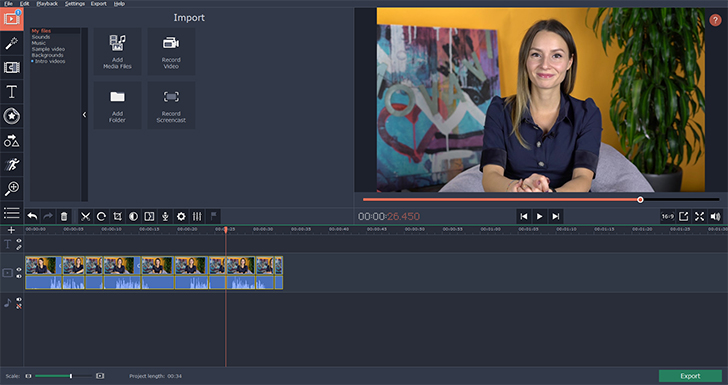
Let’s say you have several shots of yourself talking for your vlog, but, having uploaded the videos to the editor, you’ve found that you are not satisfied with the colors or lighting. You want to correct all your video material at once because you know it was all shot from the same fixed spot. In my example, I have some clips with Dasha from the Movavi Vlog team.
Enjoy our special discount for all blog readers!
Promocode: SUPERBLOG
Download Movavi Video Editor Plus with 10% discount for Windows
Download Movavi Video Editor Plus with 10% discount for Mac
The overall picture is good, but to my taste, it is a bit too contrasty, creating flare spots on the face and making the tree on the right look too dark compared with the rest of the scene.
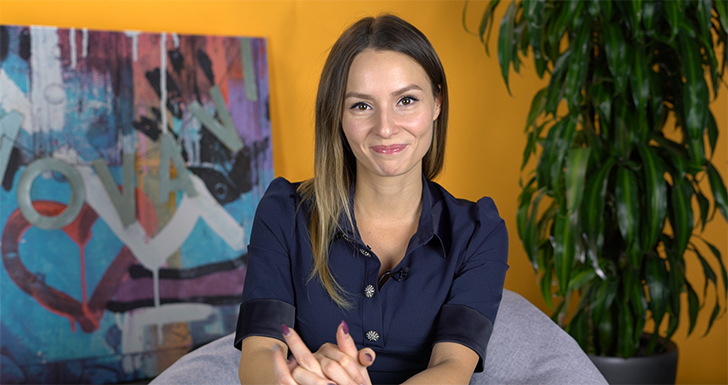
So, let’s change this.
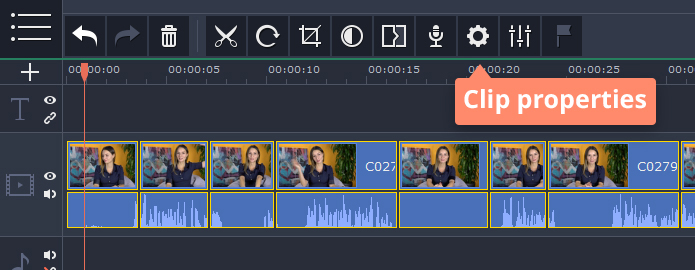
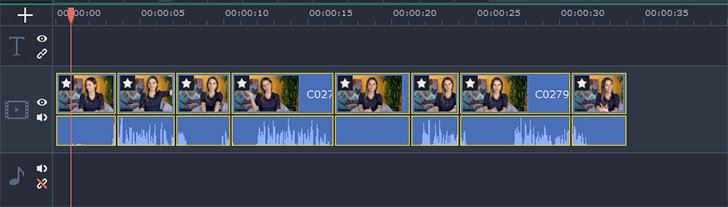
1. First, select your clips on the timeline as showed below.

2. Then go to the toolbar and hit Clip Properties.
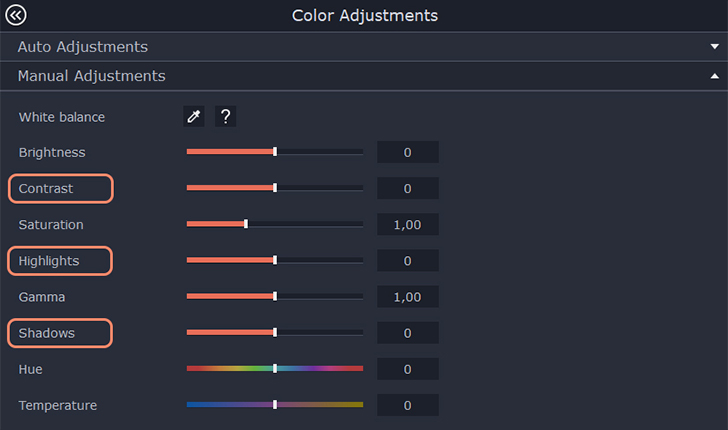
3. In the panel that opens, go to the Color Adjustments tab and select Manual Adjustments.
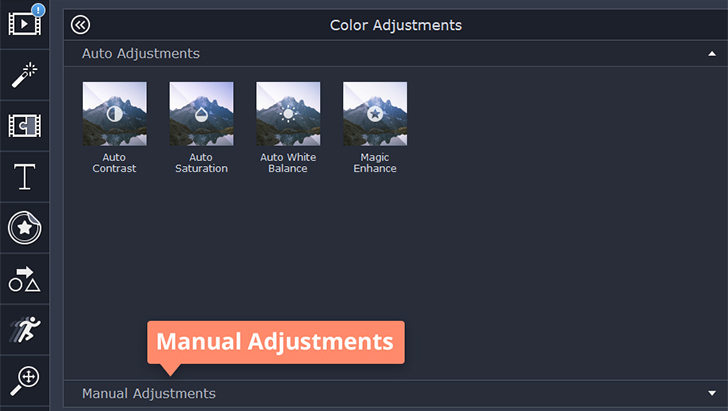
4. Make the necessary changes. They will be applied to all the selected clips.
In my case, I would either decrease the contrast directly with the Contrast slider or play with Highlights and Shadows sliders, moving the first to the left to get rid of flare spots and moving the second to the right to bring the tree forward. As I had two different tasks here, I decided to use two different sliders to make more precise adjustments.
Here is the before and after. You can see that the flares are almost gone and the tree shows a bit more detail.

Check that your settings have been applied to all the selected clips – a little star should appear at the corner of each clip on the timeline.
During the color correction, I noticed a slight amount of noise in the background. I can easily remove this noise from multiple clips in one pass, as well as change sound properties with the equalizer or add further audio effects.
1. To correct the noise issue, repeat the first two steps from the previous section and go to the Audio tab.
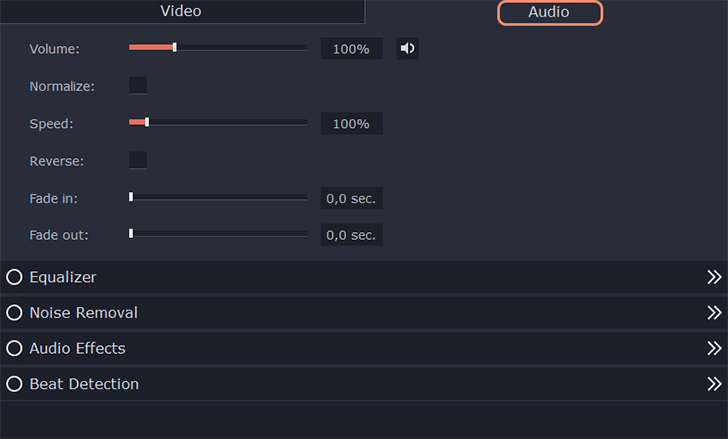
In my case, I am looking for the Noise Removal subtab, but you can go on and try other options. The Normalize and Reverse functions, as well as the Equalizer and Audio Effects tabs, also work on multiple clips at once. The Equalizer is extremely useful if you need to adjust a certain frequency on several clips, and Audio Effects are just fun to play with: who knows, maybe you might want to make your voice sound robotic! And by the way, changing your voice when speaking off-screen can be useful if you don’t want to be recognized.
2. So, back to the noise. Go ahead and hit Noise Removal.
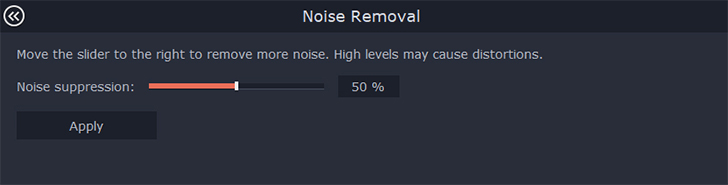
Adjust the Noise suppression slider and click Apply. Experiment with different slider values until you get the best results; be aware that higher levels of noise suppression may cause distortions in the sound.
During editing, you may find that your camera was a bit too far away and so some unnecessary elements have been included in the video; there may also be unwanted spaces on either side of the shot. You will want to crop all your video material at once because you know it was shot from the same fixed spot. Or maybe you have shot your video in a 16:9 aspect ratio and want to make a short Instagram preview using the square format and the same files. Let’s see how to realize this last option.
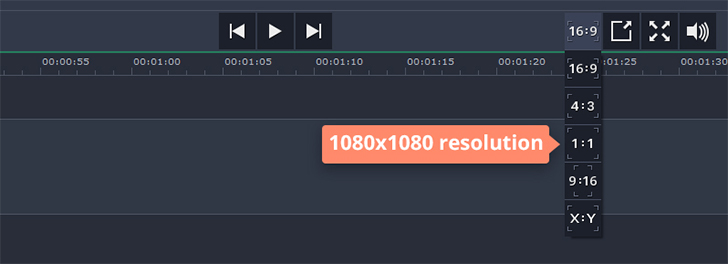
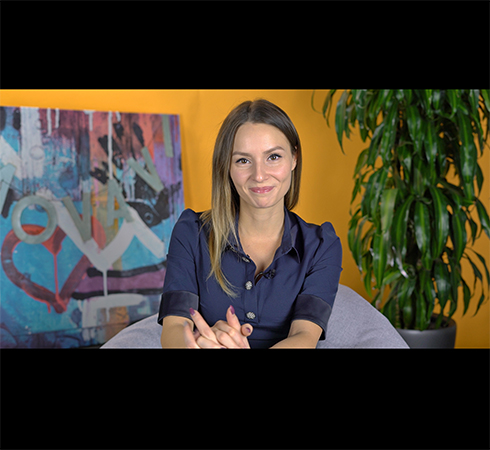
My 16:9 clips have been adjusted automatically to the 1:1 format in the preview window, with large black bars on the top and at the bottom.
1. Click on the Clip Properties button and go to the Crop and Rotate subtab, or click the Crop button directly in the toolbar.

You’ll see that the program has centered the grid in the defined format.
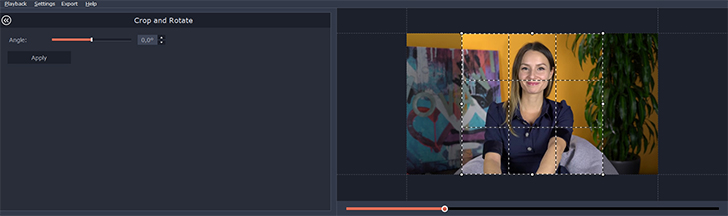
2. If you are satisfied with the proposed crop, click Apply. If not, you can always move the frame around and change its size by pulling on any of its four corners. Note that you can also pull on the sides of the square but, if you do, the defined proportion will be lost.
My videos are now square and ready to be composed into an Instagram preview!
In this example, I have used a 1:1 preset but, if you want to crop your video manually, just skip the second step of this tutorial and go directly to the Crop tool. As I’ve already mentioned, be careful with changing the proportions: otherwise, black bars will appear on the sides on your video, indicating that your crop doesn’t fit naturally into the defined aspect ratio.
That’s all for today. We will be back soon with more new features from this release: adjustable effects, the scene detection tool, and more.
Stay creative and stay in touch!
Yours as always,
Movavi Team.

