


We use cookies to improve the services we offer you. By continuing to browse this site, you consent to keep them in accordance with our Privacy Policy.
×We use cookies to improve the services we offer you. By continuing to browse this site, you consent to keep them in accordance with our Privacy Policy.
×
 5,628
5,628
 6 min
6 min
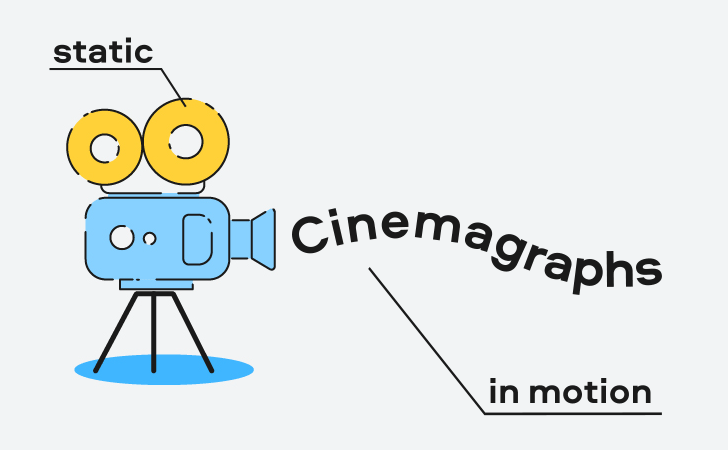
Scrolling through your social media feed you’ve probably run into some unusual moving pictures. They are called cinemagraphs and are instant attention grabbers. That’s why they’re so widely used in Instagram and Facebook ads. Whether you want to promote a product on social networks or just impress your Insta followers, definitely give cinemagraphs a try.
In a cinemagraph, part of the image remains static while the rest of it is alive and in motion. The good news is that it’s not hard to achieve this effect. Let’s see how to make a moving pic just like this.
First, you need to decide which part of the photo will come to life. A cinemagraph works better when the movement is constant and repetitive – that way, it’s easier to loop. This is why things like hair blowing in the wind, water flowing, and spinning objects are perfect for this purpose. When it comes to the still part of the pic, it’s best to freeze objects that are usually in motion, like people. for example. How often do you see people standing absolutely still? Exactly. That’s why cinemagraphs, where people are standing absolutely still, are mesmerizing.
Start by taking a video, and then grab a still frame or a freeze-frame from that video. Next, you need to cut out the area that you want to have movement. After the still photo is superimposed over the video, it will appear that the part you’ve cut out is moving. This way, part of the image is moving, and part of the image is still. Now, all you have to do is loop that movement so it becomes endless. But don’t worry, it’s a lot easier than it might sound.
Here’s a quick tutorial on how you can create moving still images on your own using Movavi software.
Firstly, you need to shoot your video. As soon as you decide what to film, you can start shooting. The most important part here is the tripod. You can’t make a cinemagraph from a shaky video. While shooting, try to place the main objects in the frame so that they’re apart from each other and don’t overlap. The subject has to stand still in the video.
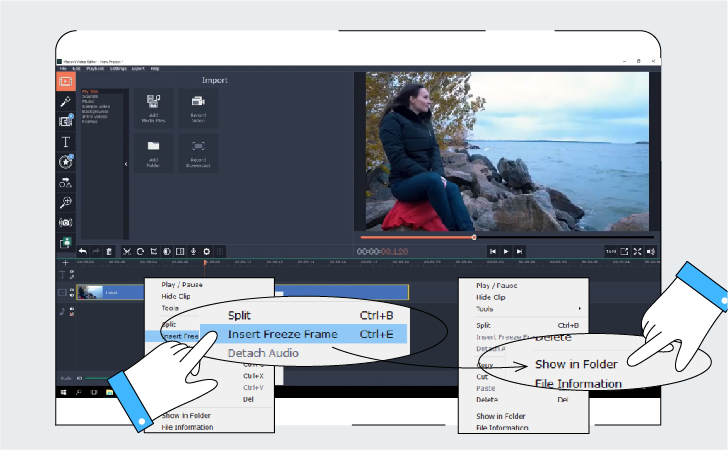
Upload your video to Movavi Video Editor. Remove the audio – you won’t need it. Watch the material and find the frame in which the subject and the surroundings look best. Right-click the video and select Insert Freeze Frame. Then select the freeze frame and select Show in folder.
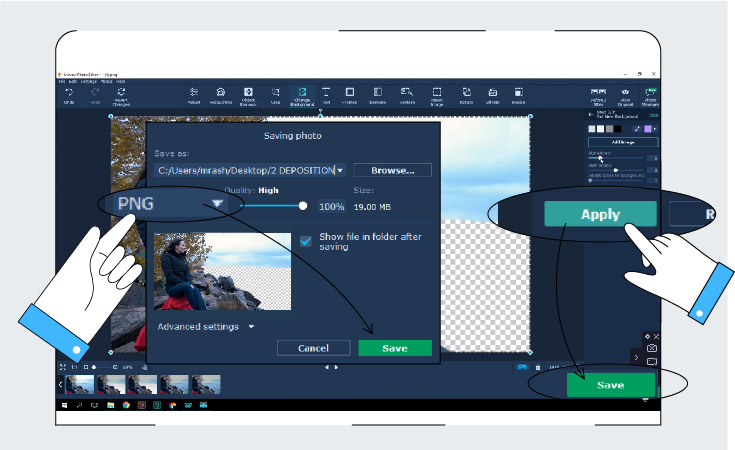
In the folder that opens, you’ll see the photo taken from the video. Copy the photo and move it to your working folder. Open Movavi Photo Editor and drag the photo into the working area. Click Change background.
Use the green brush to highlight the subject and all the objects that you want to freeze. Use the red brush to highlight the area where you want the objects to move. Hit Next and refine the edges of the highlighted areas. When you’re finished with this, click Next.
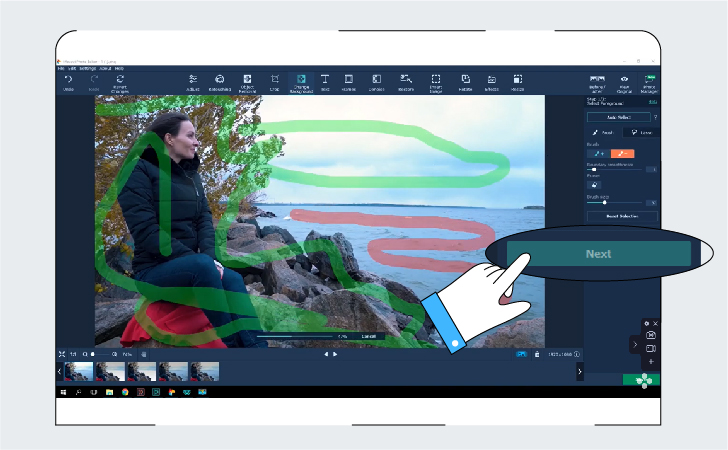
The area that was marked with red will be cut out of the photo. If you don’t like the result, use the Blur Edges and Shift Edges sliders to correct the outlining. Finally, click Apply, and save the photo as a PNG file.
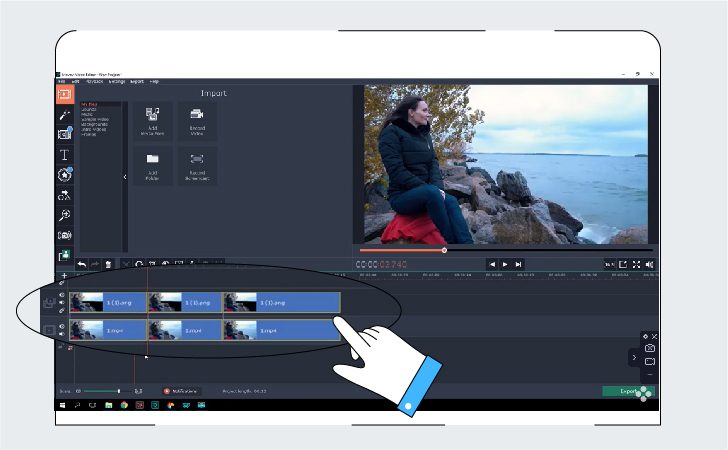
Go back to Movavi Video Editor and drag and drop the photo onto the timeline. Move the photo to the overlay track, and place it above your original video. Stretch the clip so that it matches the duration of the video. Choose the section where you want to loop the movement – it should be a short segment, no more than 2-3 seconds long. Select the clips of both video tracks. Cut out the segment out with the scissors tool and remove the unwanted parts.
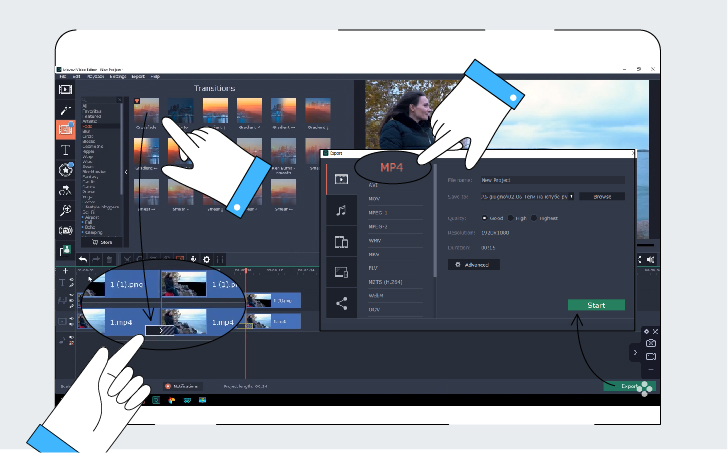
Copy the segment and paste it one or more times on the timeline. The number of copies will influence the duration of your final video. Insert the crossfade transition between the copies of the segment. Set the transition duration for 1 second. If the segment was chosen correctly, the blend between the clips will be seamless.
All that’s left is to save the result. If you want to have a video, click Export, choose the desired video format, and then hit Start.
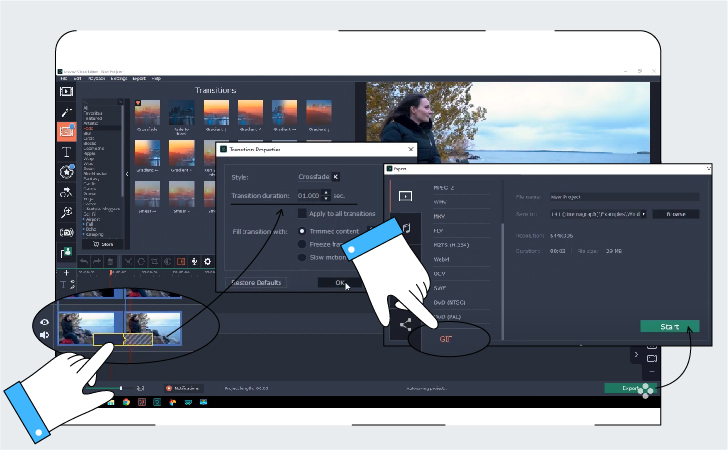
If you want to save your project as a looping image that you can post on a website or send it to your friends, you should go with the GIF format. GIFs should take up as little space as possible so that they load quickly. So, first, delete all the copies from the timeline and leave only the original segment and the freeze-frame above it. Select both these files and cut them in half. Now swap the halves and insert the crossfade transition between them. This will smooth out the hard cut that will otherwise be visible when the GIF is looped. Finally, click Export, choose the GIF format, and hit Start.
That’s it! your cinemagraph is ready!
If you don’t have much time and need an animated picture ASAP, you can use an app for your Android phone or iPhone. Here are some good ones:
2. Zoetropic
3. Lumyer
Enjoy our special discount for all blog readers!
Promocode: SUPERBLOG
Download Movavi Video Editor Plus with 10% discount for Windows
Download Movavi Video Editor Plus with 10% discount for Mac
Promocode: EFFECT
20% off Movavi Video Editor Plus + Movavi Effects Store subscription for Windows
20% off Movavi Video Editor Plus + Movavi Effects Store subscription for Mac

