We use cookies to improve the services we offer you. By continuing to browse this site, you consent to keep them in accordance with our Privacy Policy.
×We use cookies to improve the services we offer you. By continuing to browse this site, you consent to keep them in accordance with our Privacy Policy.
× 5,516
5,516
 6 min
6 min

We’ve gotten used to timelapses. We’re used to the sun falling behind the horizon and coming up again in a matter of seconds. We’re used to shots of swirling crowds in a city, of hands that quickly chop ingredients in food blogs. The timelapse technique has been widely adopted by creative industries: take the example of the Oren Lavie music video Her Morning Elegance which instantly went viral.
As it has evolved, timelapse has added a new form – hyperlapse. Hyperlapse is timelapse in motion. While timelapse is created from photos taken from one spot, in hyperlapse you add camera movement. Here’s what a good hyperlapse video looks like.
While the term was only coined in 2012, Guy Roland shot what is arguably the first hyperlapse film back in 1995: with the help of the then-unheard-of technique of hyperlapse, he proposed in Pacer an altogether new visual approach to filming urban architecture.
Today, hyperlapse is embraced by all types of video and film production, from travel blogs to music videos. The technique has also attracted large companies that incorporate it into their products. Not long ago, Instagram released a Hyperlapse app, a Microsoft Hyperlapse app followed, and Samsung added a hyperlapse camera mode to their latest phones.
Although you can shoot hyperlapse with a DSLR camera or even a drone, and the technique itself can be refined endlessly with the help of lenses, racks, ND filters, etc., in this article we’re going to talk about the easiest and quickest way to make a hyperlapse video using a phone.
Choose an object that will serve as your reference during the shoot. This will make your movements smoother and the added stabilization will make the end result look more natural and won’t distort your video.
Scout the shooting spot in advance and plan your camera movement so that it reflects your goal. It is essential to keep the distance between shots equal, so you’ll need to find a way to measure a “shooting step.” It can be your own step or small paving slabs.
When you’re done with photos, it’s time to make your hyperlapse video.
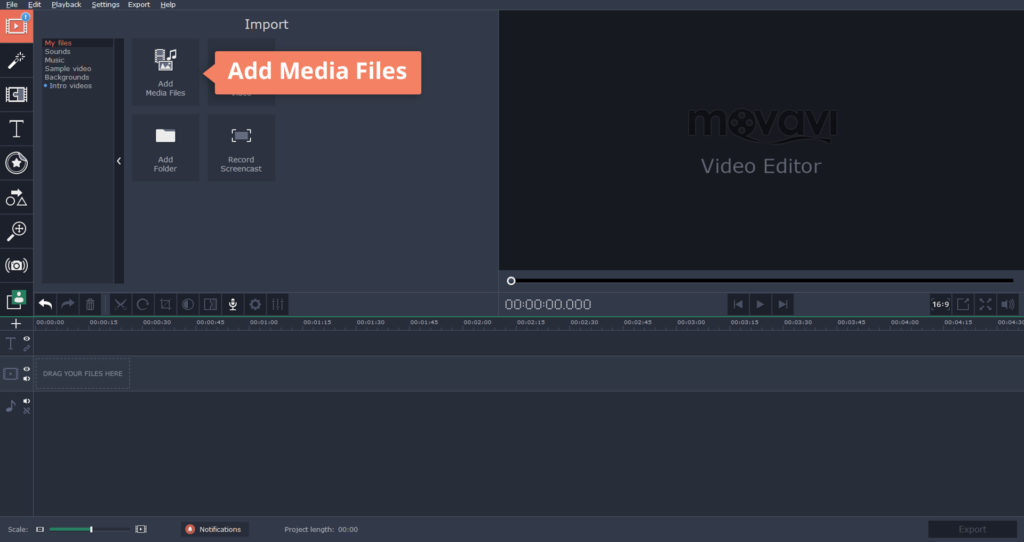
Open Movavi Video Editor Plus and select Create Project in Full Feature Mode in the welcome window. Then click Add Media Files, and choose your photos. Be careful with the order!
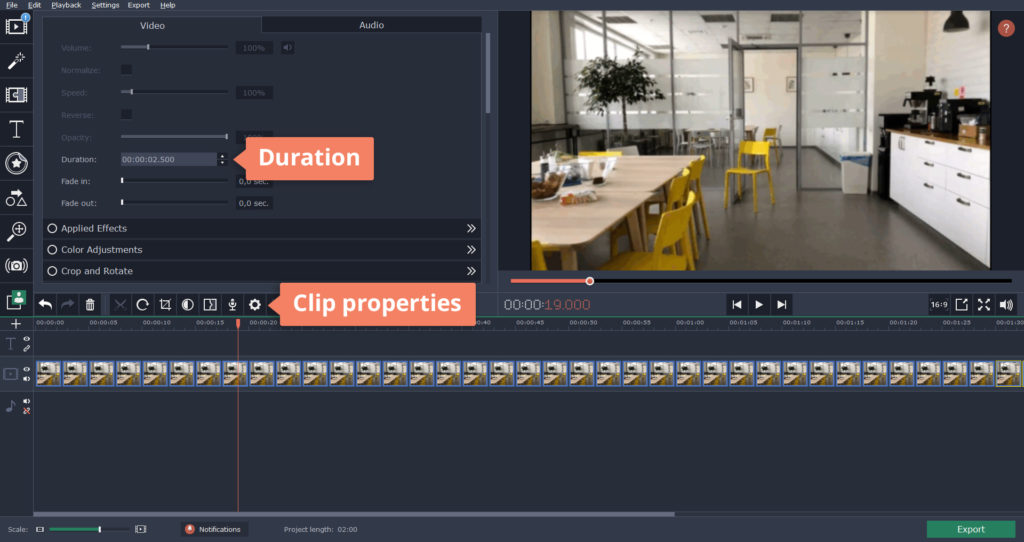
You have added your photos to the timeline. To turn them into the shots of your video, you’ll need to set the duration of their display. A simple timelapse or hyperlapse video can be based on a frame rate of 25 FPS, which means that there will be 25 photos in each second of the video. Since there are 1000 ms in one second, every shot in your video should last 40 ms (1000/25). Go ahead and set this duration to 00:00:00.040 in Clip Properties (change the milliseconds first, then the seconds).
Play the sequence. You’ll probably see something like this:

Since every “shot” in your planned video has been created manually, the result will be uneven. To smooth things out, you’ll need to use the Stabilization function, but first, you’ll need to turn the sequence of images into a video.
Hit Export on the right side of the screen.
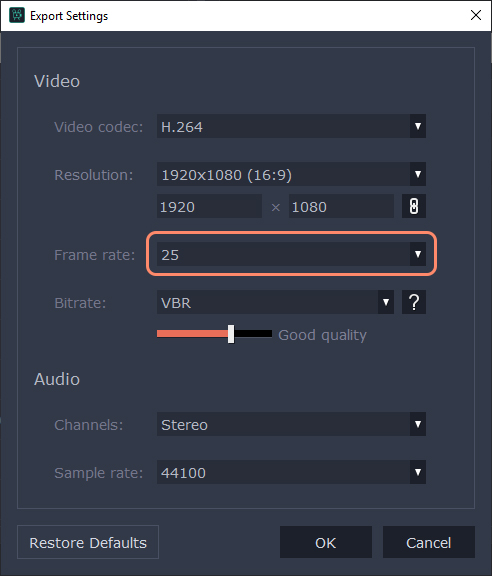
In the pop-up menu, choose the appropriate format, then click the Advanced button and make sure you set the correct frame rate.
Hit OK, then Start.
Now, create a new project and add your video to it. Play the video: the duration should be close to what you intended.
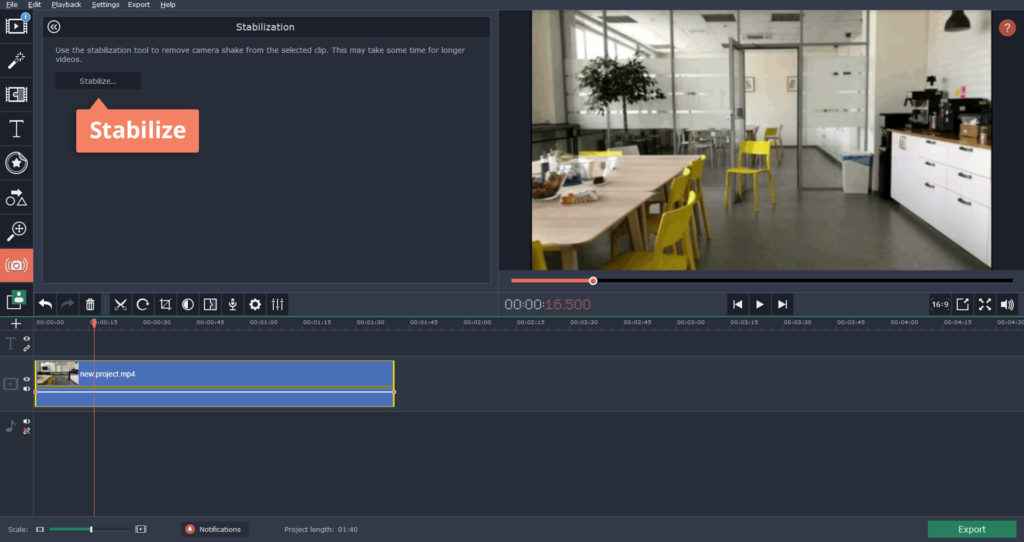
Double-click the video on the timeline and choose the Stabilization option from the Tools menu, then click Stabilize.
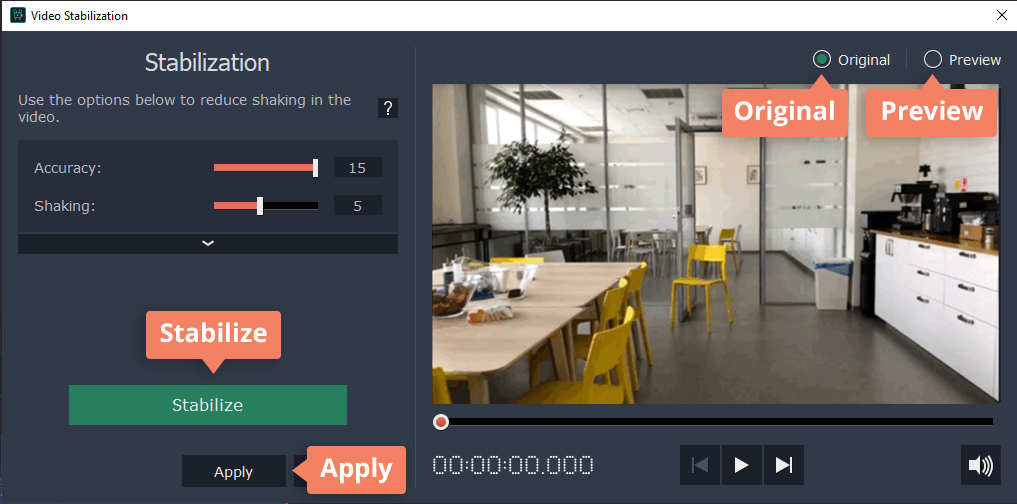
In the window that opens, you’ll see different stabilization settings. Adjust the Accuracy slider to set how precisely you want the video to be analyzed. Use the Shaking slider to reflect the amount of shaking visible in the video. To start the stabilization process, click Stabilize. When the process is finished, switch between the Original and Preview screens to see the result. If you’re satisfied with the result, hit Apply.
Our video is stabilized:

To save the video, click the Export button, choose the appropriate format, and hit Start.
And that’s all there is to it!
Stay creative and stay in touch.
Yours as always,
Movavi Team.