


We use cookies to improve the services we offer you. By continuing to browse this site, you consent to keep them in accordance with our Privacy Policy.
×We use cookies to improve the services we offer you. By continuing to browse this site, you consent to keep them in accordance with our Privacy Policy.
×
 13,615
 6 min
6 min

How well do you know your family history? It’s always fascinating to dig into one’s roots. Exploring your ancestry may result in some truly amazing discoveries. There’s always a chance to find out that your nationality is actually different from what you’d thought it to be. Or that you have historical ties with your favorite vacation spot. Moreover, you might end up finding new relatives living on the other side of the world – how exciting could that be?
And it’s not all about new discoveries, either. Putting together your family tree could be a great activity for bonding together. It’s all about talking, isn’t it? Talk to your grandparents, meet up with other relatives and see what comes up. Eventually, you’ll have a better idea of who you are – and hopefully some quality family time.
Going back to the whole idea of building a genealogical tree, it’s actually one of the simplest and most effective ways to create a cohesive visual representation of your family history. If you opt to use a computer, there is software that will not just make your tree look attractive, but also provide you with the opportunity to restore old photos, which may be faded, scratched or otherwise spoiled. In this publication, we will guide you along the path of improving the quality of archive pictures using Picverse Photo Editor and assembling those images to create a digital family tree.
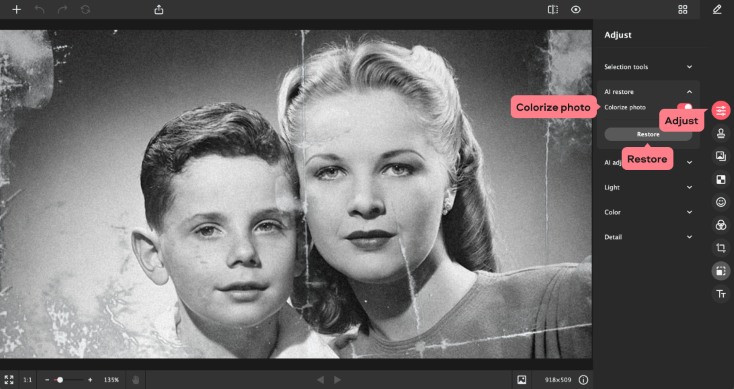
The bad thing about old photos is that they often have cracks, creases, and stains. The good news is these things can be fixed with designated photo-editing software. Take, for example, Movavi Picverse Editor: our program has an automatic quality improvement function. To fix your old pictures, upload them into the program and do the following. In the Adjust tab on the right-hand panel, select Manually and then open the AI restore section. If you want to add color to your photos, toggle the Colorize photo switch on. Click the Restore button. The photos will automatically be restored. If the original had been damaged too heavily, slight defects may remain.
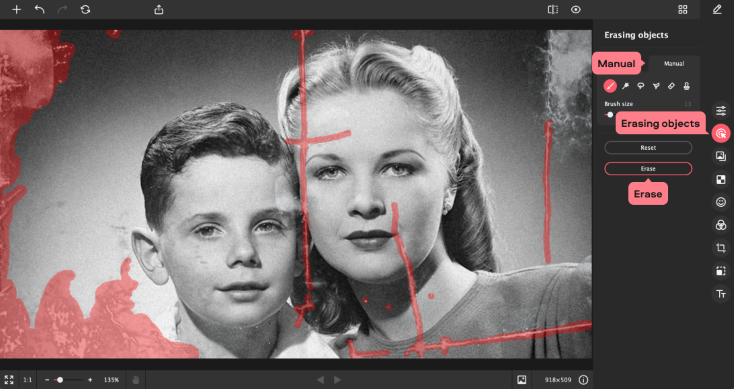
To remove any unnecessary elements, go to the Erasing objects tab and open the Manual section. Select the area you want to remove. To do this, choose one of the available tools: Brush to paint the designated area, Magic Wand to pick objects of the same color, or Lasso / Polygonal lasso to trace the outline of an object. The selected area can also be adjusted with the Selection eraser tool.
Once the object has been selected, it can be removed by clicking the Erase button. Small defects can be remediated with the Stamp tool, which enables you to copy pixels from one area of your image to another.
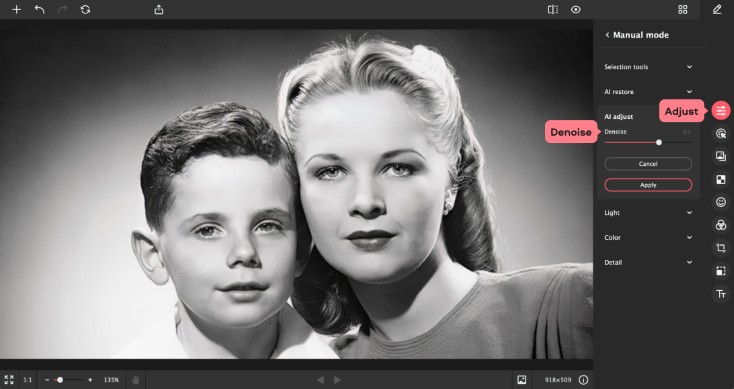
You might notice that after scanning your picture looks a bit grainy. To solve this problem, open the AI adjust section in the Adjust tab. Click the Denoise button. Adjust the Denoise setting until you get what you want. Don’t forget to click the Apply button once you’re done.
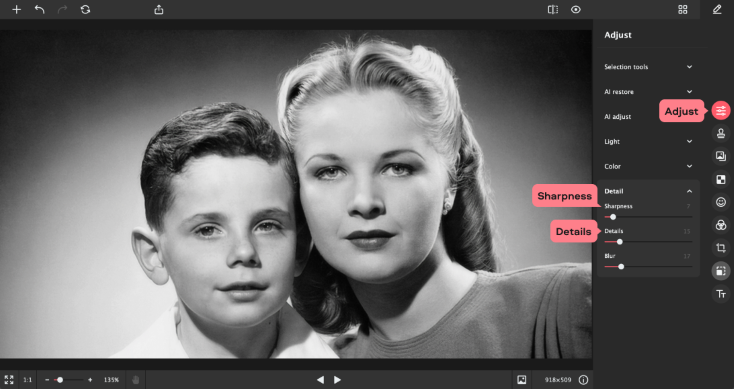
Old photos can often look somewhat washed out. In most cases (unless your photo is way too blurred), you can increase sharpness by doing as follows. Go to the Adjust tab, open the Detail section, and drag the Sharpness and Details sliders. Try also increasing the color saturation to make it look brighter and higher in contrast.
There are several ways to compile a genealogical tree:
An ascending tree is probably the most popular option, as it’s the easiest to work with – especially for those who are still in search of more information about their past. Simply put your own picture at the bottom and work your way up as you find out more.
Once you have collected and edited all the images, you can move on to styling your tree. Start by preparing the background: draw it by yourself or download a template from the Internet.
Here are a couple of our templates you might consider using:
Family tree template for adults
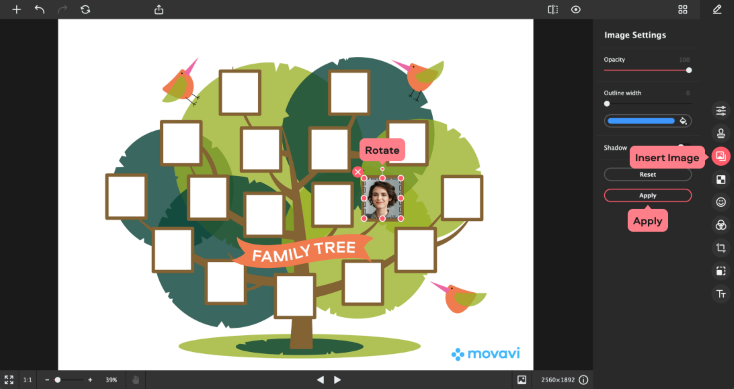
How to add pictures to the template in Picverse Photo Editor:
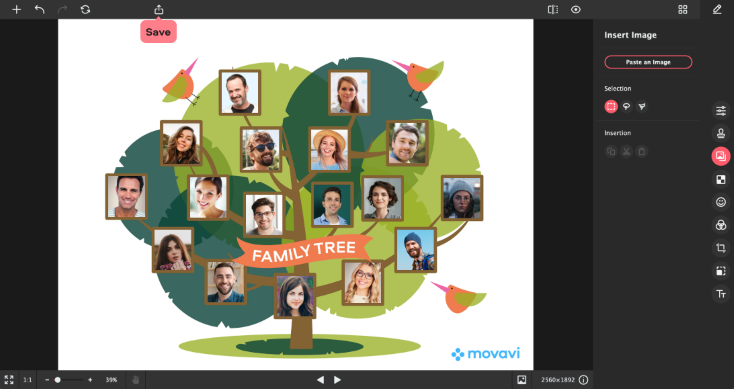
Congratulations, you’ve just created your first family tree!


