


We use cookies to improve the services we offer you. By continuing to browse this site, you consent to keep them in accordance with our Privacy Policy.
×We use cookies to improve the services we offer you. By continuing to browse this site, you consent to keep them in accordance with our Privacy Policy.
×
 5,339
5,339
 7 min
7 min
We’ve talked a lot about the importance of the first seconds of a YouTube video when you need to come up with something catchy and interesting to grab viewers’ attention right away. However, never forget that the last part of the video is at least as important! In fact, working on the ending of your videos will go a long way towards improving your channel’s performance. So it never hurts to spend extra 20 minutes to make the perfect outro.
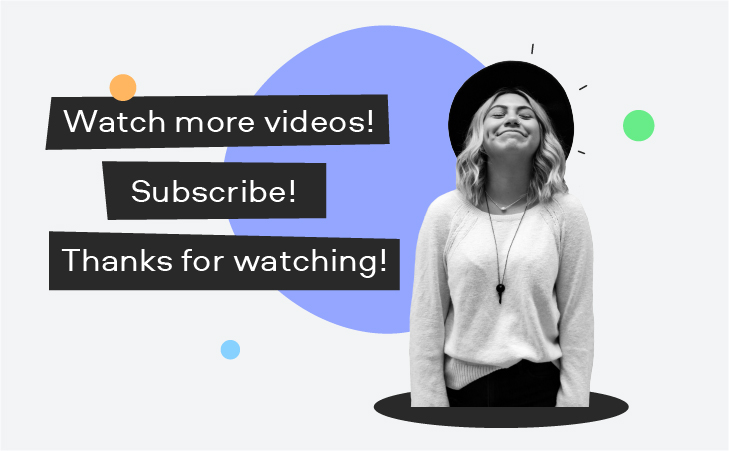
An outro is the last slide of the video, to which you can add end screens, calls to action to promote other videos, playlists and links to websites, or to encourage your viewers to subscribe. It’s an effective way to keep viewers on your channel and make them do what you want them to do, instead of picking some other video from the Up Next section. The goal is to have them stick to the content you’re suggesting to them.
You can place up to four end screens on one video and you have 5 to 20 seconds to show them. If you don’t want to have them on a silent black screen, you’ll need to create a mini video to underscore those promo elements.
What should be featured in that mini video? Well, there are many options. Here are some types of outros that are common on YouTube right now:
Remember those hilarious unused scenes they showed with the credits at the end of Jackie Chan movies? People still like to laugh at failed takes – and you don’t need to have Jackie Chan to make a great blooper video. Some YouTubers have successfully done this – putting together some of their bloopers to make engaging and funny outros!
The only drawback with blooper scenes is that you don’t always have them. And faked bloopers are not really a good idea – because, well, they do look fake.
Another way to make an engaging outro is to create a special video where you explain in a few words what’s in the videos or other web destinations you’re suggesting. An outro like this will take more time, and you can’t just make it once and forget about it. Every time you change your end screens, you’ll have to reshoot your outro.
An animated outro is much easier to make. Just add some stickers, frames and arrows to a layout that matches your blog’s style, and you’re done! The great thing about animated outros is that you can use them without changes for as long as you want.
It may be simple, but it’s still effective enough for many YouTubers. It’s better than nothing, and much better than a badly made outro.
DO think through where you’re going to place your end screens in advance. That applies to all outro types. When you know exactly where the clickable window will be, it’s much easier to shoot a video of yourself pointing to them or animate one of the arrows. If you don’t do that, you may end up with an outro where the end screen covers up the heroes or prevent you from reading the credits.
DON’T overdo the visual part of the outro. Viewers have 20 seconds max to read what’s on the end screens and decide if they want to click on any of them. If there’s too much going on, people will just skip over it and close your video without clicking on anything.
DO put some thought on what exactly you’re recommending your viewers watch next. The best way to promote your content via end screens is to show a taste of a related topic. For example, at the end of a vlog describing a day of hiking, you could invite viewers to watch a tutorial on how best to pack a backpack for a day’s hike.
Another good strategy is to promote the most successful of your videos – that way, you show your best pieces of content to new viewers and increase your chances of getting new subscribers. To discover which of your videos have performed best, check your YouTube stats. Or you could do the opposite and try to give less successful videos another outing. Perhaps the timing just wasn’t right the first time around. Anyway, the best way to find out what works best for you is to experiment. So don’t be scared to try new things every so often.
DO make your outro in the same colors and style as your whole blog. Look at your channel’s banner and your intro, and try to create something in the same vein. Develop your own brand style!
Okay, now let’s move on from theory to practice. To make a good outro, you can use regular video editing software or try a dedicated intro/outro maker. Here’s what we suggest trying:
Video Editor from Movavi will help you to create a video of any kind in no time. Its user-friendly intuitive interface makes it very easy, even for beginners. Ready to give it a try? We have a surprise for you! As a Movavi blog reader, you can get a special discount on Movavi Video Editor Plus!
Promo code: SUPERBLOG
Download Movavi Video Editor Plus with 10% discount for Windows
Download Movavi Video Editor Plus with 10% discount for Mac
Here’s a tutorial on how to create an outro using this software:
2. Fastreel Online Video Editor
If you don’t want to download anything and just want to get your outro done ASAP, use a free online editor. For example, Fastreel even has a special YouTub outro template. Making a professional video has never been easier!
3. Canva
Another online YouTube outro creator you can use is Canva, which will help you to make a custom animated outro. It also has templates, backgrounds, and animated graphics to make your outros more engaging. Try it here.
Last but not least – a quick tutorial on how to make an outro with CTRs.
Go to YouTube Studio and open the Videos page.
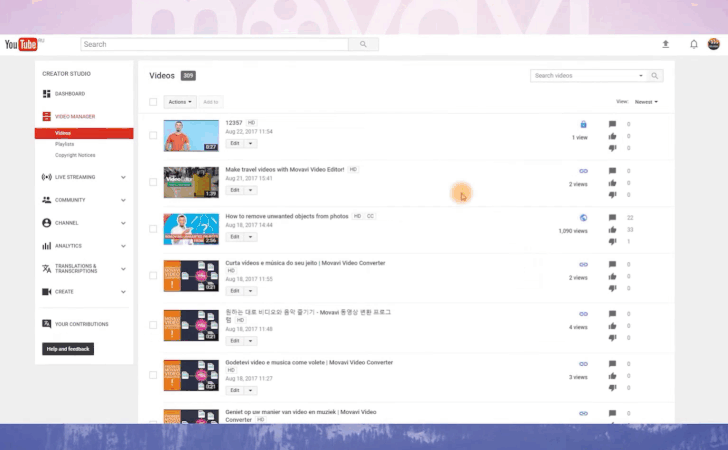
Select a video you want to add end screens to.
From the left-hand menu, select Editor.
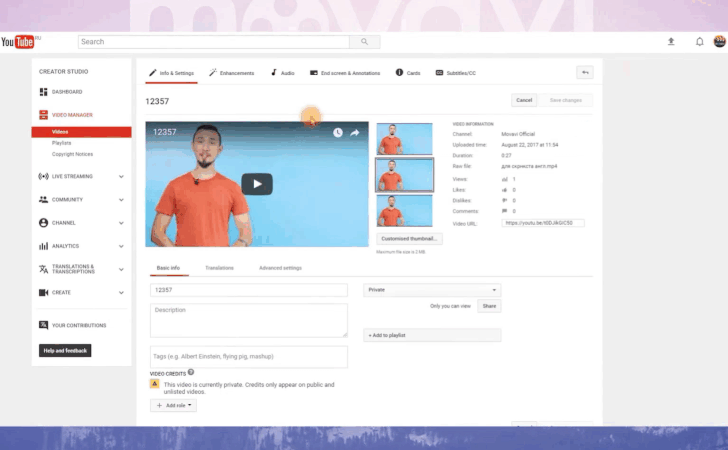
Click Add an end screen, adjust the size, and move it to where you want it to appear.
Done! Now you’ve used every second of your video in the most effective way 😉

