


We use cookies to improve the services we offer you. By continuing to browse this site, you consent to keep them in accordance with our Privacy Policy.
×We use cookies to improve the services we offer you. By continuing to browse this site, you consent to keep them in accordance with our Privacy Policy.
×
 17,961
 6 min
6 min
 1
1
If you’re running your own YouTube channel, you’re probably no stranger to the fact that your audience is everything. The number of subscribers is one of the key indicators of your channel’s performance: the better content you produce, the better you promote it, the more people will eventually follow you. Consequently, the bigger audience you have, the higher the chances of making your efforts pay off financially, as you’ll be able to benefit from YouTube partnership programs, advertising, and so on. So, how do you get more people to subscribe to your page?
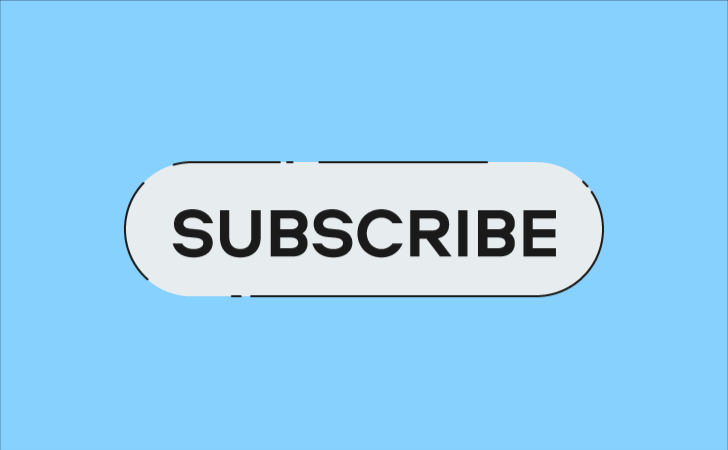
Strange as it may seem, simply encouraging your viewers to hit the right button at the right time does work. The Subscribe button is located below each video on YouTube. After clicking it, you can also hit the bell icon to receive notifications from this channel.
You’ve probably already noticed that almost every blogger out there reminds the viewers to follow their channel at the end of each video. Quite often you’ll also see an animated subscribe button coming up on the outro screen. This is a simple trick that provides your audience with the right call to action at the right time.
Even if you’re completely new to creating video animation, learning how to make a subscribe button will literally take just minutes. Let’s explore how to do this in Movavi Video Editor Plus.
Enjoy our special discount for all blog readers!
Promocode: SUPERBLOG
Download Movavi Video Editor Plus with 10% discount for Windows
Download Movavi Video Editor Plus with 10% discount for Mac
Add a video clip to the timeline. The easiest way is to use one of the built-in ones, as it will be hidden anyway.
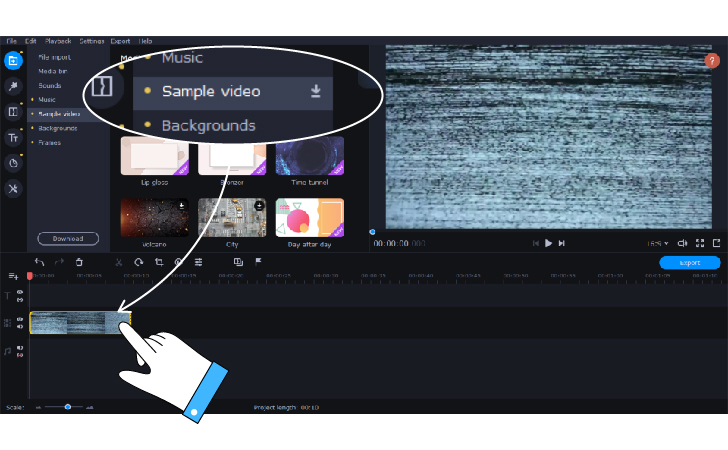
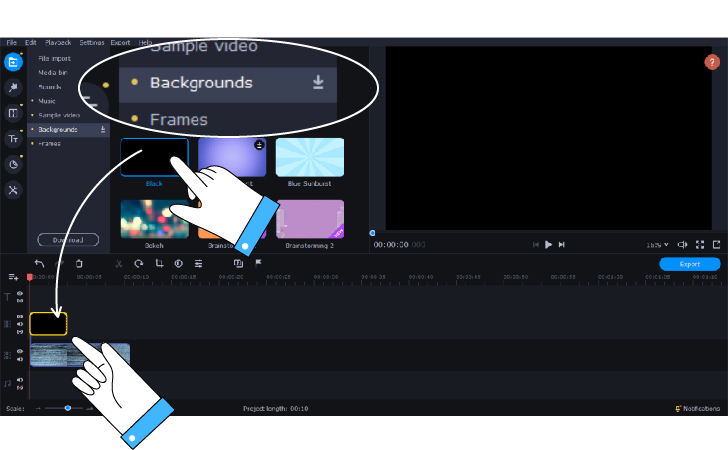
Go to Backgrounds and drag a simple black background onto an overlay track. This is the foundation of our future Subscribe button.
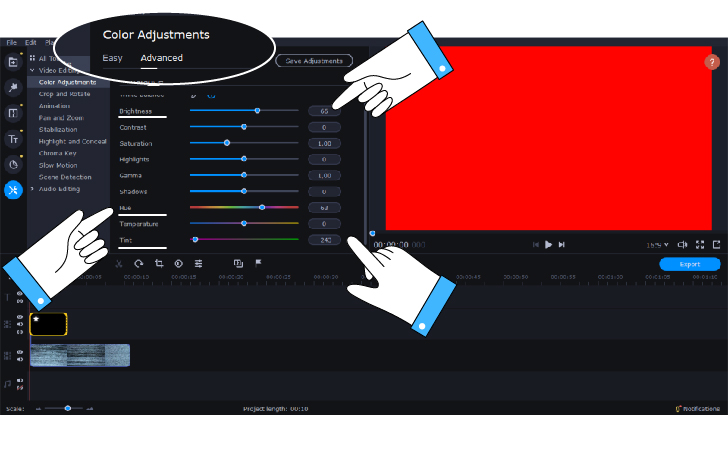
To change the color, select Tools and pick Colour Adjustments. Choose Advanced and apply the following settings: Brightness: 66, Hue: 63, Tint: minus 246. Now your button is red. Feel free to experiment with any other color of your choice.
Double-click the background and select the Picture in picture option. Place the background in the center and adjust the size to resemble a subscription button. Hide the main video track so that it doesn’t interfere.

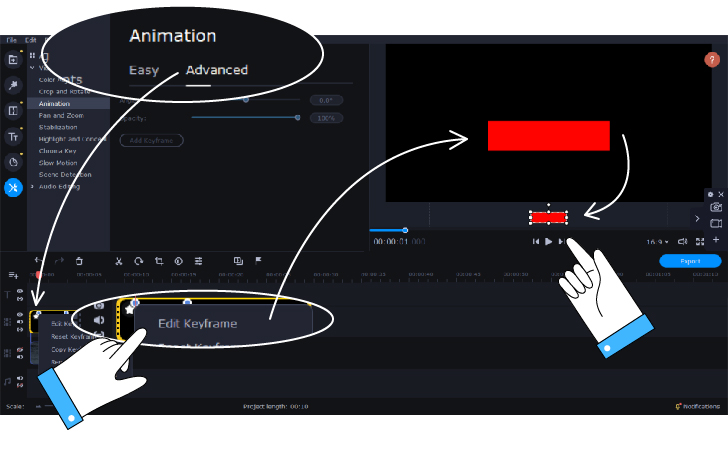
Now it’s time to add some animation to your button. In the tab labeled More, choose Advanced animation, then Add animation. Two keyframe points will appear on the clip with the Subscribe button. The final keyframe point looks the way we need it to look, so it can be left the way it is. Let’s work on the first keyframe point: right-click it and choose Edit keyframe. Let’s move our red button below the preview screen and squeeze its edges in. Now let’s reduce the distance between the two keyframe points to increase the speed at which the button appears. Now the button emerges smoothly from below, getting big by the time it reaches the center.
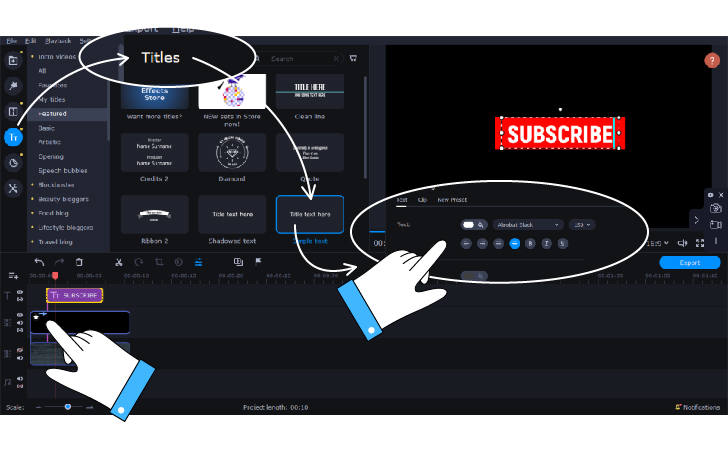
Now let’s add some text. Open the Titles tab and select Simple text. Add it to the titles track. Pick a font you like and type the word SUBSCRIBE inside the title in capital letters. Format the size of the text so that it fits nicely in the centre of the button. We need the text to emerge on the button at the very last moment, so we’ll place the title on the track right after the final keyframe point.
Your button is ready. Now, to make your YouTube subscribe animation really stand out, it’s worth adding a finger hitting that button, imitating the clicking of the mouse. Or even a notification bell to complete the whole picture. To continue working on your animation, check out this tutorial on the Movavi Vlog. You can watch the whole process starting from the button or jump straight to the most relevant part – the timecode is 03:36. Before you start, look for images of the hand and the bell on the internet, or pick the pre-made icons from Movavi Team via this link.
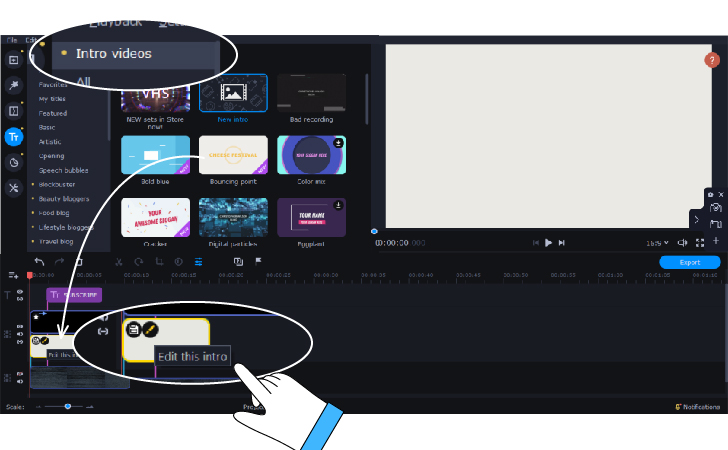
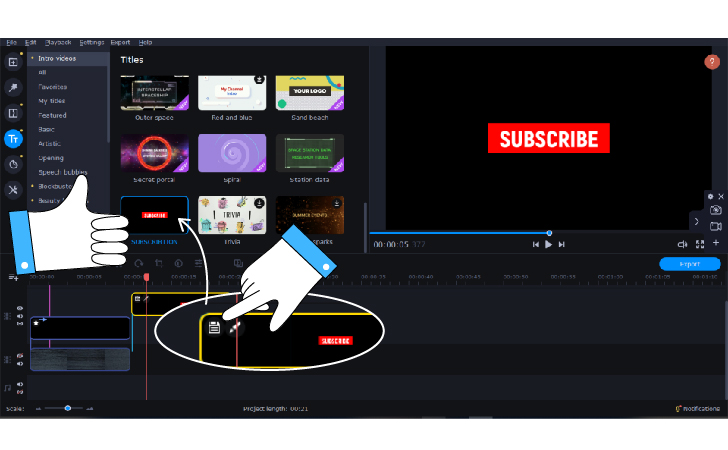
At any given time, you can save your animation to access or edit later. To do this, select all the files on the timeline with the help of hotkeys Ctrl+A and copy them using Ctrl+C. Hit the Titles tab and follow the Intro videos. Don’t forget to add an intro to the timeline. Click the pencil icon to proceed to the intro editing.
From the template with our intro, remove all the files from the timeline and press Ctrl+V. Now our animated Subscribe button will be stored here. Make sure to hide the main track and click Apply and return.
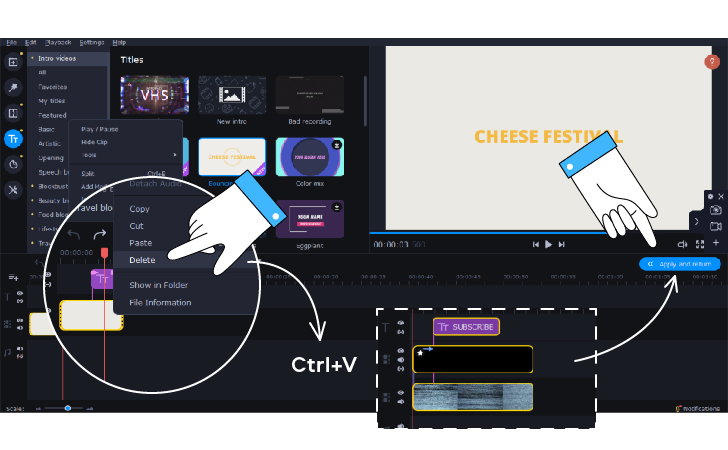
Click the floppy disk icon to save the template. Enter a name for your template and press OK. Now you will always be able to find this template in the “Intro videos” section and easily add it to any of your videos. You can also edit and save changes to this template anytime you need.
Apply the new Subscribe button to your videos and watch your audience grow!

