


We use cookies to improve the services we offer you. By continuing to browse this site, you consent to keep them in accordance with our Privacy Policy.
×We use cookies to improve the services we offer you. By continuing to browse this site, you consent to keep them in accordance with our Privacy Policy.
×
 6,154
6,154
 11 min

The final school bell is about to ring! Late spring is indeed a very exciting time for all parents waiting for their senior students to finish high school. So why not celebrate this important milestone by making a memorable graduation slideshow? It’s a great way to make use of all those pictures and videos accumulated over the years. Once the kids have left for college, they’ll particularly appreciate having the opportunity to relive those happy memories by watching the clip over and over!
If you have enough pictures of other guys from your child’s class, you might even come up with an initiative to make a graduation presentation for everyone to share. Alternatively, you can make a personalized slideshow for the family to enjoy and to remind the students how proud their parents are of them. You’ll love rewatching it years later when your kids have graduated from college, too!
There are a number of ways to compile your pictures into an engaging slideshow. While you can always create a simple photo sequence with the built-in tool that came with your computer or smartphone, a dedicated program like Movavi Slideshow Maker will give you more advanced editing capabilities. This kind of software lets you apply customizable transitions, effects and captions, zoom in and out of shots, record a voice-over, and apply a custom intro.
Download Movavi Slideshow Maker for Windows
Download Movavi Slideshow Maker for Mac
Here’s how to make your slideshow with our program:
Select the photographs you want to include in your slideshow. Remember, there are only so many you can use – no one wants to watch it for hours! So how long should your clip be? Well, as it’s a special occasion we’re celebrating, you can certainly go longer than the typical 3-4 minutes. A good average to aim for would be up to 50 pictures and maximum of 10 minutes. Aside from photos, you can also include some video clips, too – it’s actually a good idea to mix both for a more dynamic movie.

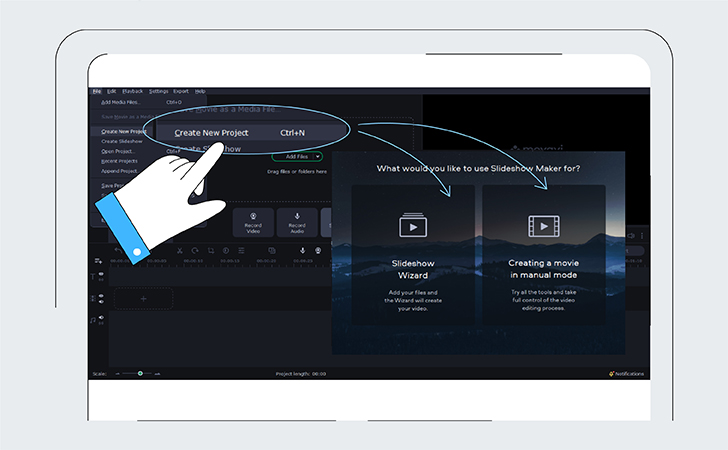
Once you’ve installed Movavi Slideshow Maker, run the program and choose the appropriate mode. Use the Slideshow Wizard mode to simplify the process – you’ll only have to import pictures, choose a template and music, add a couple of titles and export the result. However, to take advantage of all the editing features, choose the other option – Creating a movie in manual mode.
Click the Add files button and browse the materials you want to include in your slideshow. Make sure you’ve already done all the pre-editing – once the images are on the timeline, you can only apply minor changes such as cropping, flipping and basic color correction. It might be worth tweaking them a little with Movavi Photo Editor beforehand!
Choose the background music in advance – read on to see where to find the perfect tracks for your graduation slideshow. Import it into the program the same way you did with your pictures. Alternatively, if you don’t have any music of your own, there are quite a few sample tracks available via the Sounds and Music menus – those are all copyright-free.
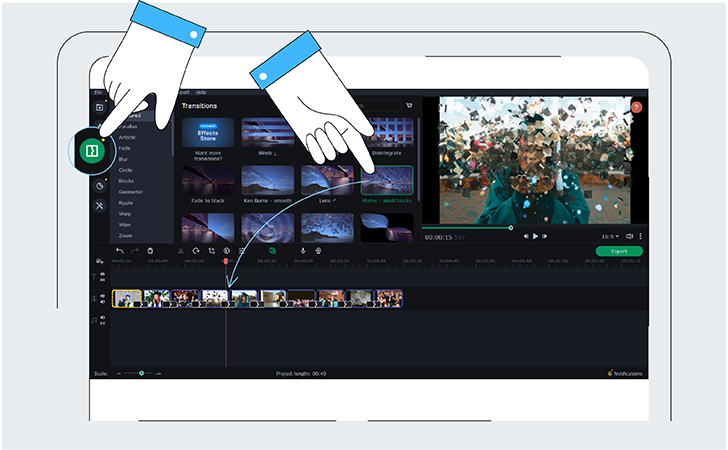
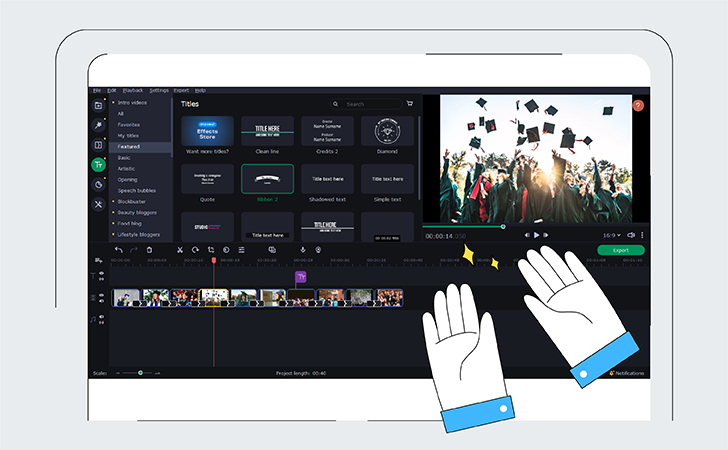
Place your pictures on the timeline and start assembling the flow. Once you’re done composing the order, decide which transitions you want to apply and which filters you’d like to put on your slideshow.
If some of your photos and videos use different aspect ratios, you’ll see some of them appear with black bars. Make sure you crop these off and zoom in where necessary.
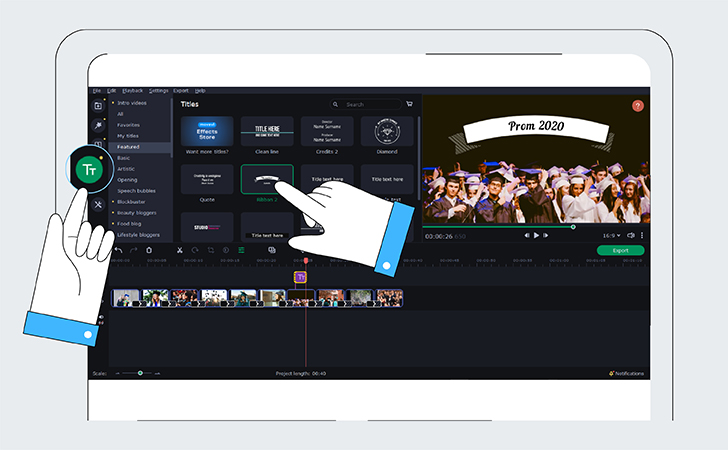
Make your slideshow more fun with some well-chosen captions and titles! Click on the Titles menu to check out the options. Drag and drop them onto your images and type in the text.
Think of a perfect ending that will leave a lasting impression on your audience. Choose a particularly touching photo or come up with a powerful quote that summarizes your visual narrative.
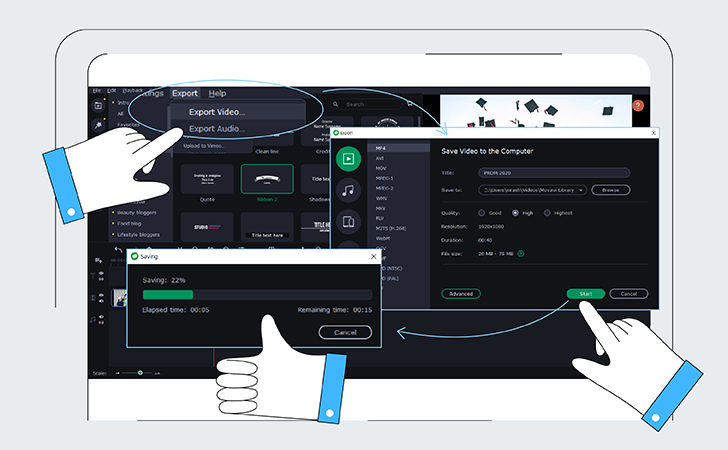
Finish your project by hitting the Export button. Choose the settings you want to apply and the output location. Press Start to save the slideshow. Done!
If you’re planning to use a few dozen photographs, you’ll probably need more than one piece of music. So what are the best graduation songs for a slideshow? What usually works best is a mixture of upbeat rock numbers with a few sadder nostalgic tunes. Here are a few options to consider:
Vitamin C – Graduation (Friends Forever)
Green Day – Good Riddance
Nickelback – Photograph
Also have a look at:
Third Eye Blind – Graduate
Avicii – Wake me up
Miley Cyrus – The Climb
Kris Allen – Live Like We’re Dying
The Rembrandts – I’ll Be There For You
Blink 182 – Going Away To College
The Wonder Years – My Last Semester
Journey – Don’t Stop Believin’
Alphaville – Forever Young
That said, if you’re planning to post the whole video on social media, you’ll have to look into copyright issues (check out our article FAQ: Copyright and Social Media). In short, use YouTube Music to identify popular tracks that are risk-free or search for tracks with a Creative Commons license. We’ve outlined some top free music sources in the article How to Make a Travel Slideshow to Capture Your Memories. Finding license-free instrumental music might be easier than finding the right songs with the right lyrics. However, if you’ve fallen for a track created by an indie artist on Spotify, don’t hesitate to get in touch with the artist and ask for permission to use the song. Most likely they won’t mind if you give them credit.
Although it’s quite fine to just assemble your pictures and insert some captions here and there, why not apply some creativity? Obviously, it’s worth making sure your kids approve of what you’re doing! If they don’t mind you making something more fun than just a regular collection of photographs, here are a few ideas to think about:
Tell the story in chronological order: start with preschool pictures and continue up to the present day. It’s always fun to watch children growing up. Show how everyone has changed over time, which activities your children used to be involved in and what they’re doing now, how their style in clothes has changed, and so on.
Give every person in the class a spotlight. Introduce them one by one, provide their profile in captions, and add a few pictures that best describe their schooldays. This way you’ll make a slideshow that’s fun for everyone to watch, ensuring that no one misses out!

Instead of treating titles and captions solely as decorative elements, why not center your narrative around them? Now, there are several ways to do that. One is to find some inspirational quotes from famous people and use them like chapter headings for the different parts of your slideshow. Find some phrases about teamwork and illustrate them with pictures from your son’s or daughters’ school competitions. Or something about the specialness of childhood to go along with photos of the little ones back in kindergarten. Alternatively, you can gather quotes from teachers and mentors – or even the children themselves! They don’t even have to be serious as long as they are positive and sincere.
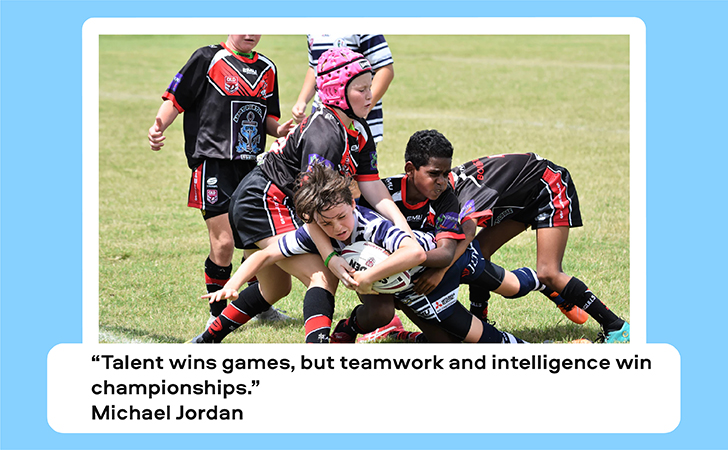
Try arranging some pictures into funny comic strips! You can use speech bubble titles to compose a dialogue between the people in the photographs. What if we imagine the boy in the middle of the picture starting a conversation?

It’s not all about the graduation itself when your kids finish high school. It’s the prom that everyone’s been waiting for, isn’t it? Even if there is no official reception happening (like this year – and we all know why), there is every reason to host a family party at your home to celebrate. Put up some decorations, tell everyone to dress up, make something special for dinner and make the most out of what you’ve got. And don’t forget to make sure your kids have something to keep their memories warm years after those moments are gone! Prepare your smartphone and take lots of pictures and videos. If you have a professional camera, you can even make a real photoshoot for your graduates – that’ll give them an extra reason to dress up. Once you’ve collect all the footage, you can put it together in a video editing program and make a lovely family movie – don’t forget to send it to all your relatives who weren’t able to take part!
We suggest using Movavi Video Editor together with the newly released Prom Night Effects Pack. The set includes 8 titles, 10 stickers, a couple of backgrounds and transitions, and the perfect intro for your prom clip.
Bonus point: if you still keep your archives from your own prom night, why not freshen them up by compiling into a new video with our effects? Surprise your former classmates by posting the clip on your social media accounts and tagging them – it’s a great way to get in touch again.
Check this video to see how it might all work out:
New to using our Effects Packs? See this tutorial to learn how to apply effects in Movavi Video Editor:

