


We use cookies to improve the services we offer you. By continuing to browse this site, you consent to keep them in accordance with our Privacy Policy.
×We use cookies to improve the services we offer you. By continuing to browse this site, you consent to keep them in accordance with our Privacy Policy.
×
 4,749
4,749
 12 min

We all have at least a few photos in which we look awesome, yet the background ruins the whole thing. Think of all those gorgeous street-style images that could have looked so glamorous – if it had not been for that huge trash bin right behind you. Or all those beautiful selfies you made to show your subscribers your awesome make-up that accidentally wound up showing off a big pile of laundry on the floor, too. Wouldn’t it be so much better to replace those not-quite-so-photogenic backgrounds with something nicer?
Even if you’re not that big a social media user, this kind of photo editing is not just about leisure shots. How many times have you hated how your official photos have come out? Stop torturing yourself by taking passport photos in mall kiosks! Instead, choose a neutral portrait-style picture of yourself and apply a little editing by adding a classic white background. There you go – now you can submit this photograph with your formal applications and official document requests.
Changing the background in photos is a useful skill which can be used in multiple ways. And the truth is, you don’t need to be a Photoshop guru to do it. Learn how to change photo background in just a few simple steps using the software of your choice – our Movavi Photo Editor, the classic Adobe Photoshop, or a handy mobile app!
Changing the background in your pictures using this user-friendly tool literally takes just minutes. If you’re not very familiar with complex photo editing software, this is definitely the right choice for you. Consider downloading our free trial version and run through the steps below to see how easy it is!
Download the software onto your computer and follow the installation instructions.
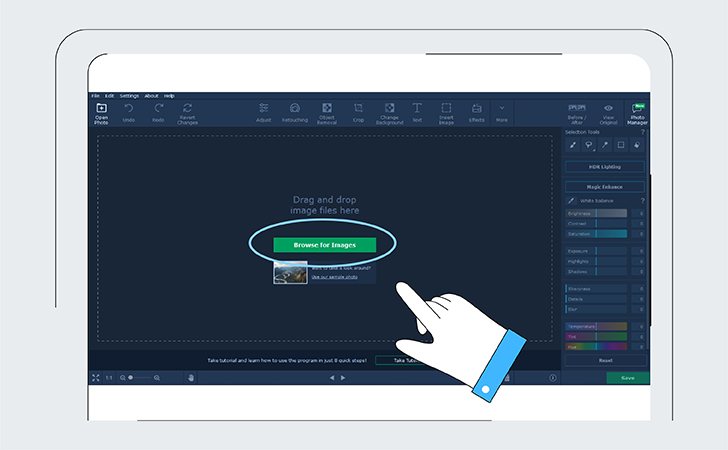
Launch the app and click Browse for Images. Choose the pic you’d like to change the background in. Or simply drag and drop the photo into the program’s working area.
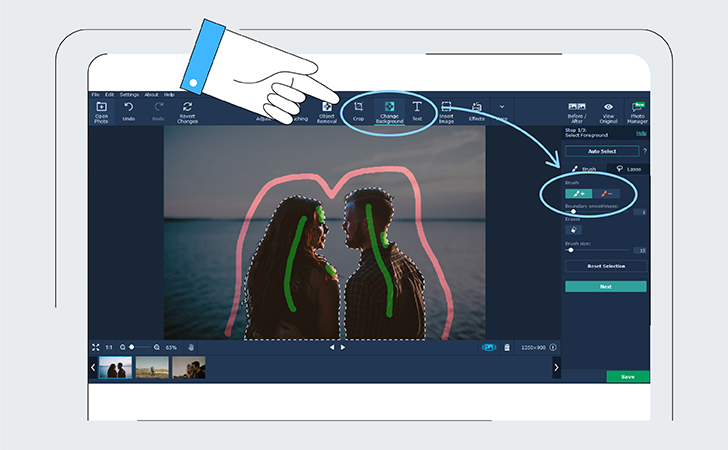
Open the Change Background tab. Try clicking the Auto Select button to automatically mark the objects you’d like to keep in the picture. Alternatively, you can use the green Foreground Brush tool to do this manually. Once you’re done, mark the background with the red Background Brush.
Another way to select the area is to choose the Lasso tool. Set the starting point and move the tool around your object. As you finish, you’ll see a marquee selection tool around it. Don’t worry about minor selection errors here – click Next to continue working on it with other tools.
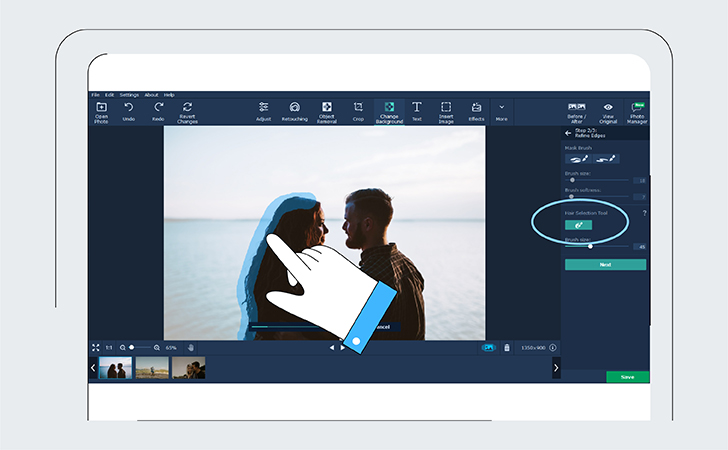
Now use the Mask Brushes to add or remove areas of finer detail. Try the Hair Selection tool for more precision. Once you’ve carefully chosen the area you wish to keep, click Next.
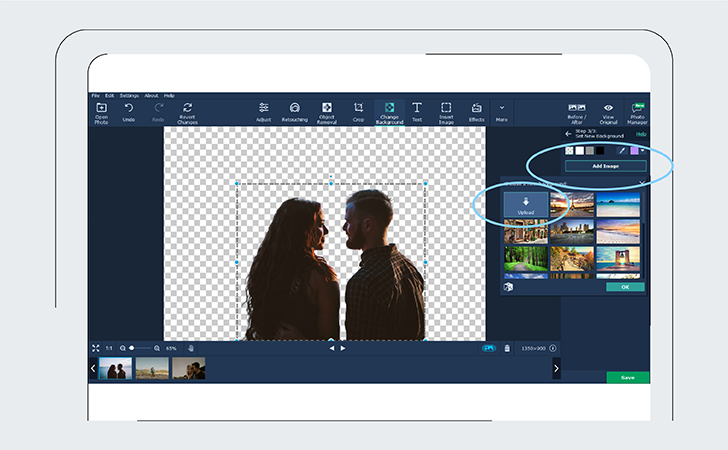
The main objects in the photo are now displayed on a transparent background. To replace this with a photo of your choice, click Add Image. Now choose Upload to pick an image of your choice or try applying something from our background collection. Click Apply once you’re happy with the result.
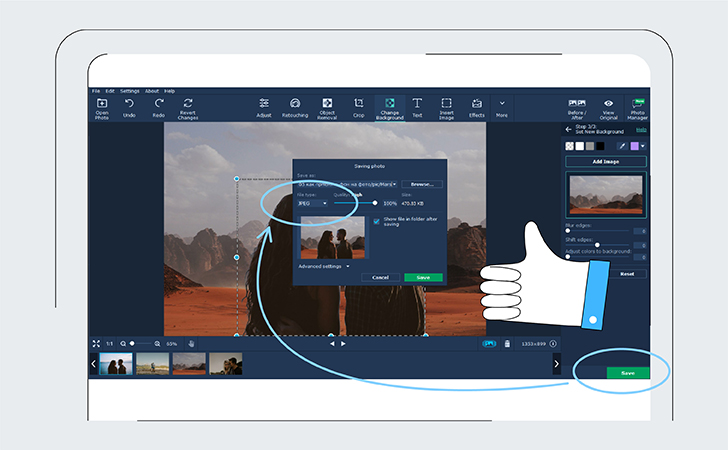
Click Save in the lower right corner of the program window. Select the desired image format and finalize the process by clicking Save again.
Take a look at this instructional video from the Movavi Vlog Team to see the whole process performed step by step:
If you are already familiar with professional photography software, you might find it easier to use Adobe Photoshop. After all, it’s one of the most popular image editing apps, and offers a broad selection of advanced tools for editing your pictures. It’s worth noting that Photoshop can be quite hard to master if you’ve never worked with it before, and the license fee might seem a little pricey. Other than that, this program is genuinely great and works wonders when it comes to changing photo backgrounds.
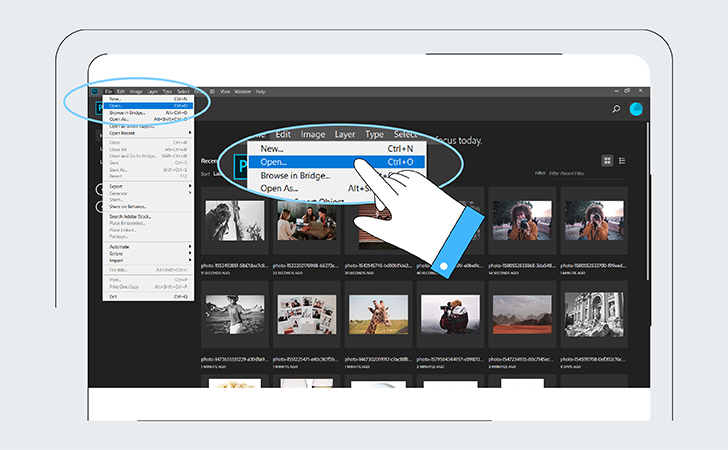
There are two ways to do this. First, you can find the photo you want to work on, right-click (or Command + click on Mac) on it and pick the Open with… option. Select Adobe Photoshop from the dropdown menu and launch the program.
Alternatively, you can open the software first and find the right photo by browsing through your computer.
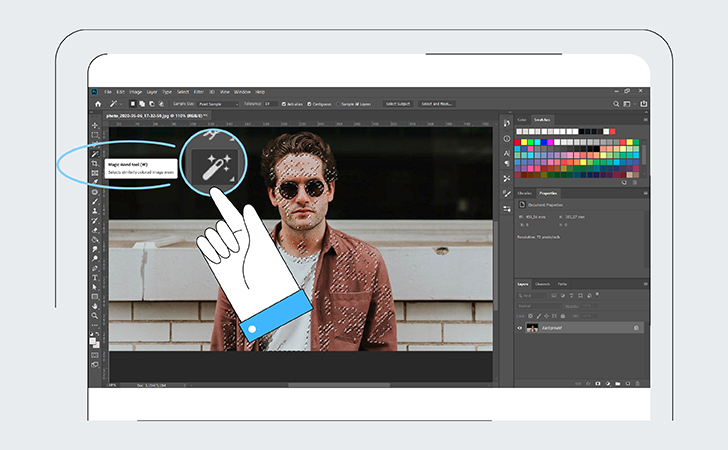
Once you have the photo open in the program, pick the Quick Selection tool on the toolbar or press W on your keyboard. Click and drag the brush to the desired area. The software will try to guess which parts you want to select depending on the contrast levels. Most likely you’ll find that those areas with high contrast and hard edges will be selected neatly.
Sometimes you might find it easier to select the background instead. You can invert the selection process by pressing Shift + Ctrl + I on Windows or Shift + Cmd + I on Mac.
Zoom in on the image and adjust the brush size as needed. Continue clicking and dragging to add more elements to your selected area. To deselect certain elements, press the Alt key and hold it while you continue clicking and dragging in the area.
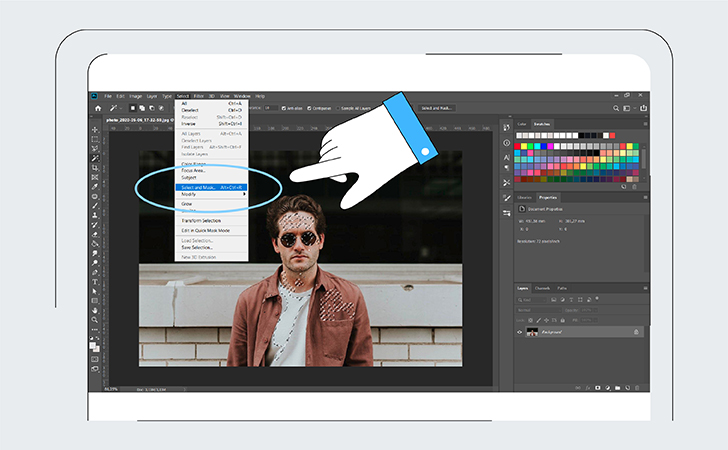
Find the Select and Mask option in the options bar at the top. You’ll see a toolbar that enables you to edit your selected area. Go to the Properties panel, select the View Mode and define how you’ll view the selection. Go for Overlay to see the contrasts clearly or click the F key to look through different backgrounds – applying them to your image temporarily will help you identify any minor problems with your selection.
Pick the same Quick Selection tool or a Lasso/Polygonal Lasso tool to continue working with larger areas. To adjust smaller details, use the brushes: the regular Brush Tool works best in the case of hard edges and strong contrasts, while the Refine Edge Brush Tool can be used to smooth out softer edges.
While using the Refine Edge tool, check the Smart Radius box under Edge Detection in the right-hand panel. This option helps the program to distinguish between soft and hard edges. Press P on your keyboard to switch between the before and after views.
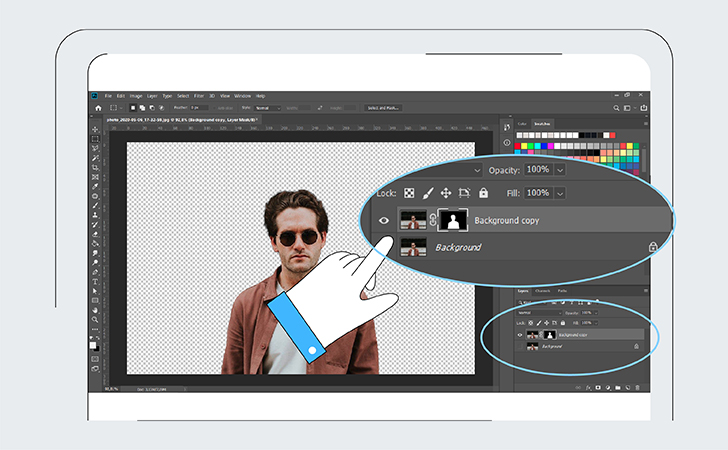
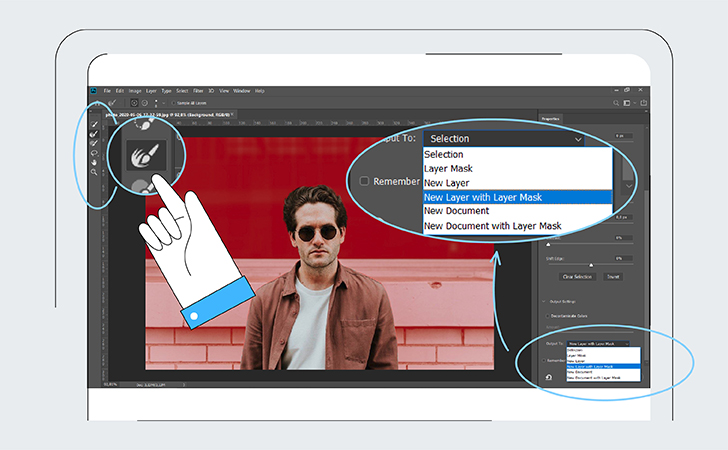
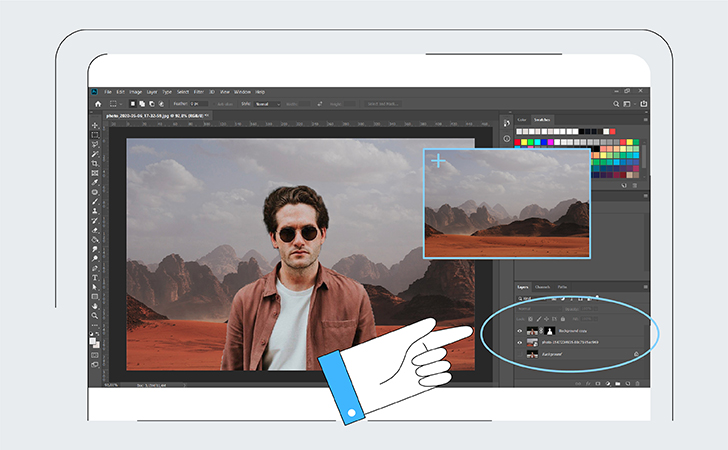
Remove any unwanted color edges – this can be done by selecting Decontaminate colors under your Output Settings. View Output to and select Layer Mask/ New Layer with Layer Mask. Make sure you locate the new layer behind your selected foreground. Now select the desired background and paste it on the layer you’ve just created. Use the Hand tool to position the new background where you want it. Hit Free Transform tool to resize the image while holding the Shift key to retain the aspect ratio.
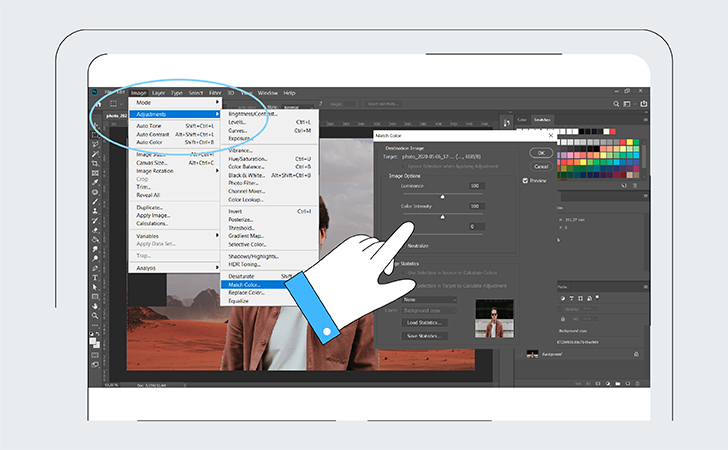
Now match the colors so your main object doesn’t look out of place. Select the foreground layer and go to Image > Adjustments > Match Color. You’ll see a new window. Go to Source and select the correct image. Select the specific Layer to fix it. Now check the Neutralize box to clear out any unwanted color casts. Adjust the Luminance and Intensity until both parts of your image match. Try applying the Fade effect as needed. Check the Preview to see if you’re happy with the result.
Click OK to finish your work and save the result. Congratulations, you’ve just learned how to change the background of a picture in Photoshop!
There are quite a few apps for editing pictures on your phone that feature an option to change the background. One of the best-known apps is Picsart, which works equally well on iOS and Android smartphones. You can follow the instructions below or try doing a similar exercise on a different app, such as SnapSeed, Meitu or others.
Here’s how to do it in Picsart:
Download the PicsArt app to your smartphone and open it.
Tap the + icon at the bottom of your screen and choose the image you’d like to use as a background. Proceed by clicking the red circle button.
Click on Add photo and choose the image you’d like to amend by replacing the background.
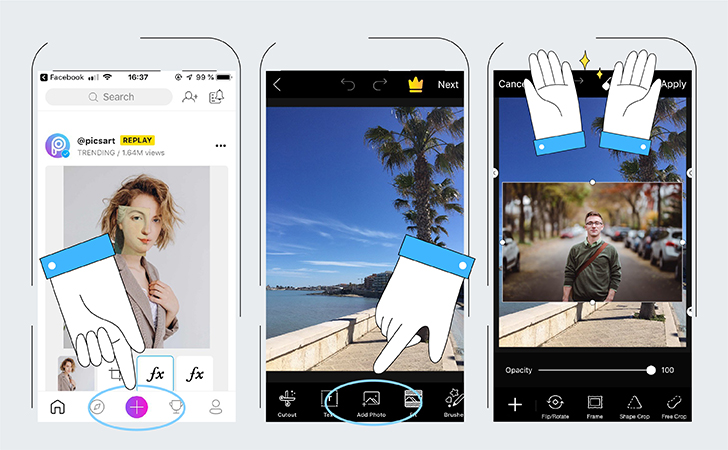
Click on Free Crop, pick the appropriate brush size and select the area you want to replace with a different background. Use the Eraser to refine the edges. Once you’re done, click on the arrow to proceed.
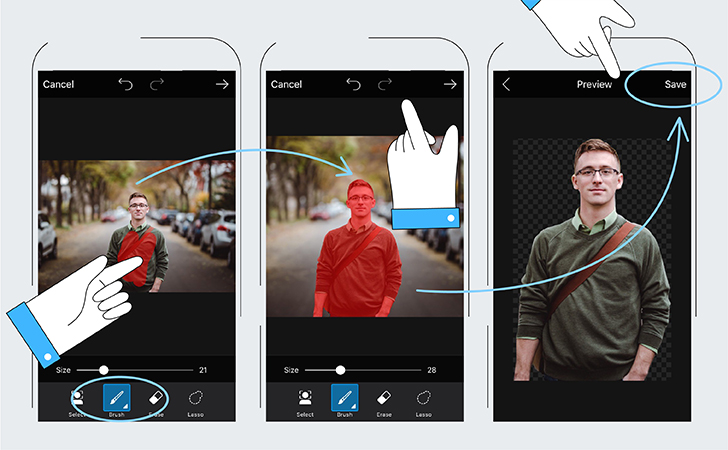
Now you will see your main object displayed on a black background. Check if the image has been selected properly. If not, go back. Click on the checkmark if everything looks good.
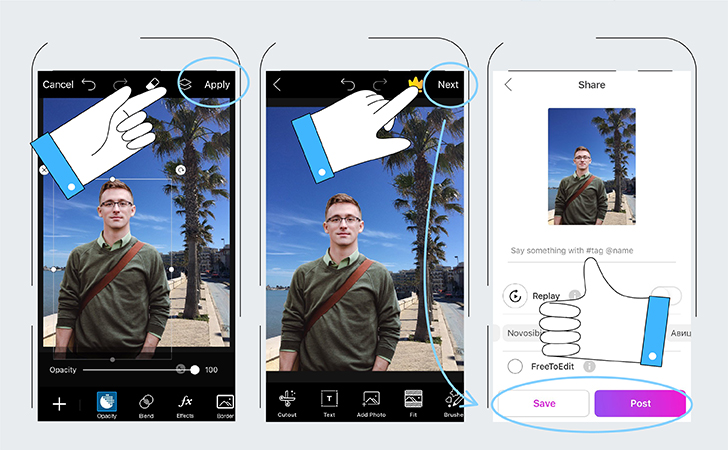
Adjust the foreground image on your background. Click the checkmark to finish your edit.
There are multiple options available for saving your image and sharing it online. The app lets you post your pic directly to your social media accounts. Or you can simply save the photo into your camera roll to review it later.
Here are some suggestions for how to use these background changing techniques:

