


We use cookies to improve the services we offer you. By continuing to browse this site, you consent to keep them in accordance with our Privacy Policy.
×We use cookies to improve the services we offer you. By continuing to browse this site, you consent to keep them in accordance with our Privacy Policy.
×
 3,727
3,727
 8 min
8 min

It’s no secret that you can do almost anything you want with your photos if you have the right software. However, when it comes to complex photo editing, the programs can get pretty complex, too. If you don’t want to spend a lot of time learning how to use it, we have a simpler solution.
We’ve taken the most popular photo manipulation concepts – levitation, cloning, magazine covers – and experimented with them in Movavi Photo Editor. Take a look at what we came up with.
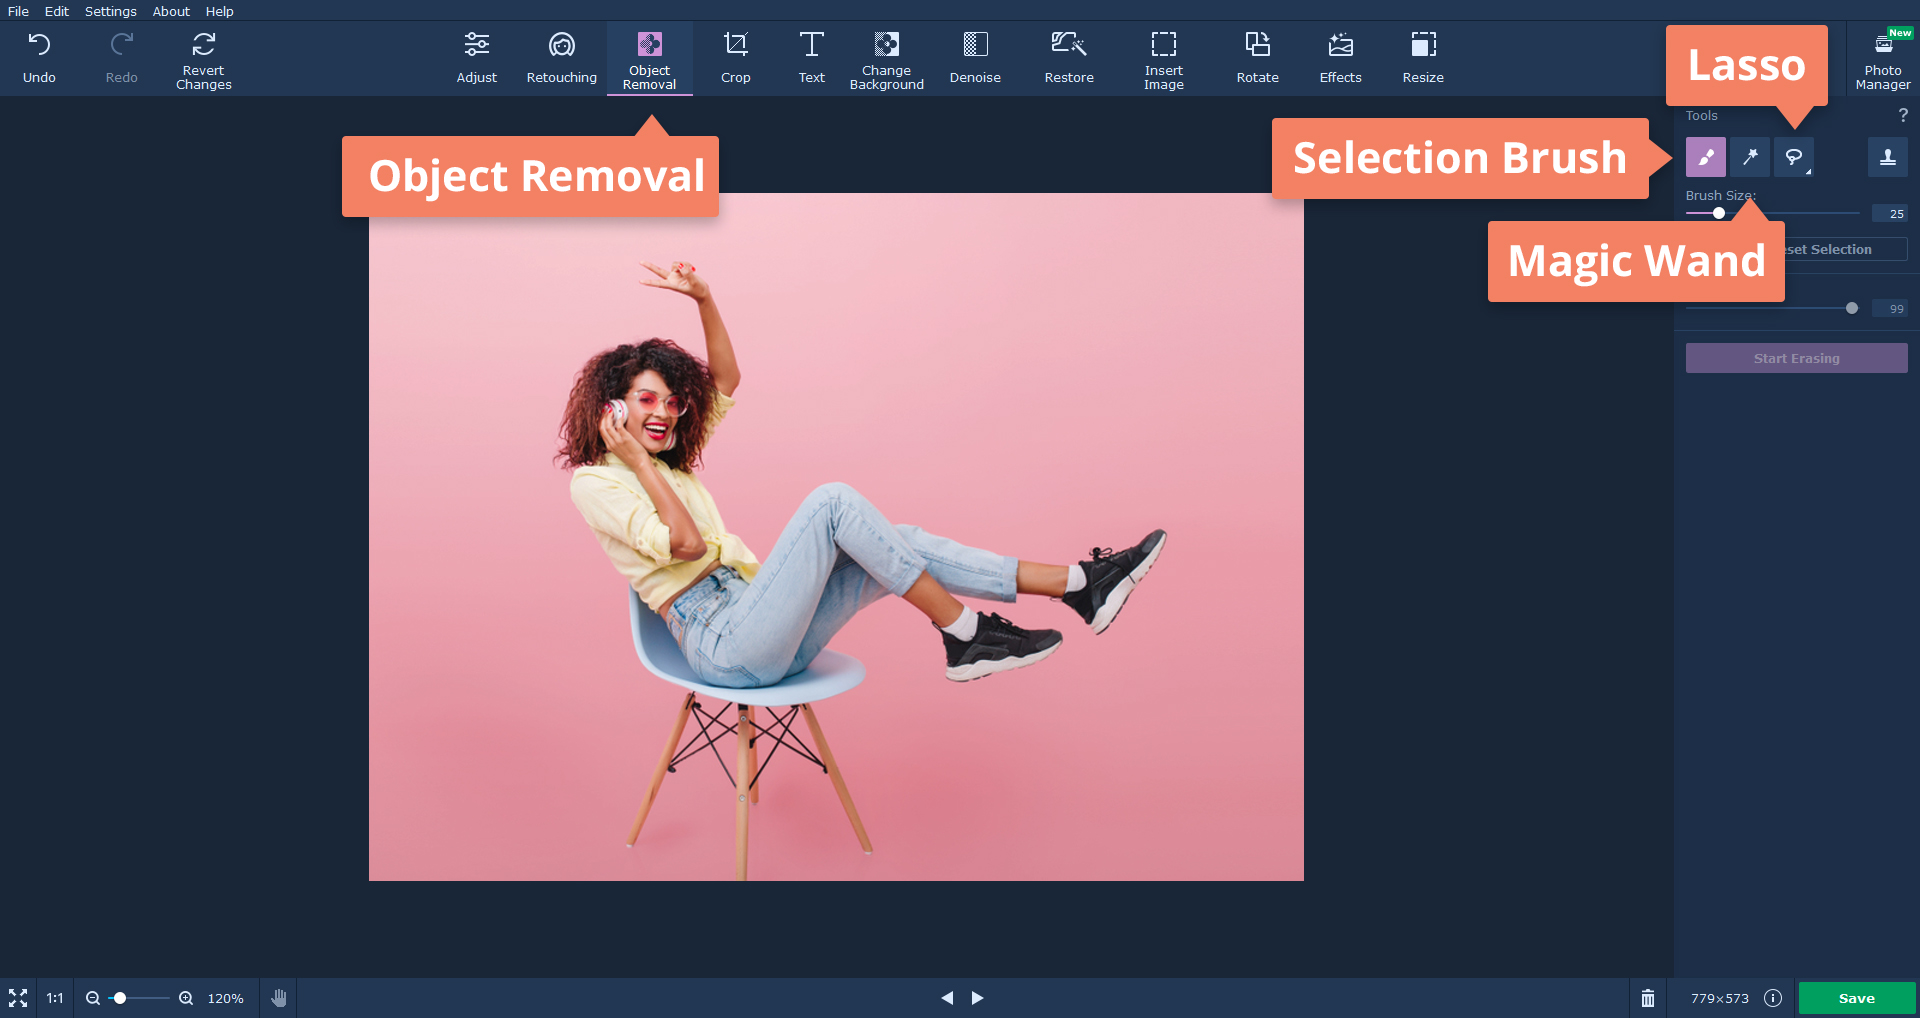
If you think the levitation trick can only be performed by skilled magicians, let us prove you wrong. First, you’ll need an appropriate image – a person sitting on a chair or climbing a ladder. The idea here is to remove the object and make it seem as if the person is floating in mid-air.
Upload the image to the editor and open the Object Removal tab. Using one of the tools, you can erase everything that prevents the person from flying:
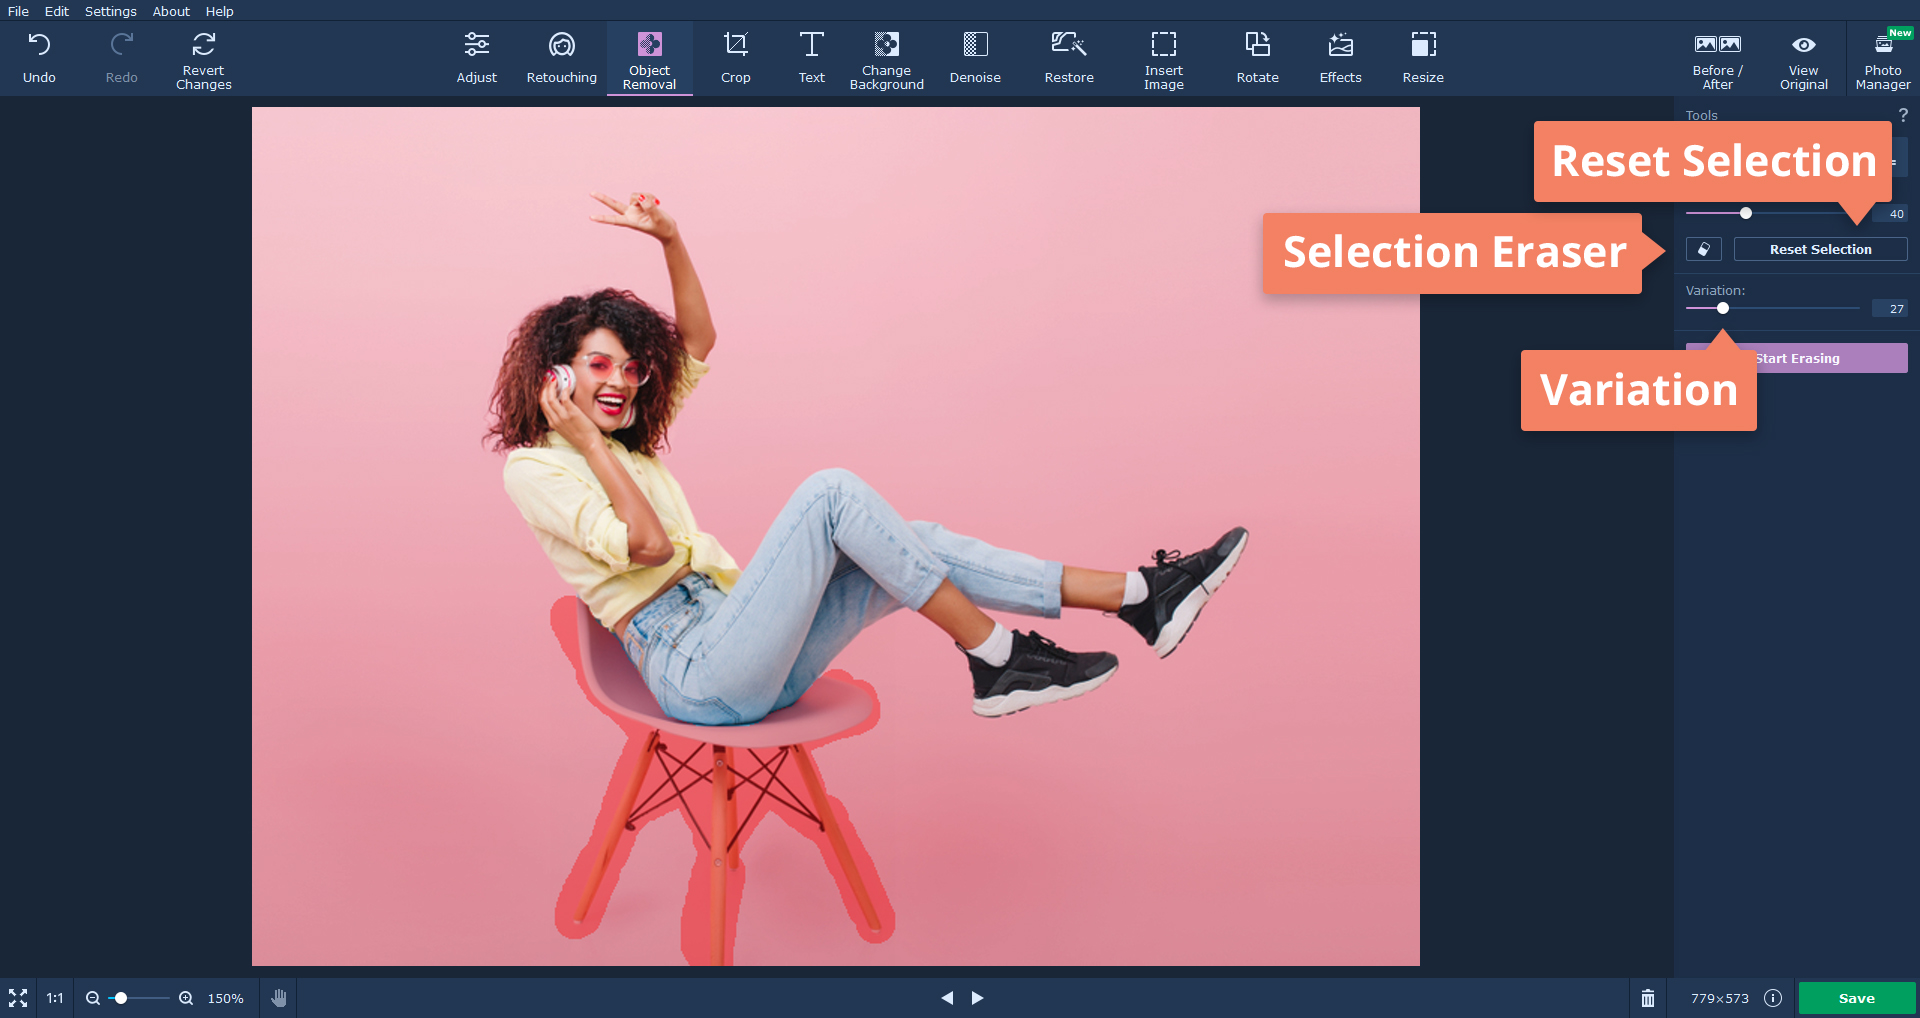
When you erase an object, the program replaces it with pixels from the image. That’s why it is important to adjust the Variation slider, as it affects the range from which these pixels can be taken. This depends on the object’s size and the background, so try different variation values until you find the one that works best for your image.
To deselect parts of the image, use the Selection Eraser tool. Or you can click Reset Selection to start over.
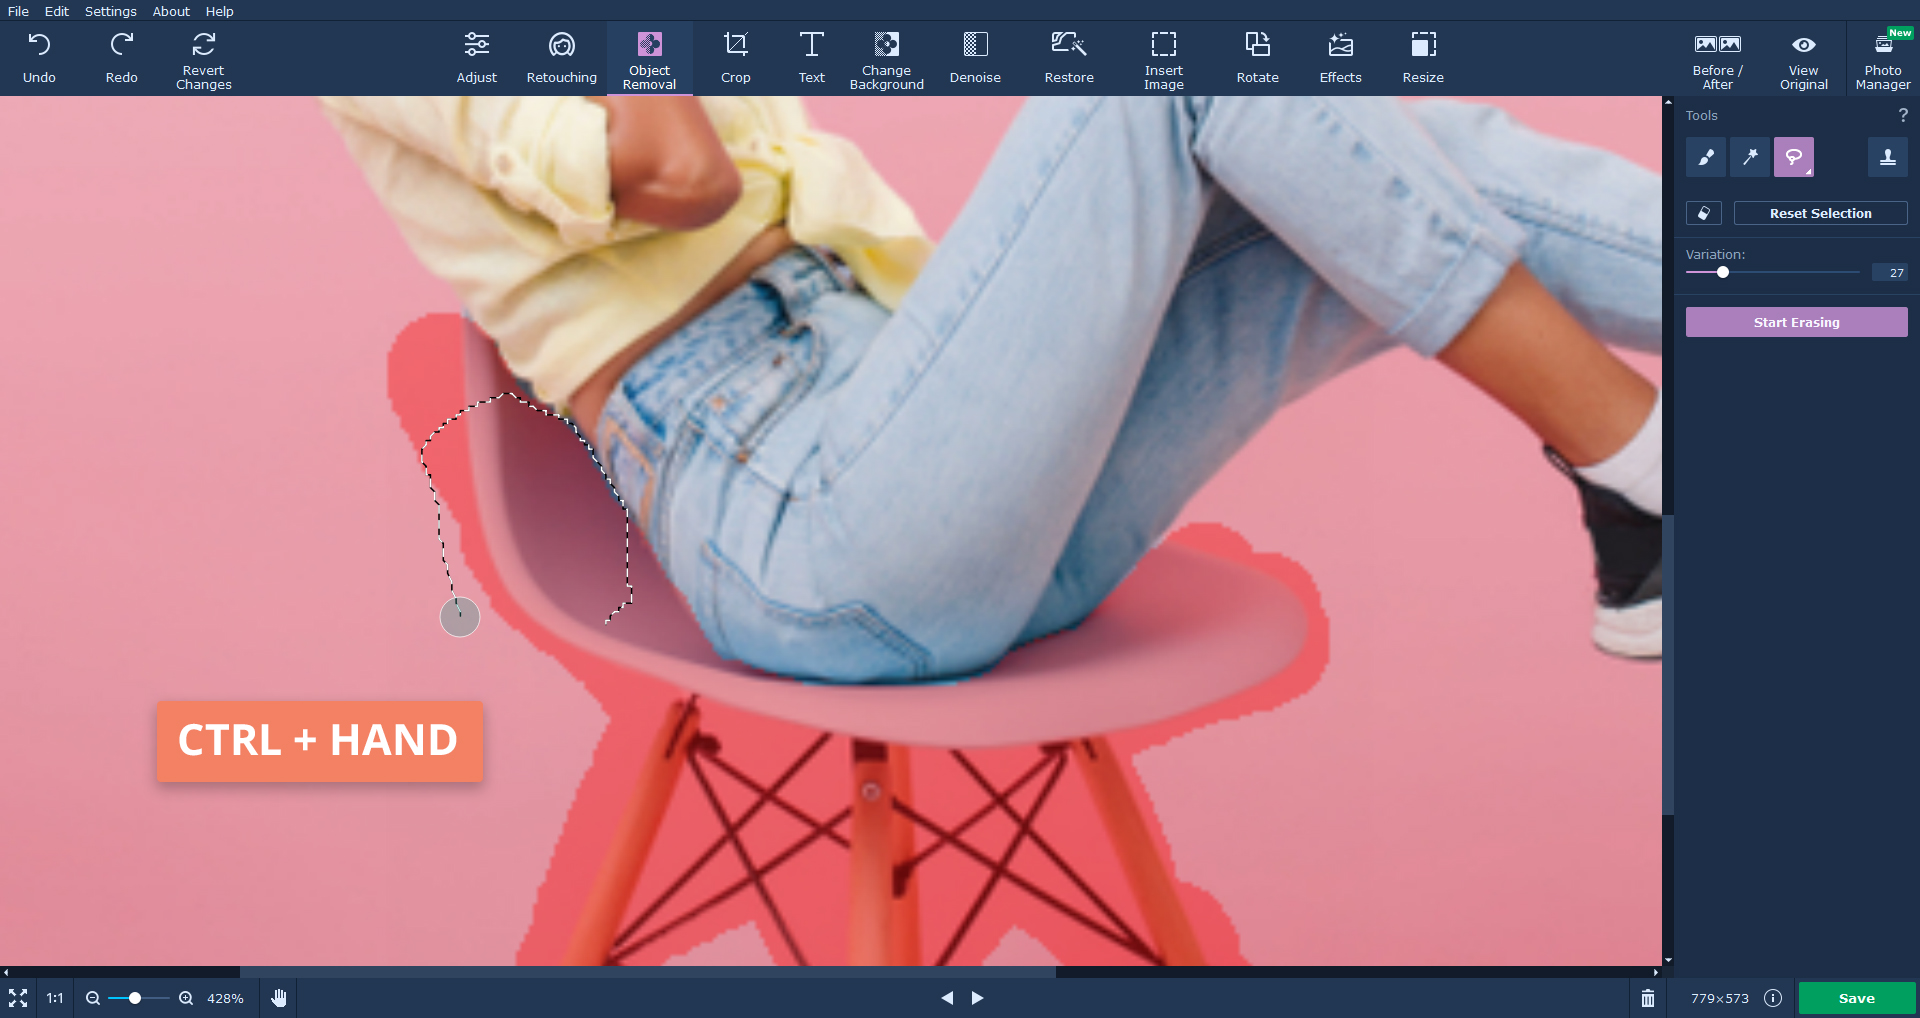
Zoom in on the picture by holding Ctrl and scrolling up. Press and hold the space bar, then use the Hand tool to move around the image. This will help you select the object more precisely and not leave a single detail behind. Don’t forget to select the object’s shadow!
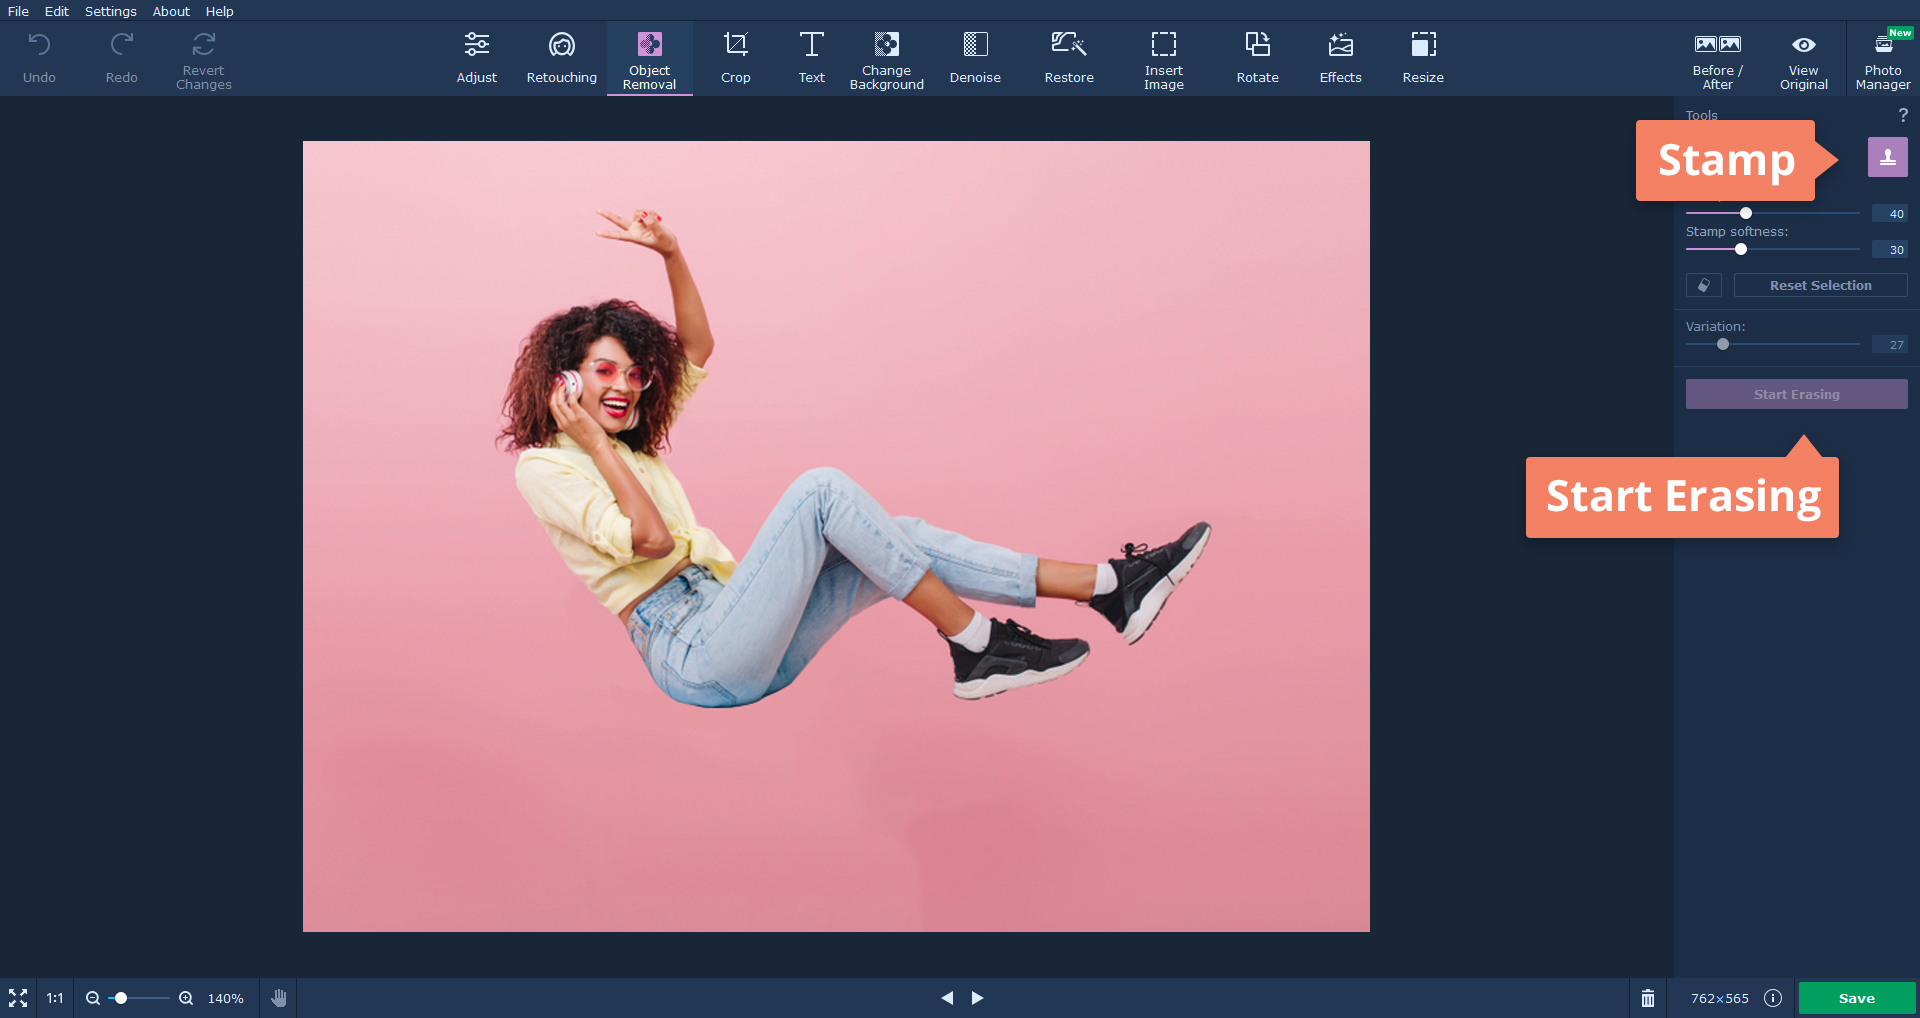
Click Start Erasing and let the editor work its magic. Pay attention, as there may still be so-called artifacts left – tiny parts of the object that could not be removed. You can get rid of them with the help of the Stamp tool. Press and hold Alt, then click on the background to copy the area. Then release the Alt key and mask the artifact with the copied background. Little by little, paint over all the remaining area until you have a pretty realistic image of a levitating person.
You don’t have to wait for a scientific breakthrough to have yourself cloned. All you need is a couple of similar photos – let’s call them Photo 1 and Photo 2.

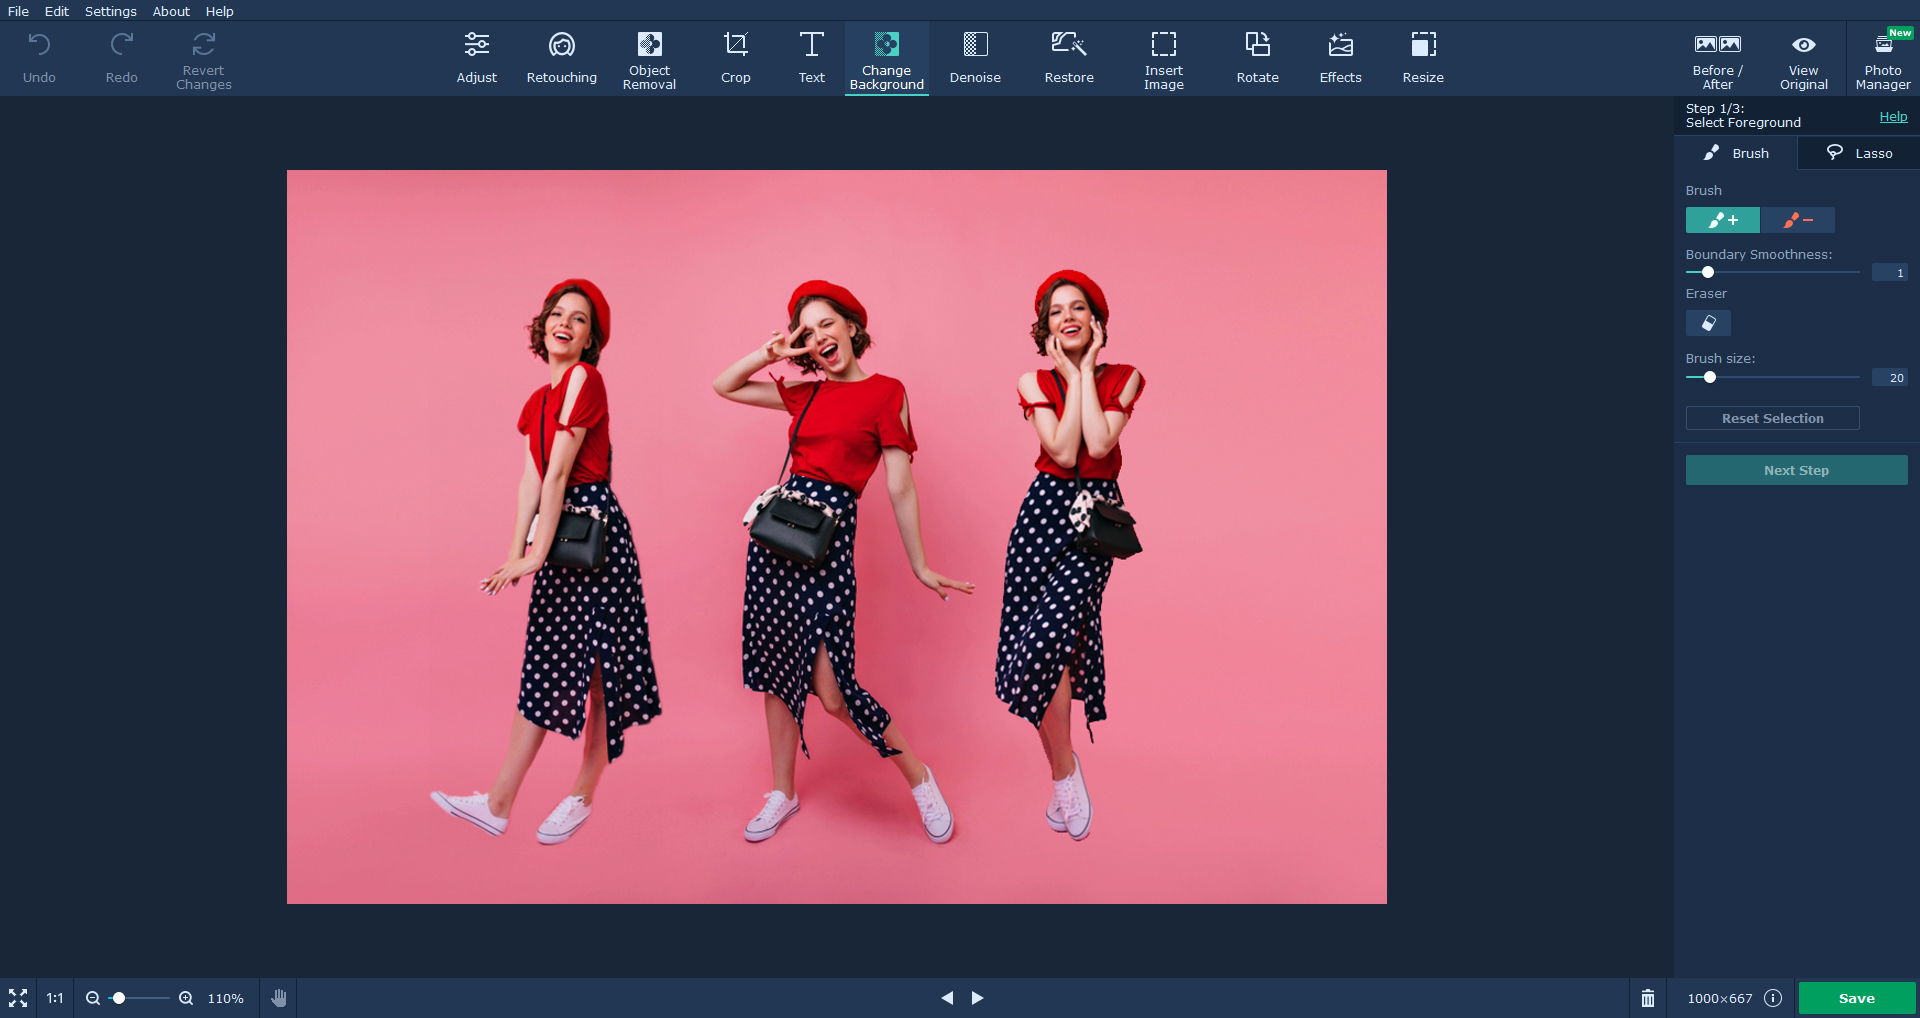
Upload Photo 1 to the editor and open the Change Background tab.
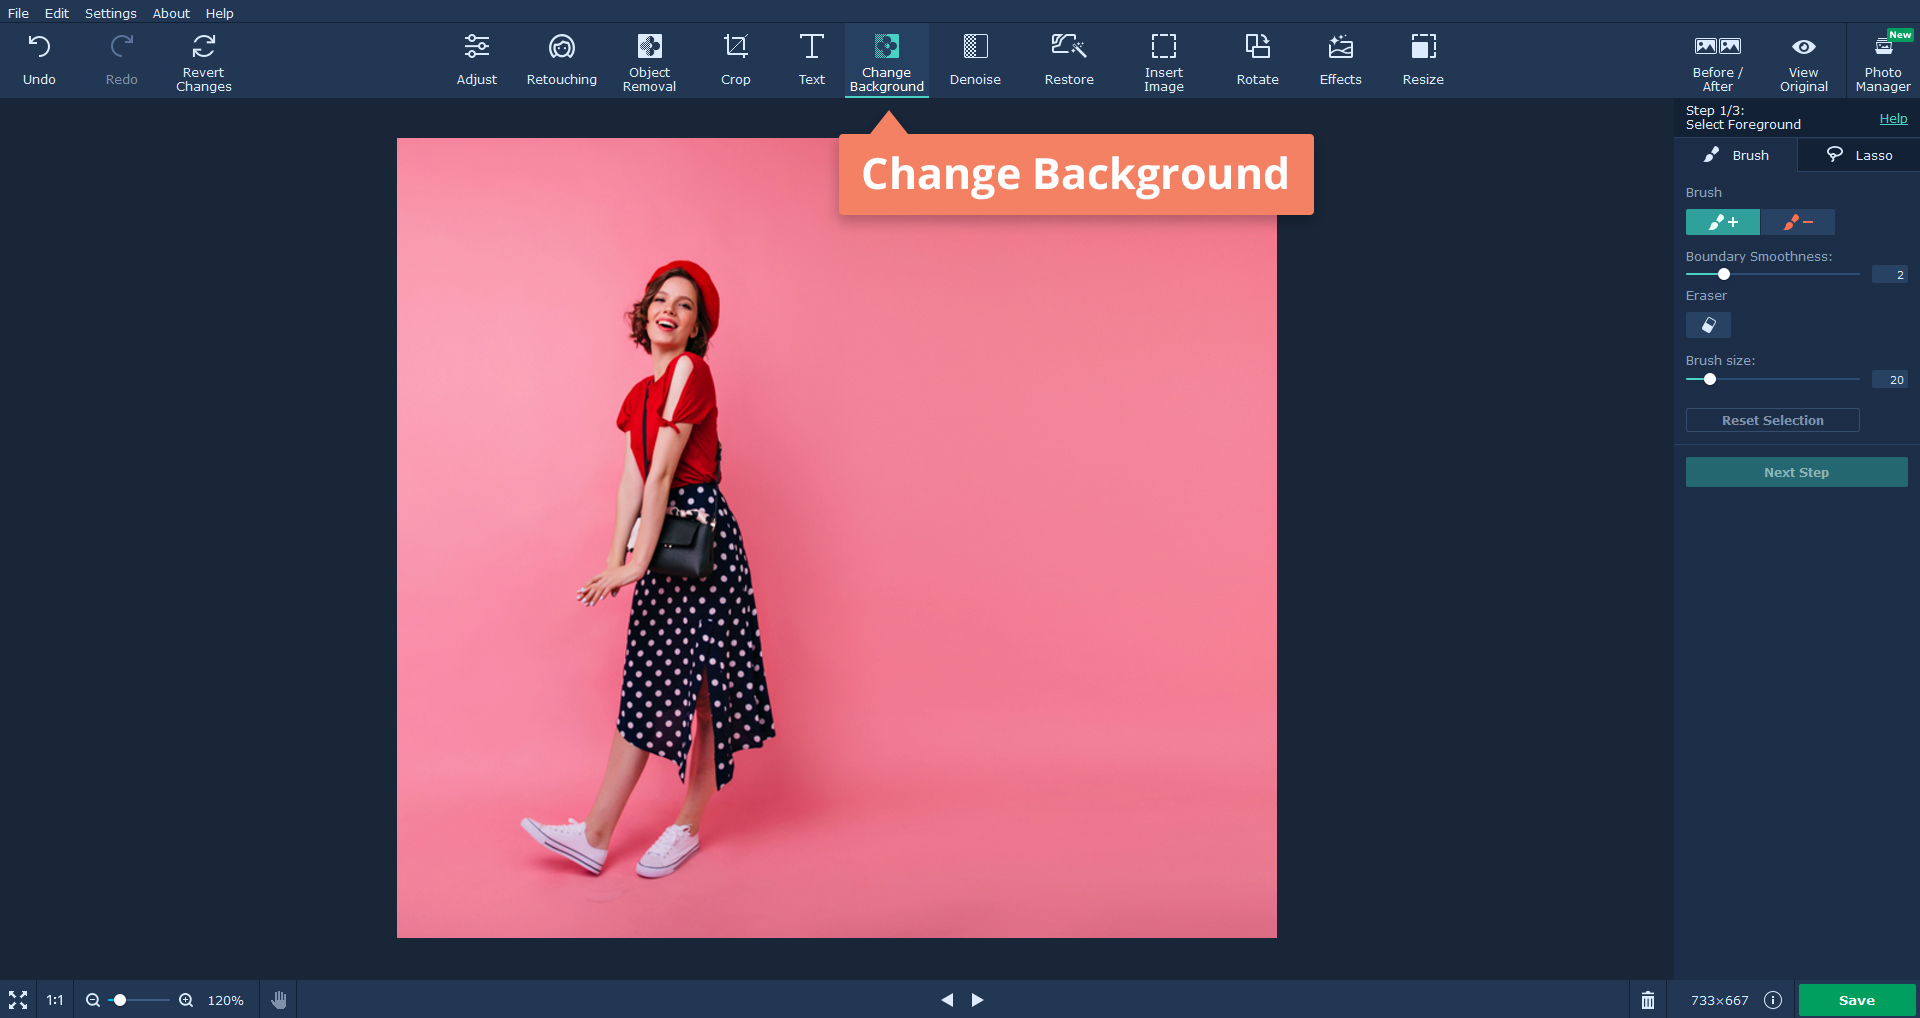
Next, you need to select the foreground; there are two ways to do this:
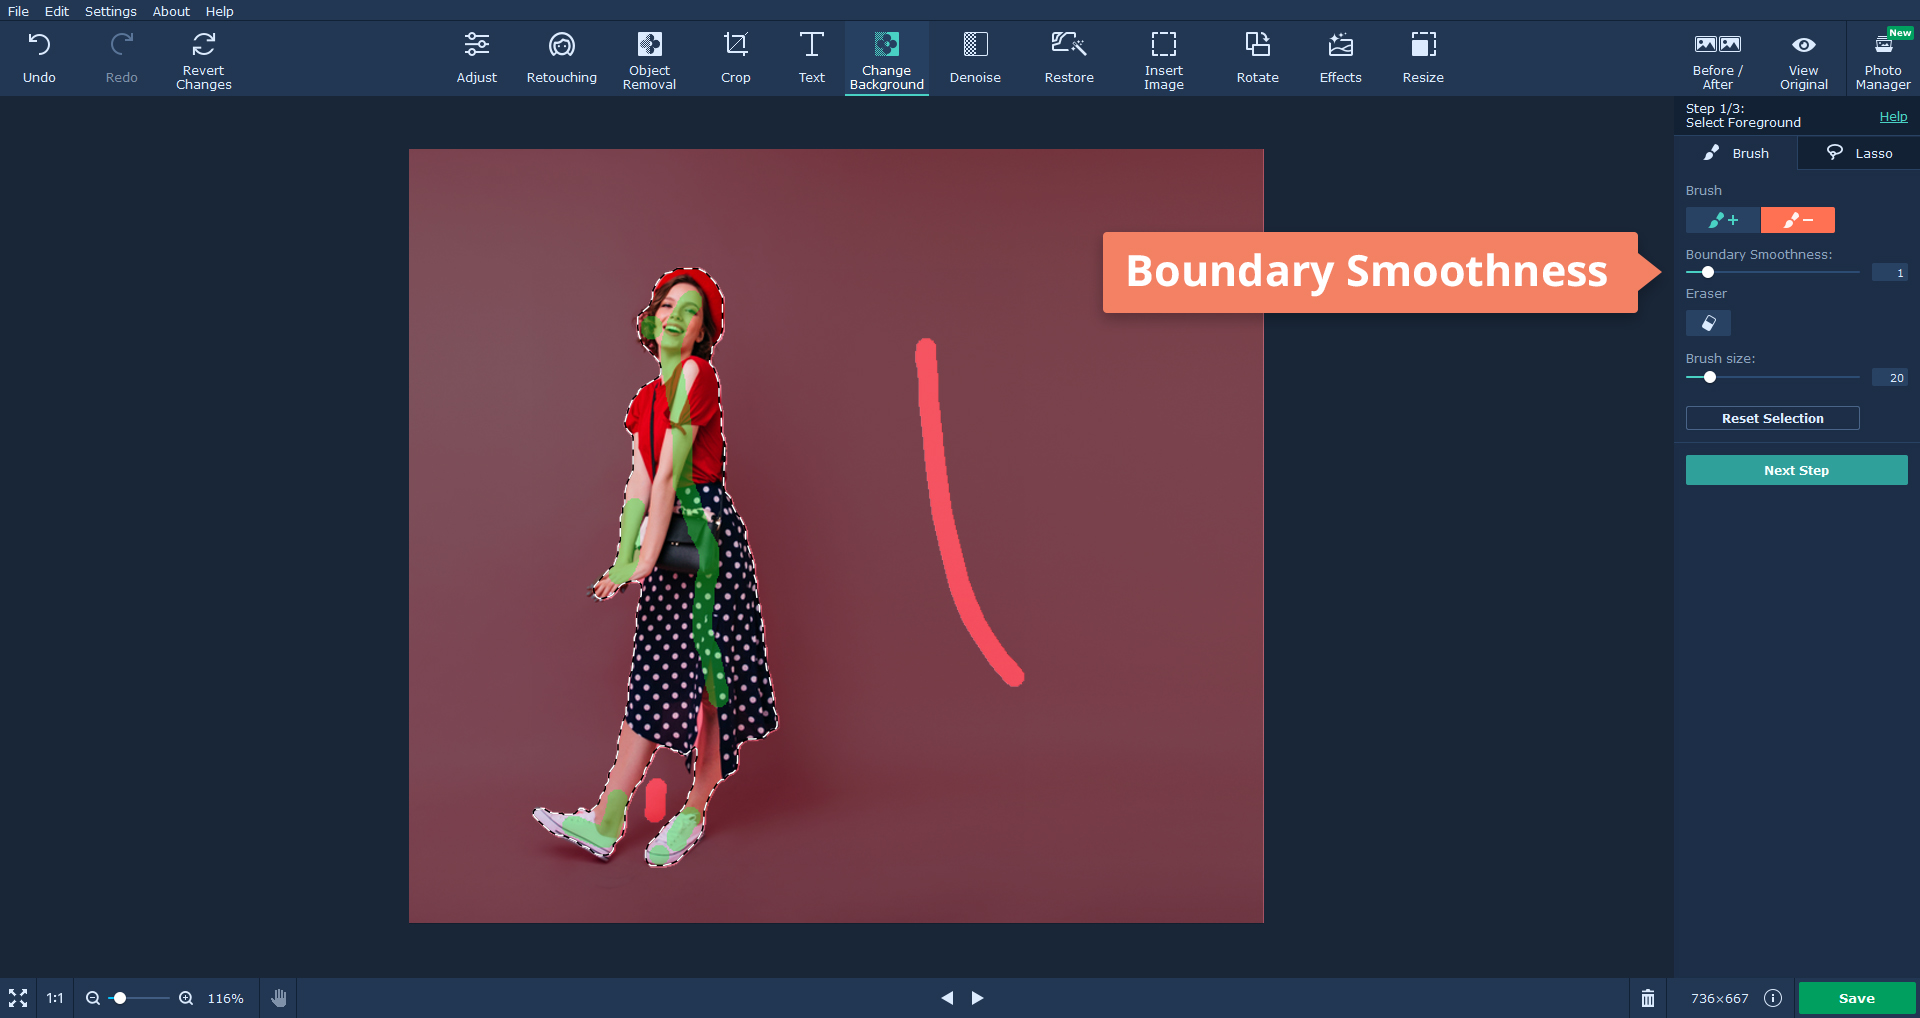
Brush
Mark the foreground object you want to keep with the green Brush+ tool and add a few strokes to the background with the red Brush- tool. Adjust the Boundary Smoothness: overly sharp edges will make you look like a cardboard cutout and, because of the blurred boundaries, you will look like a ghost. If this is not the effect you’re going for, find the right balance by adjusting the slider.
Lasso
Use the Lasso to select the object by tracing its outline. This tool works best when selecting objects with colors that contrast with the background colors.

Now you can select the object more precisely. Add or subtract areas with the help of the Mask Brush – just use it to paint over the object’s borders. If some imperfections remain, you can fix them in Step 3.
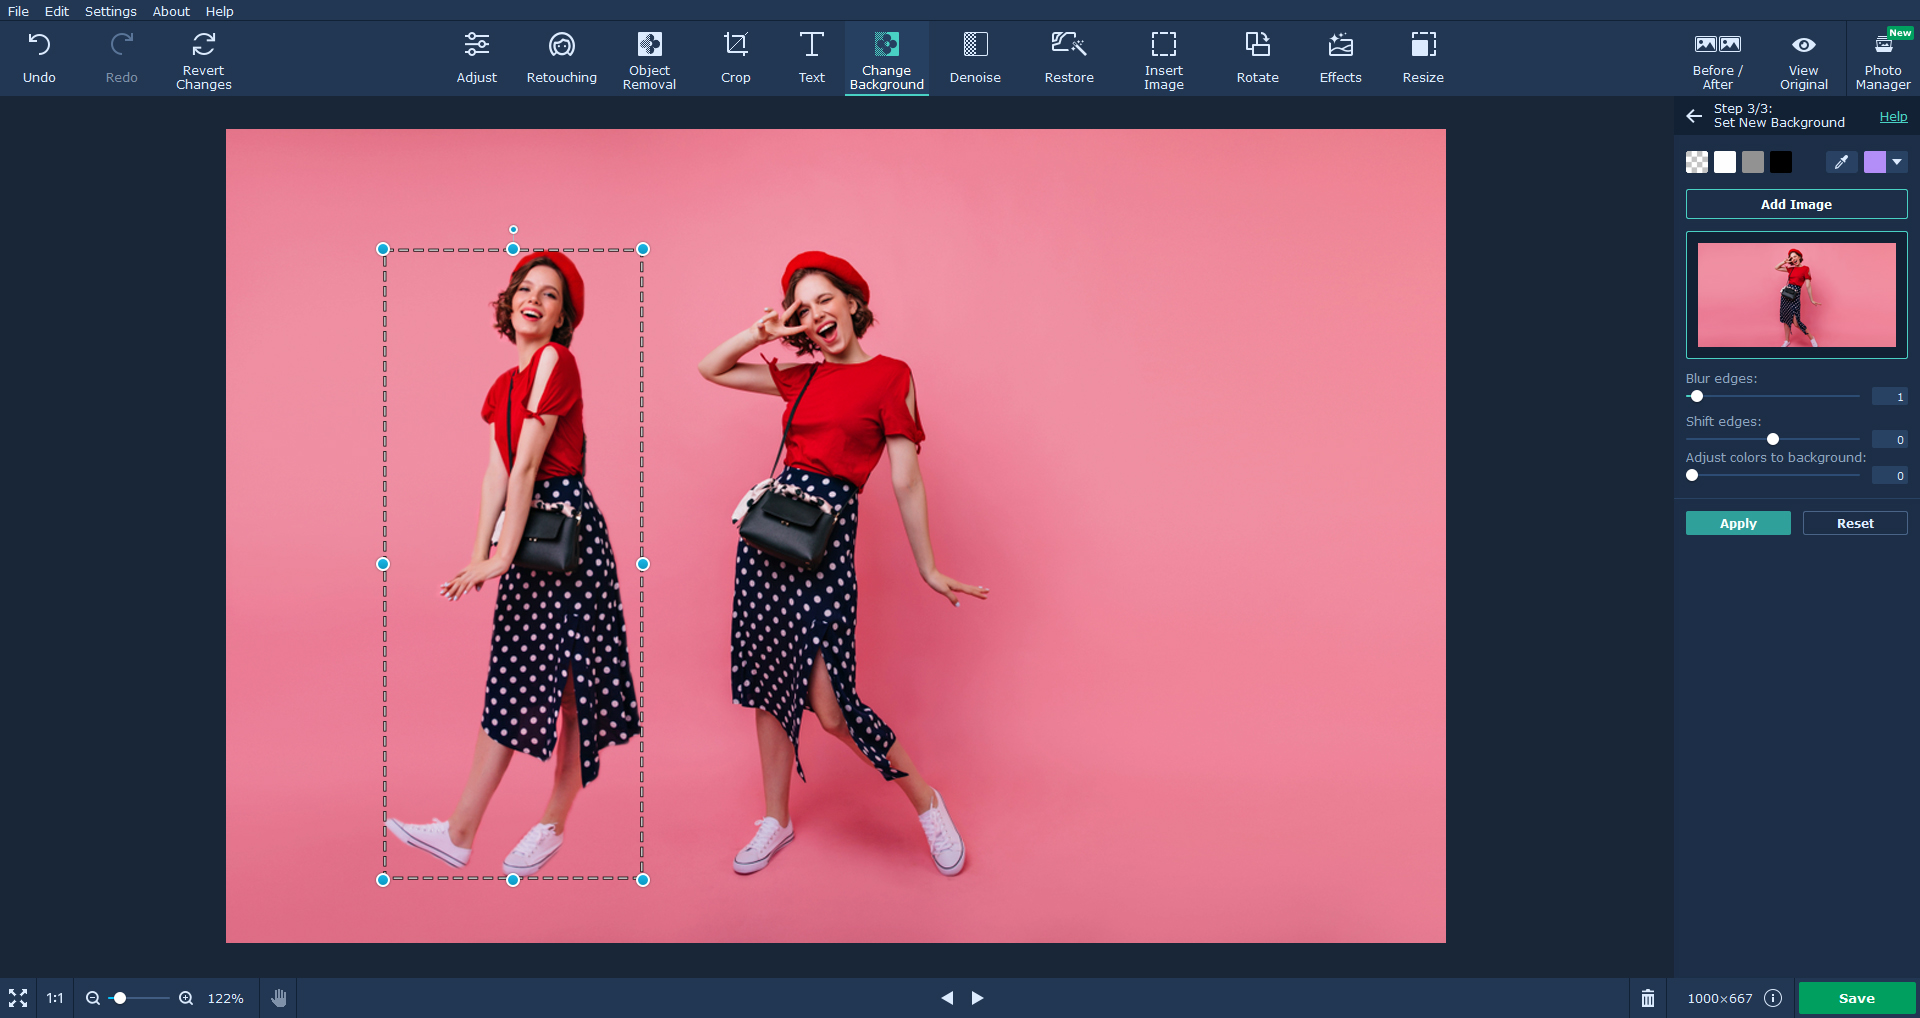
Add Photo 2 as the new background. Adjust the size of the cutout (Photo 1) and move it around to find the best place for it. You can create an actual-size clone or a miniature copy, depending on your artistic decision.
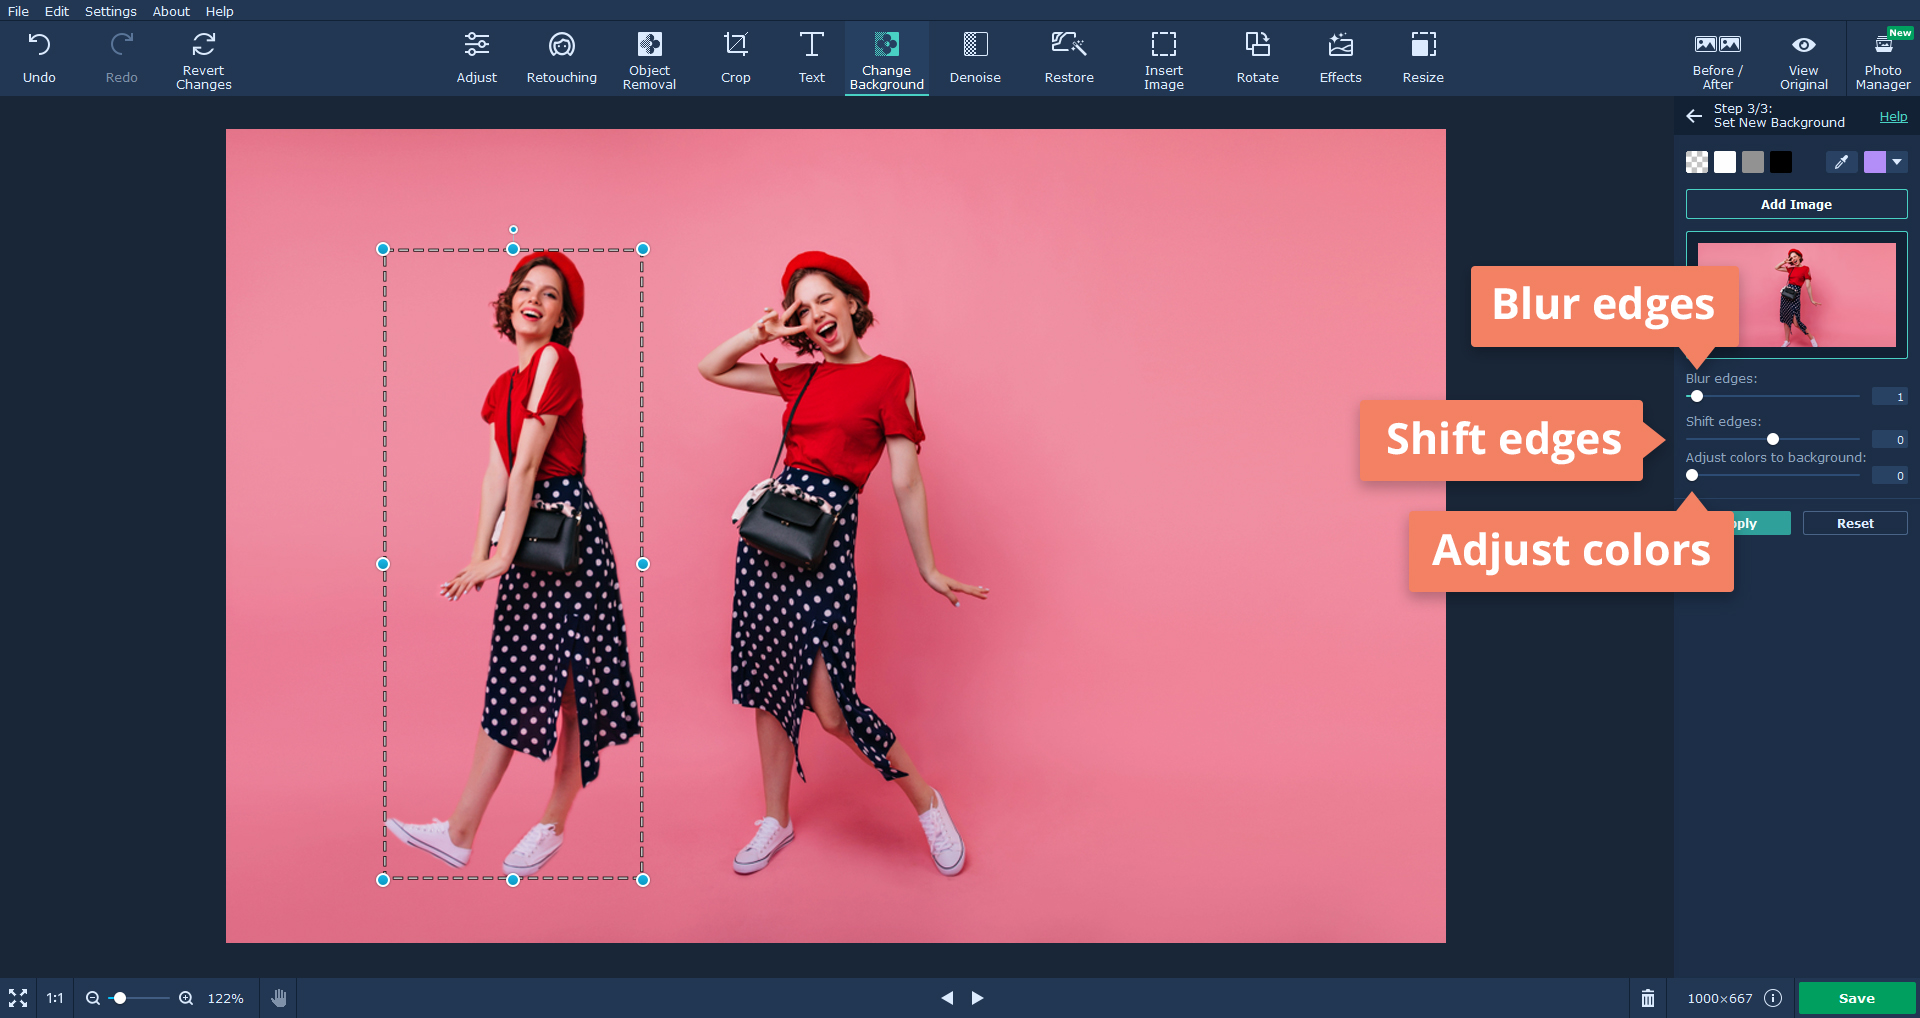
Here you can also hide all the evidence of photo manipulation:
Alright, your twin is ready! So why stop here? Add two or three more clones (don’t get too carried away, though):
Here’s your chance to appear on the cover of your favorite magazine, or even create your own publication. The “cover” can also become a cool birthday card for someone if you create extra pages to make it look more realistic – add stories, photos, and wishes about the person.
Choose a picture with portrait orientation or crop the edges, if necessary. There should also be some space above the head to add the magazine title.

Go to the Retouching tab to get rid of any flaws:
Now you have the perfect selfie worthy to be on the cover. Save the image as Copy 1.

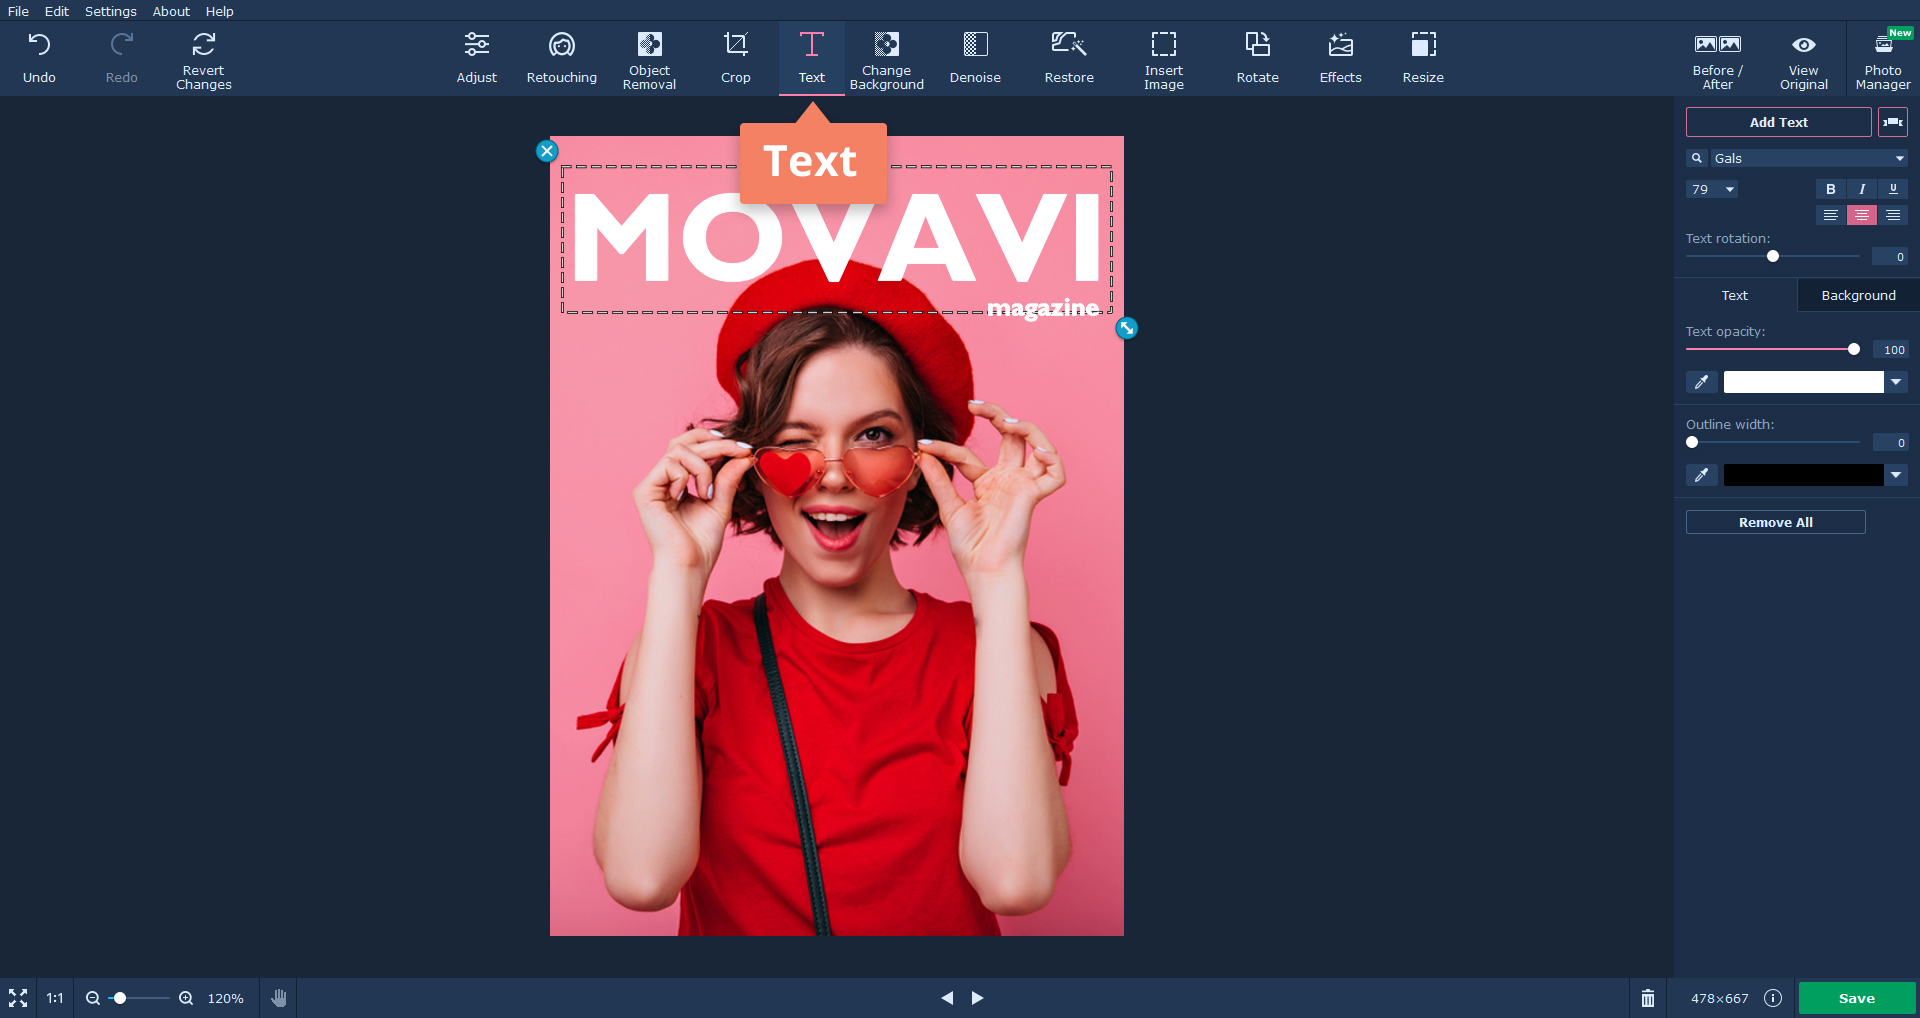
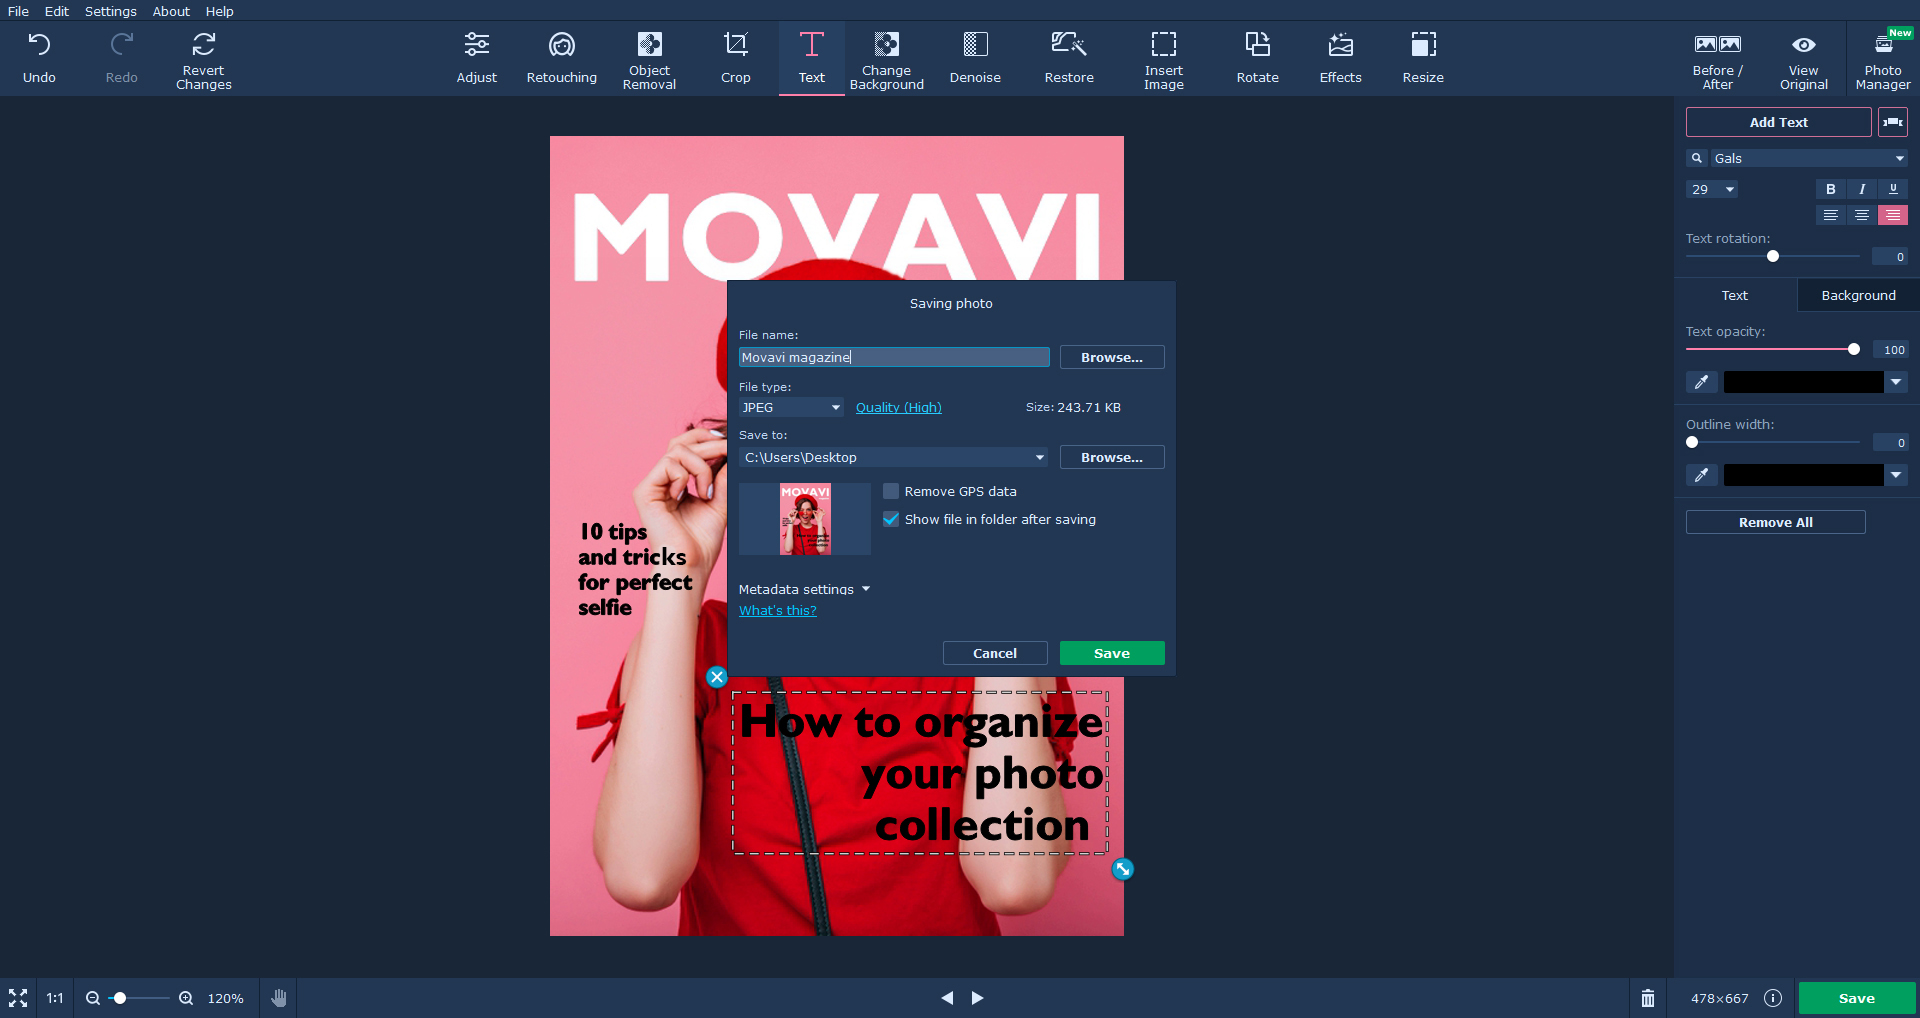
Go to the Text tab and add the magazine’s title so that it overlays the head a little. Choose one of the fancy fonts if you like, adjust the text opacity and the outline width, then align the text to the center. Save the result as Copy 2.
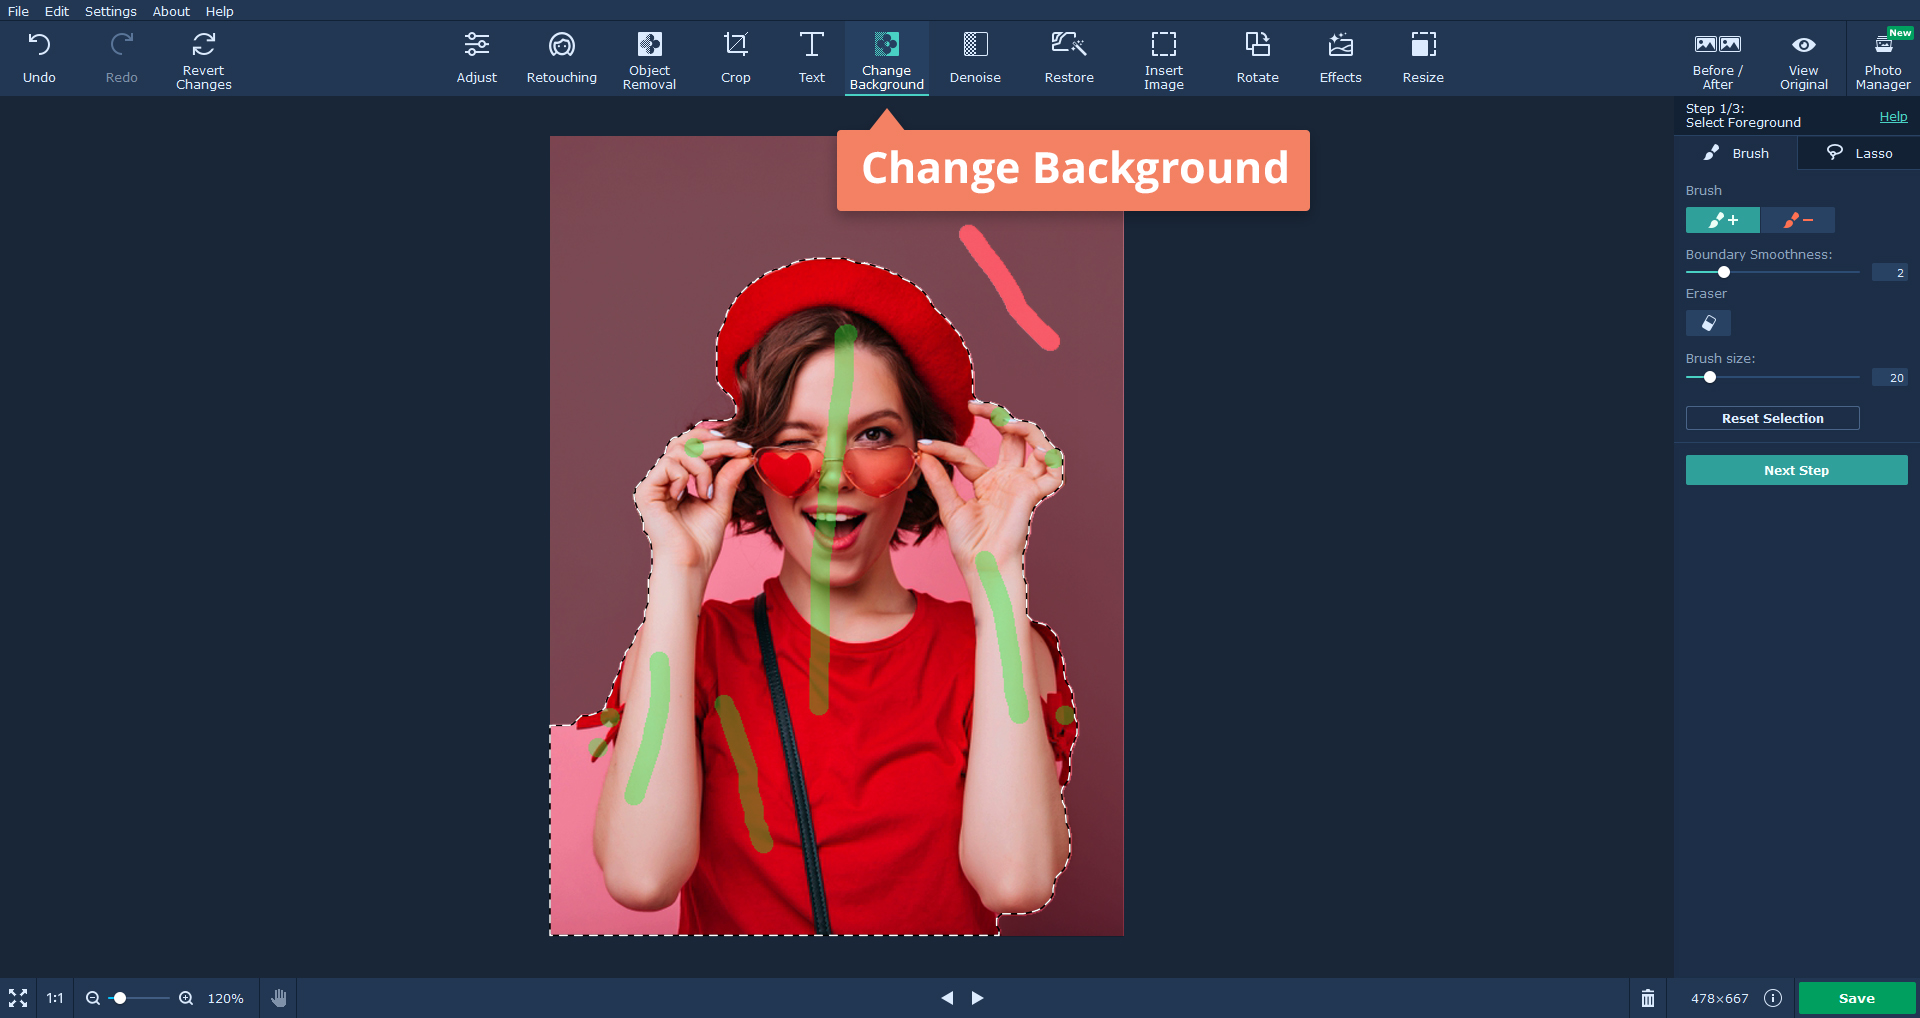
Open Copy 1 and go to the Change Background tab. Select the person in the foreground using the Brush or the Lasso as we did in the Cloning tutorial earlier. Brush along the selection edges with the Hair Selection Tool to deal with such difficult areas as flyaway hair.
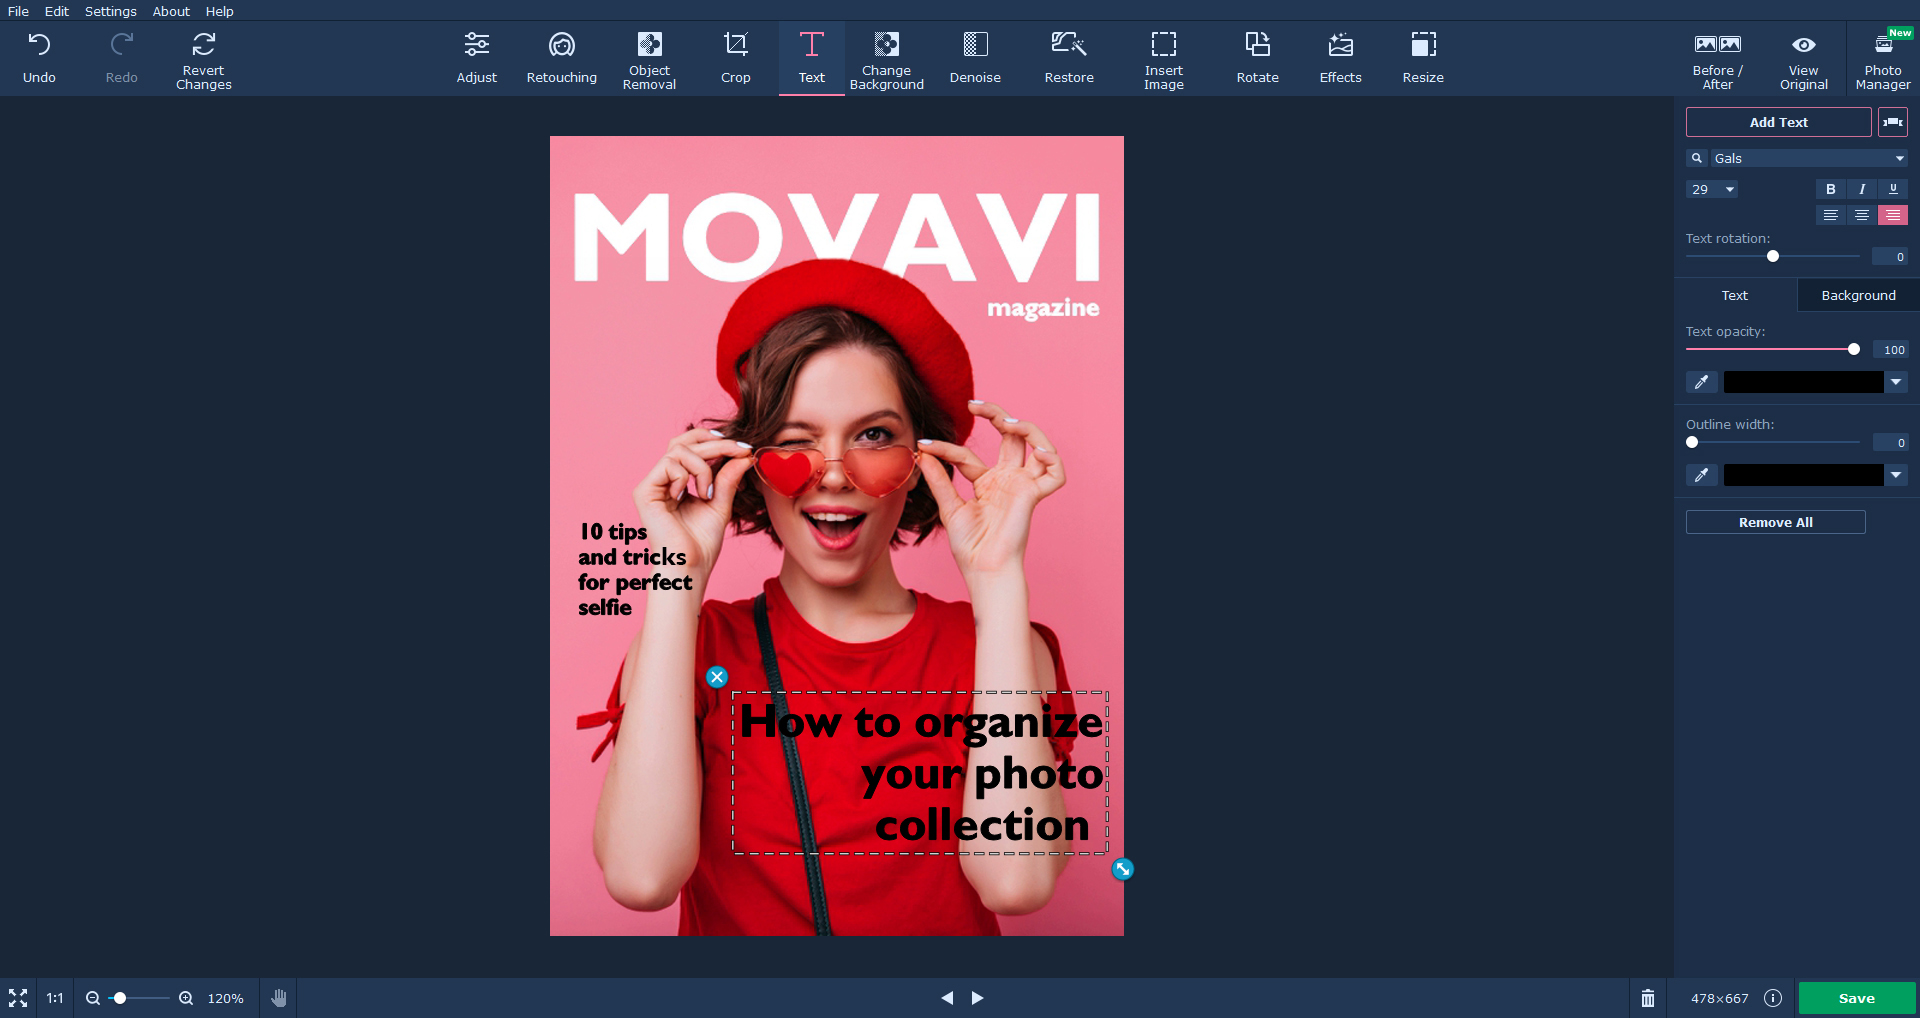
At Step 3, replace the background with Copy 2. The figures in both pictures should overlay each other perfectly. The upper layer will overlap a part of the caption too, making the photo look like a real magazine.

Every magazine cover needs headlines! Think of some funny captions or teasers and add them to the cover too – choose different fonts and decorative elements, and adjust the text parameters. You can also add filters from the Effects tab if you want.
When you’ve finished editing the photos, click Save and choose the desired output format and folder.
That’s it! We hope you liked these photo manipulation tricks – have fun recreating them yourself.

