Take advantage of our special 10% discount for all our blog readers!
We use cookies to improve the services we offer you. By continuing to browse this site, you consent to keep them in accordance with our Privacy Policy.
×
 107,517
 7 min
7 min
There are many occasions when you have to trim off a tiny bit of your video to make it good enough for posting. Sometimes there’s random camera shake at the very beginning, a weird noise at the end, or even a whole section that needs to be removed from somewhere in the middle of the footage.
Although there are many specialist programs for cutting videos, including our favorite Movavi Video Editor Plus, sometimes it’s easier to shorten your clips right in the player you’re using. One of the top choices of computer users, particularly those with Windows-based devices, is VLC Media Player – one of the oldest and best-known programs for viewing videos.
In spite of the fact that the majority of people use VLC solely for viewing media files, few are aware of its cropping and trimming tools. It’s a handy program that supports the majority of common video formats. What’s also important is that VLC Media Player is compatible with pretty much all operating systems, including Windows, Mac OS X, Android, and iOS, as well as the less widely used Linux, Ubuntu and Unix platforms.
Now, to be fair, VLC Media Player doesn’t exactly cut the file in the same way most editing programs do. What it does is it records a clip from a video. So, technically, using this function, you get a trimmed version of your clip in the end. Although the program doesn’t let you make more precise changes to your video, it’s quite handy when all you need is to make a few cuts.
Here’s our step by step guide on how to trim video in VLC Media Player.
As simple as that – go to this website and download the player to your computer. The website will automatically detect your operating system and deliver the correct version of the software.

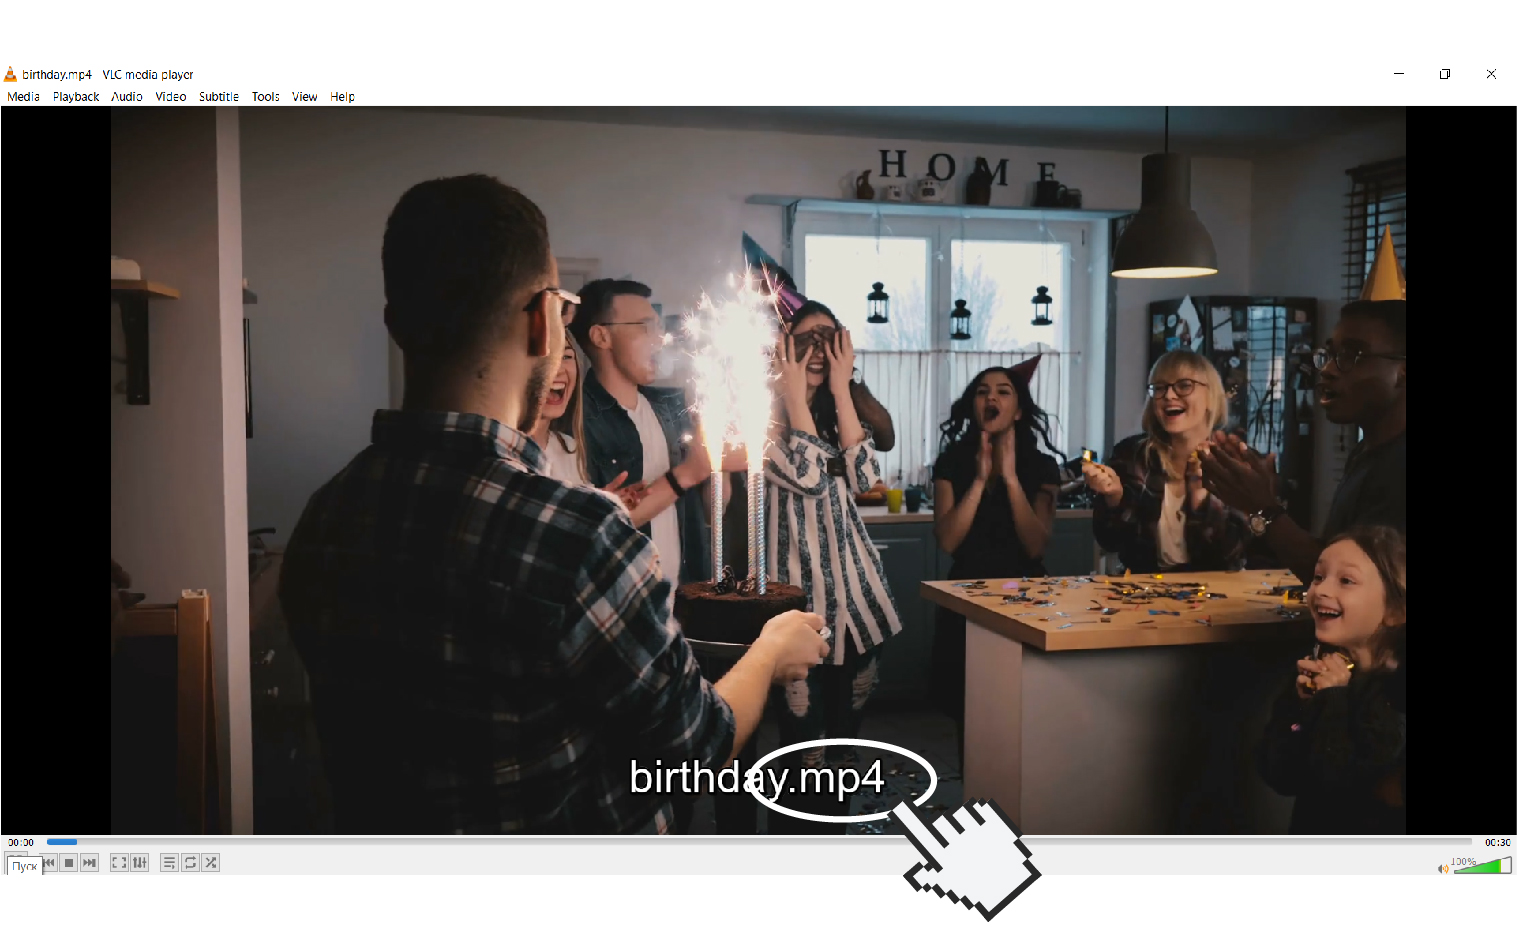
Open VLC Media Player. Click Media->Open File. Locate the file you’d like to cut and view it in the program.
MPEG-2, MP4, OGM, ALAC, RM, SCVD, Raw DV, AIFF, CD Audio, AC3, MIDI, FLV, WAV, AMR, VOB, MACE, VCD, DVR-MS, Raw Audio, XM, DTS, OGG, 3GP, ASF, RM, Quick Time Format, DTS, DVD-Video, DVB, FLAC, MXF, It, AVI, DV Audio, MKV, Mod, AAC, MP3.
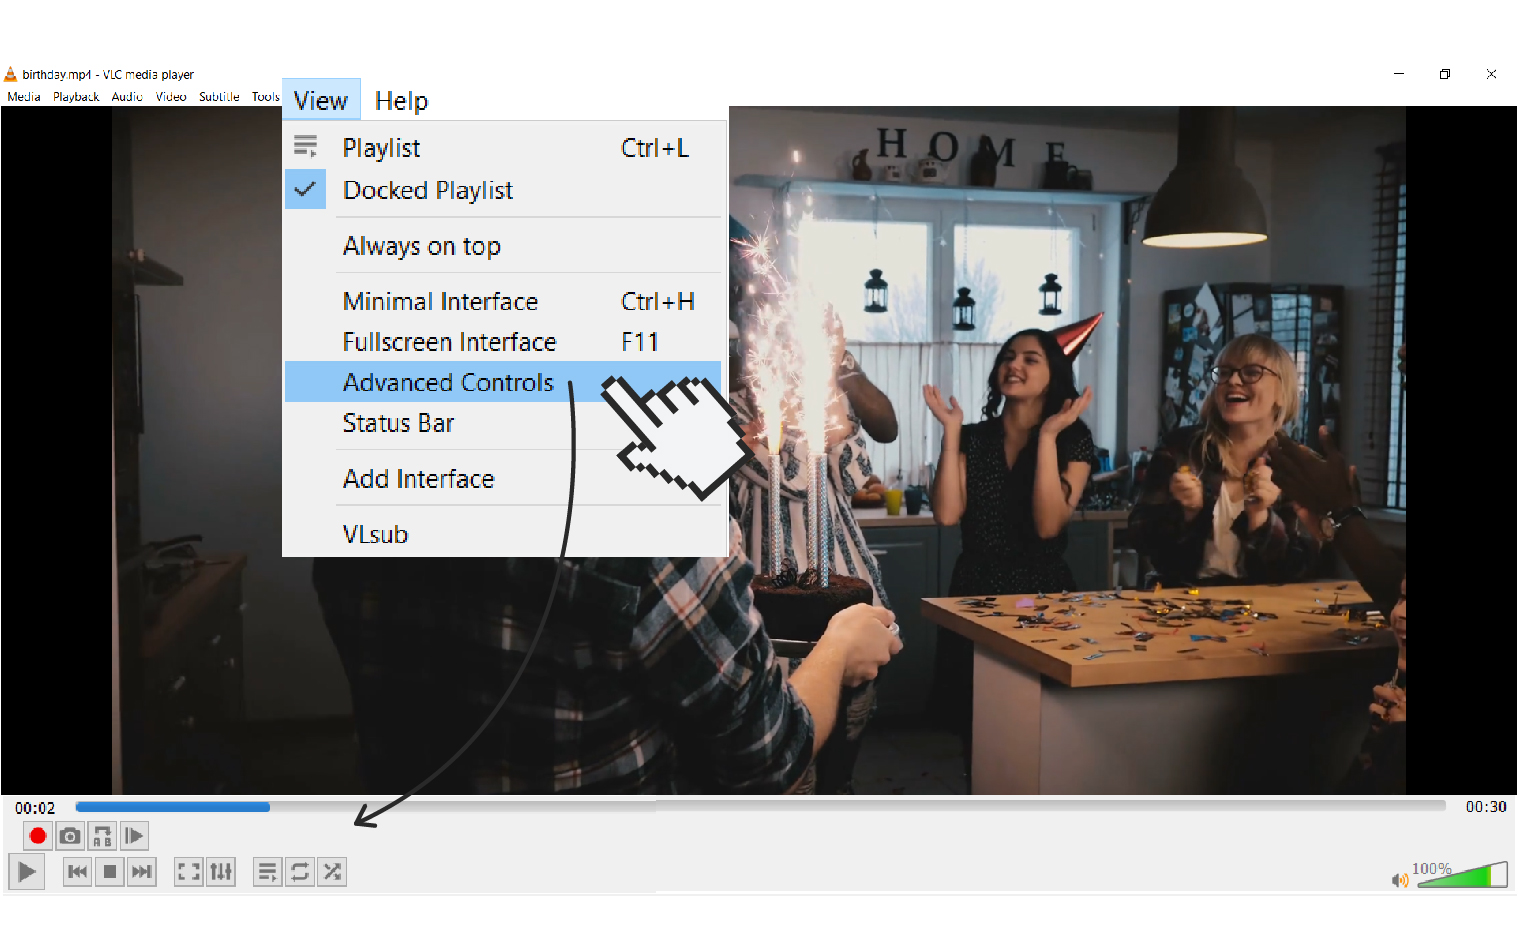
In the upper toolbar, choose View and click Advanced Controls. Now you will see four additional buttons over the Play/Pause.
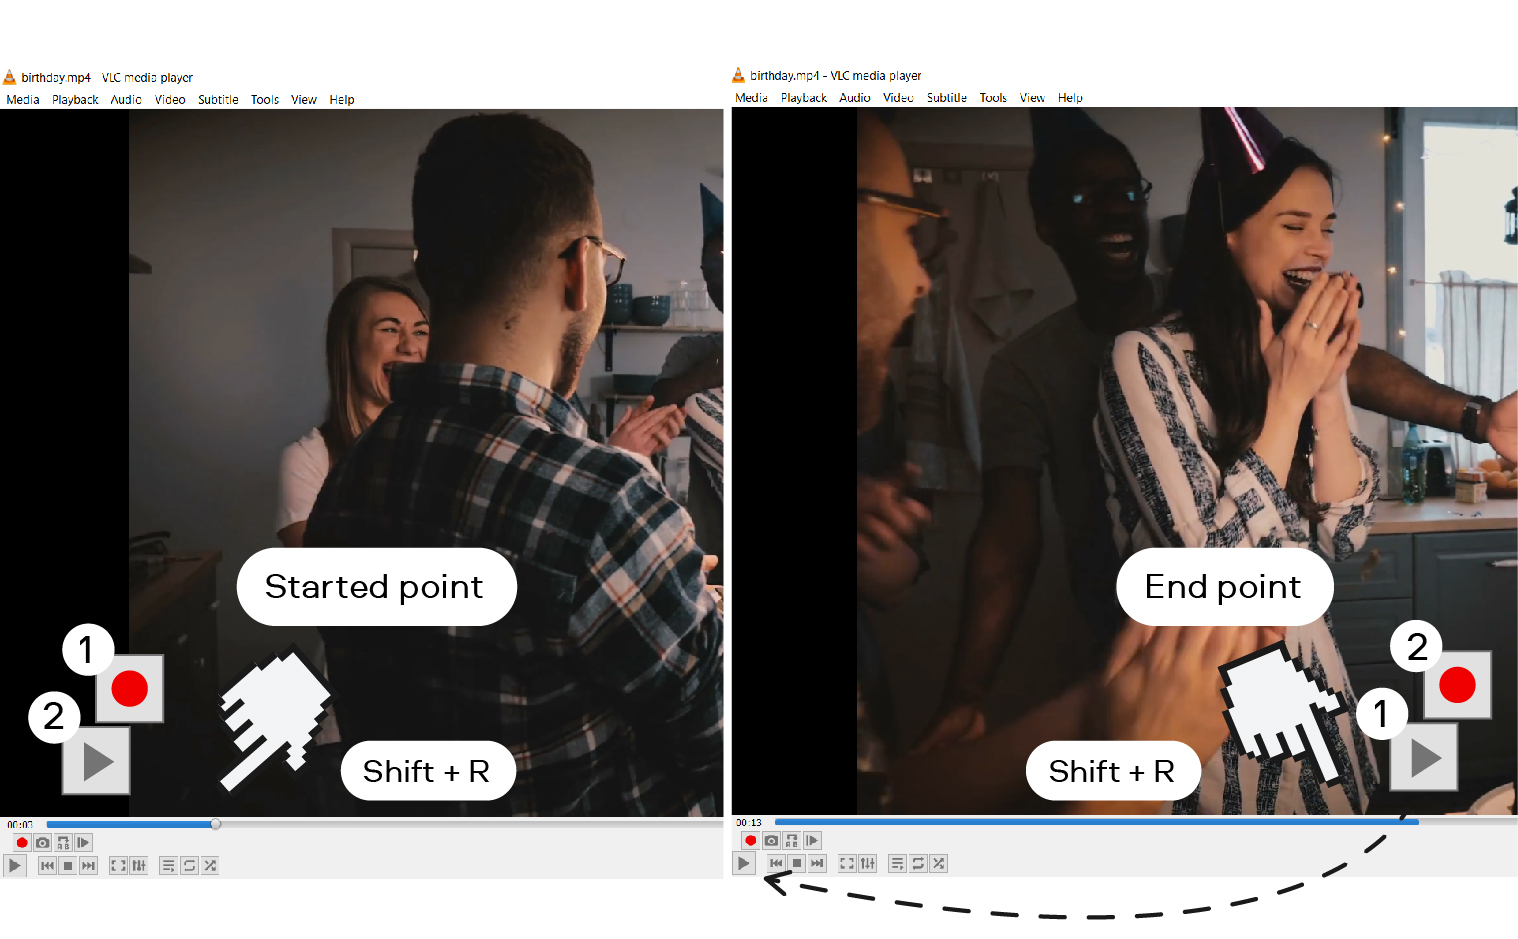
Drag the slider to the point where you want your segment to begin. You can also use the Frame by Frame button for greater accuracy. Now press Record and Play simultaneously. You can also do this by using the Shift + R hotkey combination if you’re doing the trimming on your computer. The software will start recording the clip. Once the slider reaches the point where you want your excision to end, hit the recording button again – or use the same Shift + R combo.
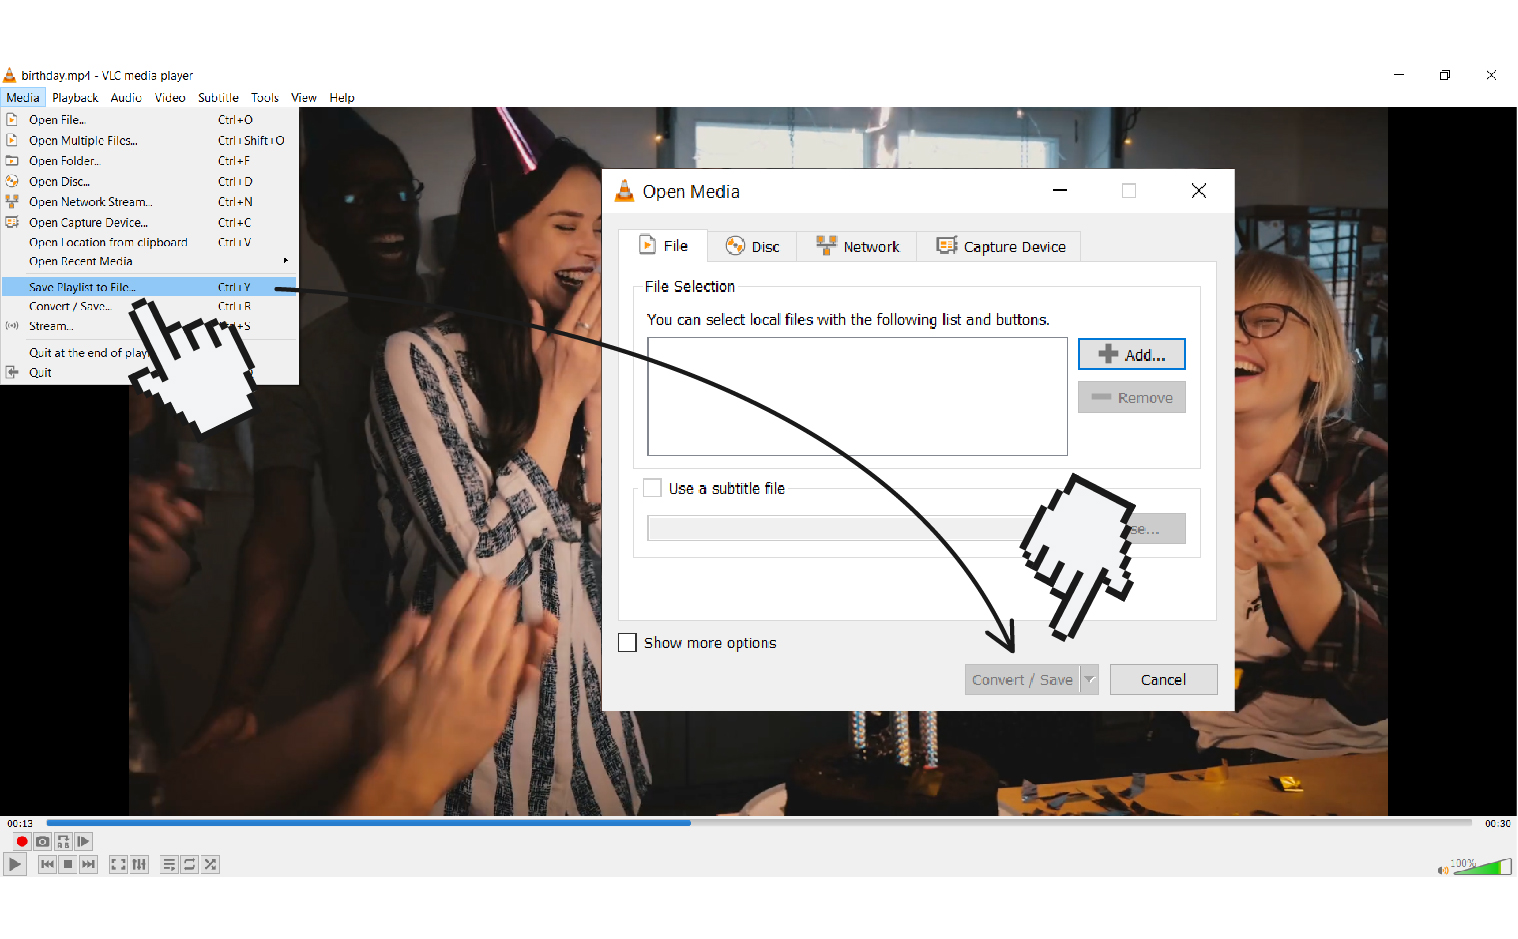
The software will automatically export your clip to the default save location. To select a different folder, go to the Preferences Dialogue Box under Record Directory. A window with the Input & Codecs Settings will appear. Set the directory you want to save to so you can easily find your files later on.
VLC lets you produce videos in a number of widely accepted formats.
AVI, WAV, MP4, MP3, FLAC, MKV, PVA, ASF, Ogg, MPEG-2, AC-3, AAC, MPJPEG, Fraps, TS, DV Audio, FLV, WebM, PS, and Quick Time.
That’s it – you’ve just mastered trimming videos in VLC Media Player. As we explained above, this approach doesn’t really have much to do with editing. Recording a clip from your initial video lets you alter its length, but doesn’t let you perform any other manipulations with cutting out other sections, removing or adding audio tracks, and so on. To do that kind of thing, you need a different program with a more advanced toolset.
There are many video cutters and video editing services out there that let you easily make adjustments to your clips. For basic trimming, we suggest using simple software that lets you adjust your footage in just a few simple steps. Movavi Video Editor Plus would be our top pick for a number of reasons – including the fact that its system requirements are more modest than those of professional editing programs, meaning that it’ll run happily on most computers.
Aside from cutting, you can also take advantage of numerous additional tools that help you transform your footage into a solid piece of content. There is a wide array of filters, effects and captions to choose from. The latest update has also introduced a new feature which enables you to leave blank spaces between your shots, so trimming separate parts of your video is even more convenient.
If you’re interested in trying Movavi Video Editor Plus, there’s every reason to do so right now – considering that we’re offering a special 10% discount for our blog readers on the latest 2021 edition.
Thanks to the program’s innovative user-friendly interface, it’s exceptionally convenient for cutting videos quickly and without hassle:
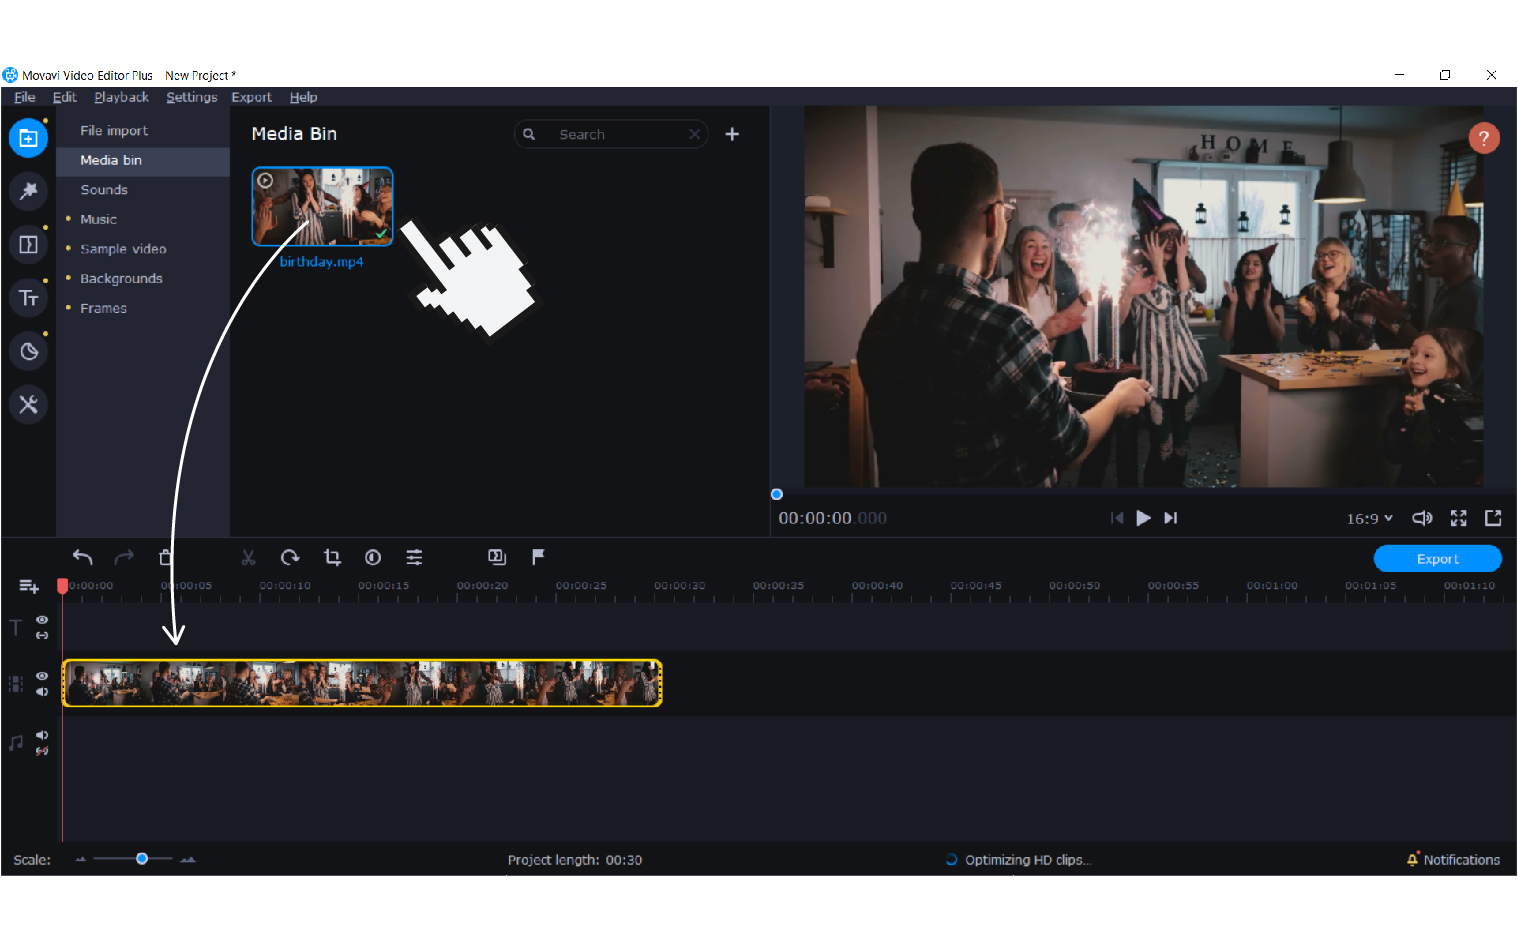
Step 1. Open the program and import the file you’re looking to trim. Then place the footage on the timeline.
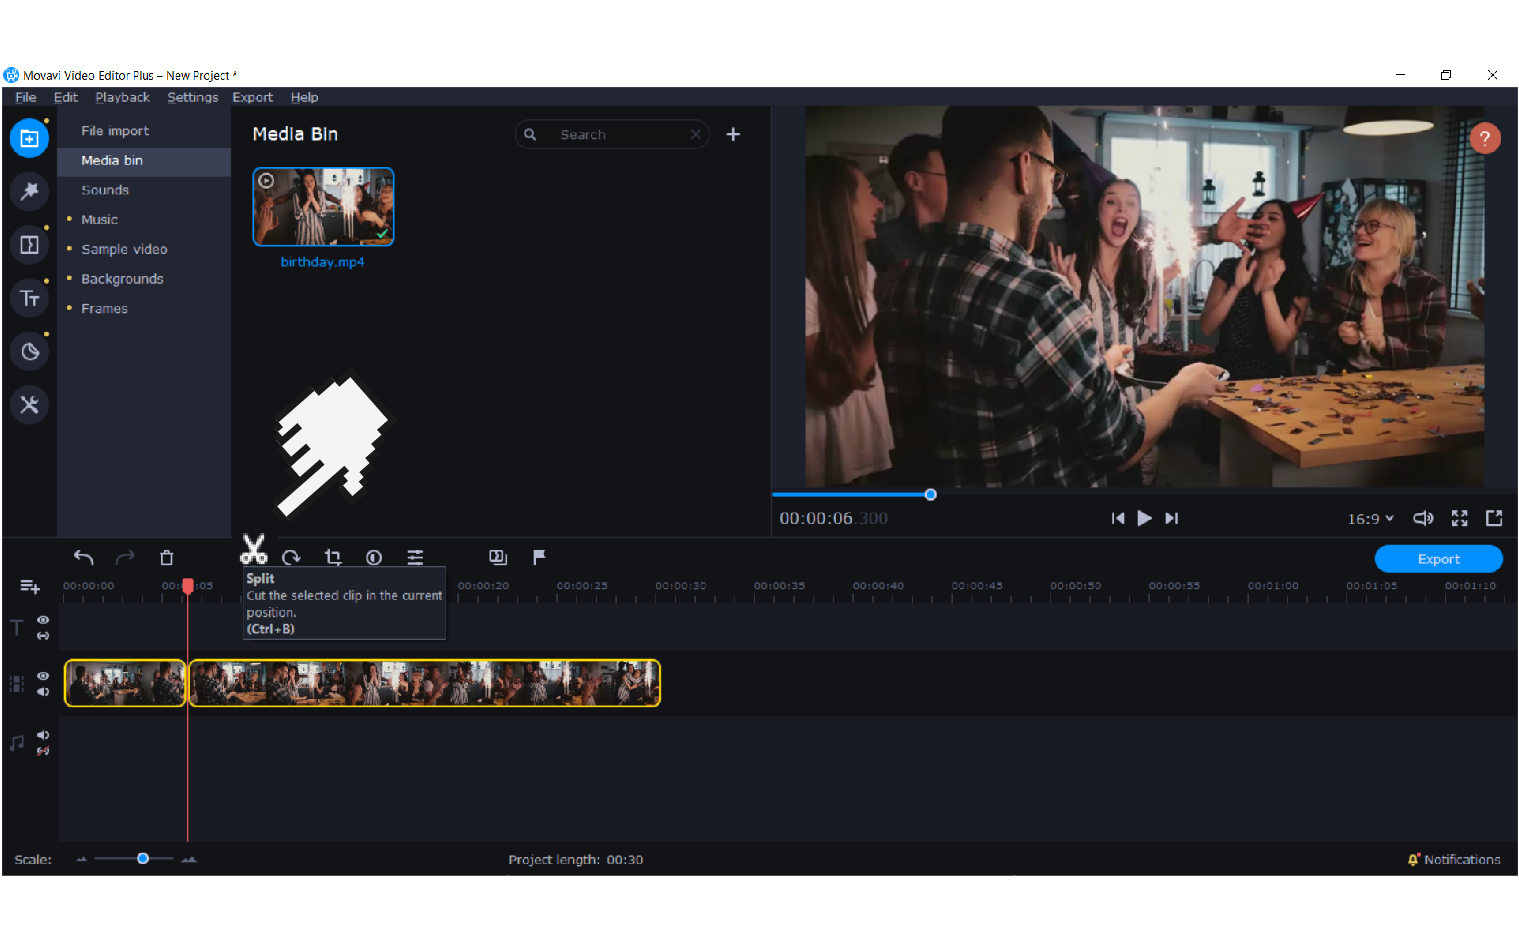
Step 2. Move the marker along the timeline. Once you’ve located the part you wish to trim, click Split.
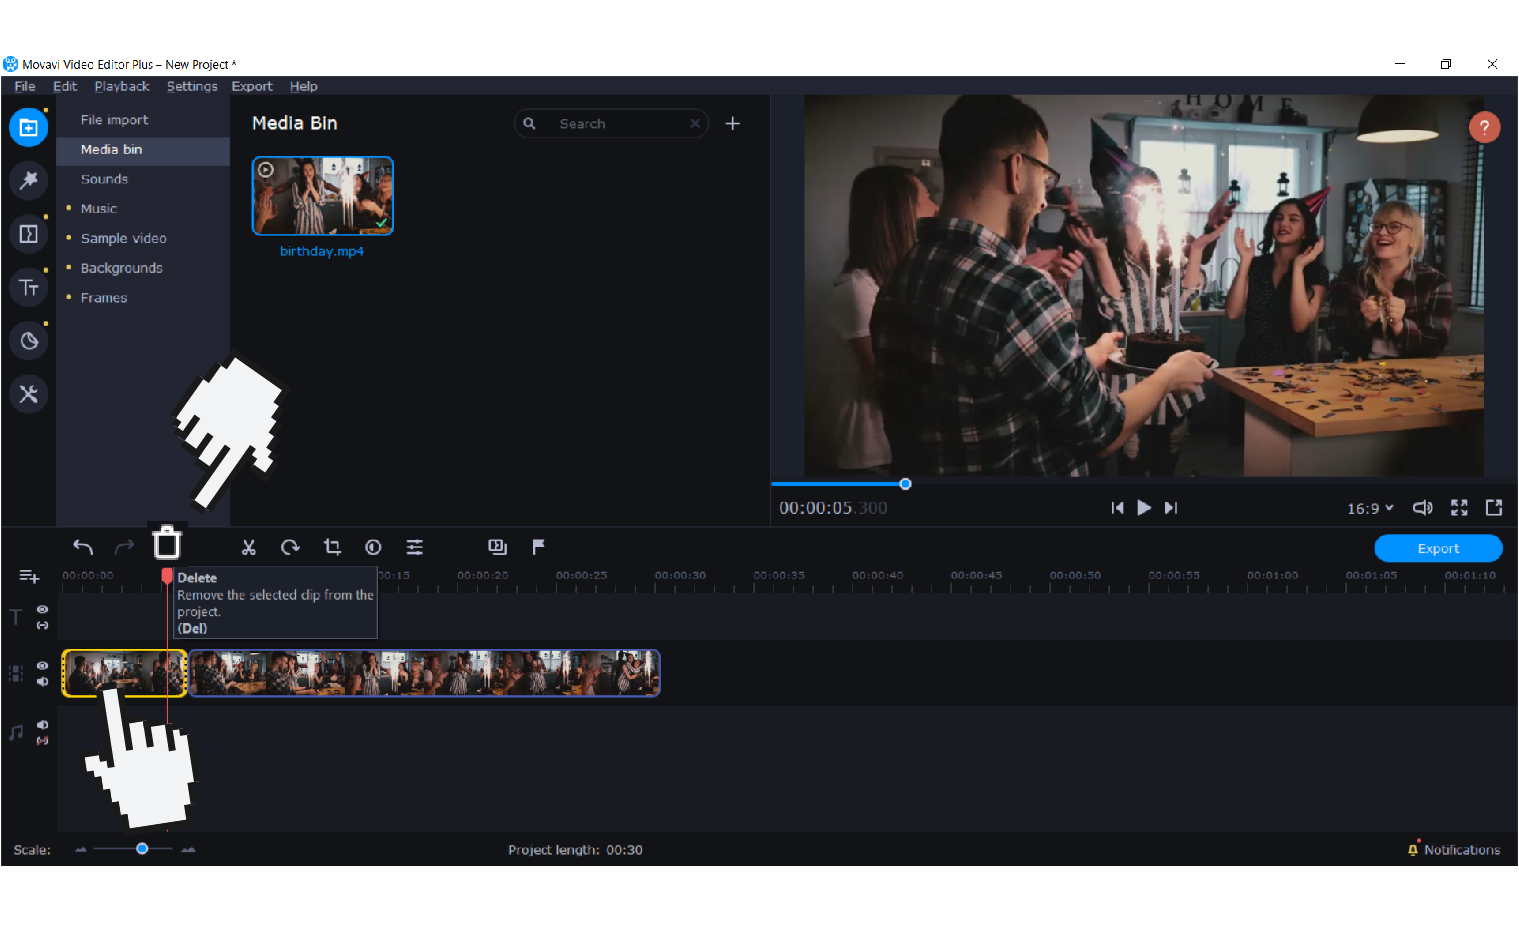
Step 3. Now you can select the unwanted part and click Delete to get rid of it. Done! Now you can save your file to the folder of your choice or export it straight to YouTube.
Here’s a video tutorial by Movavi Vlog Team on how to trim a video in Movavi Video Editor Plus: